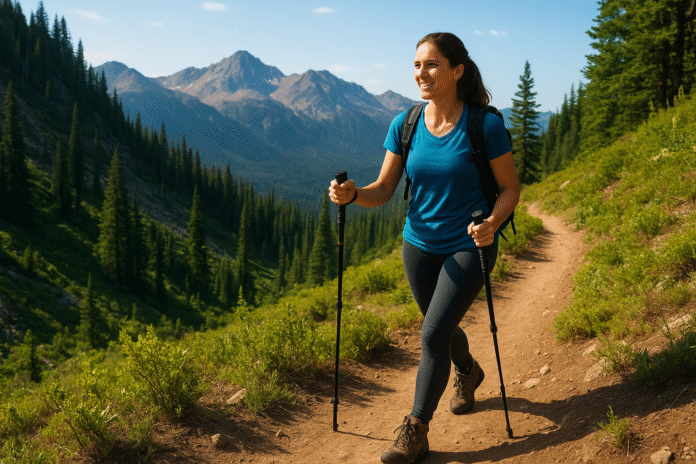
Hiking is one of those rare workouts that trains your legs, core, balance, and cardiovascular system all at once — and when you pick the right trail, you’ll add upper-body engagement, balance challenges, and lung-busting climbs that qualify as a true full-body session. This guide walks you through seven world-class hikes that reliably deliver a full-body workout: each entry explains what the trail is, why it works your whole body, what you need, how to do it safely, and a beginner-friendly plan you can put into practice. If your goal is strength, endurance, and coordination — with scenery as a bonus — you’re in the right place.
Medical disclaimer: This article provides general fitness and safety advice. If you have heart, lung, joint, or other medical conditions, or if you are pregnant, consult a qualified healthcare professional before attempting strenuous hikes or high-altitude treks.
Key takeaways
- Choose terrain, not just distance: steep ascents, technical descents, and uneven ground turn a walk into a full-body workout. TIME
- Prep and packing matter: the right shoes, layering, hydration, and simple strength baseline will keep workouts productive and safe. National Park Service
- Scale smart: every trail below includes low-cost gear alternatives and progressions so beginners can build up safely.
- Measure progress: use time, elevation gain, and perceived exertion rather than distance alone to track full-body gains.
- Leave no trace: train hard, tread light — follow minimum-impact rules to protect trails and future workouts.
How to use this guide
Each of the seven hikes below is presented as a standalone H2 so you can jump to the route that interests you. Every route includes: what it is, why it builds full-body fitness, prerequisites and low-cost alternatives, step-by-step beginner instructions, modifications and progressions, recommended frequency/duration, safety notes, and a short 2-3 step sample mini-plan you can try that day.
1. Bright Angel Trail — Grand Canyon (Arizona, USA)
What it is and core benefits
Bright Angel Trail is a classic rim-to-river route on the South Rim of the Grand Canyon. The trail drops steeply from the rim into the canyon with long switchbacks and sustained elevation change, which translates to intense concentric leg work uphill and eccentric braking work downhill — both excellent for strength, joint resilience, and cardiovascular load. Carrying a loaded daypack engages the posterior chain and core; technical footing strengthens ankles and small stabilizer muscles.
Requirements / prerequisites (and low-cost alternatives)
- Must-have: sturdy hiking boots with good traction, 2–3 liters water (more in summer), electrolytes, sun protection, layered clothing for changing canyon temps.
- Permits/cost: No special permit required for day hiking; backcountry camping requires reservation through park channels.
- Low-cost alternatives: local steep ridge trails, staircases in parks, or long urban hill walks with a weighted backpack.
Step-by-step beginner implementation
- Start small: hike the first 1–2 miles (down to the first rest houses/overlooks) with a light pack to practice pacing on switchbacks.
- Pacing: adopt a conservative “one step up, one step recover” cadence; descending, shorten stride and use poles or planted steps to protect knees.
- Hydration and rest: plan water stops and take short breaks every 20–30 minutes to eat small snacks and check feet.
Beginner modifications and progressions
- Modify: go only 1–2 miles in and back out the same way (out-and-back). Use poles and carry minimal weight.
- Progress: extend distance by 1–2 miles each outing, add 5–10% pack weight each 2–4 weeks, and practice controlled downhill reps on steeper sections to build eccentric strength.
Recommended frequency / duration / metrics
- Frequency: 1 long hike (2–4 hours) per week + 1-2 short hill sessions (45–90 minutes).
- KPIs: elevation gain per session, perceived exertion, heart-rate zones, and post-hike muscle soreness duration (safe progress means soreness resolves in 48 hours).
Safety, caveats, common mistakes
- Heat danger: summer heat in the canyon is severe — avoid midday, carry extra water, and know signs of heat illness.
- Common mistakes: underestimating descent effort (downhill is harder on joints than many expect), starting without water, and not acclimatizing to altitude if you’re coming from sea level.
Mini-plan (2–3 steps)
- Hike 2 miles descending from rim (turn around at the first rest house).
- Walk back at steady pace with poles, focus on short steps.
- Stretch quads, calves, and hip flexors for 5–10 minutes after.
2. Half Dome (Yosemite Valley, California, USA)
What it is and core benefits
Half Dome is an iconic granite ascent in Yosemite that combines miles of steady climbing with a final cable-assisted scramble up a steep granite slab. The full route packs cardiovascular work, leg strength, core stabilization during exposed scrambling, and upper-body pulling/grip on the cable section — a true full-body challenge. Permit rules control access to the cable section.
Requirements / prerequisites (and low-cost alternatives)
- Must-have: permit (when cables are up), solid hiking boots, gloves for cable section (no slippery gloves), helmet optional if in a group, layers.
- Fitness prerequisites: prior long-distance hikes with significant elevation gain; confidence on exposed, steep sections.
- Low-cost alternatives: local steep technical hikes, rock scrambles, or cable-free granite slabs in accessible parks.
Step-by-step beginner implementation
- Build up to it: complete multiple 8–12 mile hikes with 1,500–3,000 ft elevation gain.
- Cable practice: if comfortable with via ferrata or short rock scrambles, practice controlled pulling and bracing on low-angle slabs before attempting Half Dome cables.
- Pacing & fuel: start before sunrise, take small frequent snacks, and turn back at the first sign of unstable weather.
Beginner modifications and progressions
- Modify: instead of the full Half Dome, hike to the Vernal and Nevada Falls loop for steep exposure without the cables.
- Progress: add pack weight gradually, practice slab-walking with sticky-soled shoes, and train grip strength (farmer carries, dead hangs).
Recommended frequency / duration / metrics
- Frequency: one long summit hike every 4–8 weeks while maintaining weekly hill work and strength training.
- KPIs: time to summit, ability to maintain steady pace, and cable confidence (measured by successful up-and-down without assistance).
Safety, caveats, common mistakes
- Permits: a permit is required to access the cables when they’re up; check park rules.
- Weather risk: cables should not be used when wet or lightning threatens — fatal falls have occurred during storms. San Francisco Chronicle
- Common mistakes: trying the cables tired, poor glove choice, and carrying a heavy pack during the last exposed section.
Mini-plan (2–3 steps)
- Do a 10–12 mile training hike with 2,000–3,000 ft gain and a 20–30 lb pack.
- Practice granite slab walking on a local crag or park (20 minutes of controlled ascents/descents).
- If permitted, arrive early, move deliberately on cables, and descend slowly.
3. Kalalau Trail — Nāpali Coast (Kauaʻi, Hawaiʻi, USA)
What it is and core benefits
The Kalalau Trail runs along the rugged Nāpali Coast and blends sustained hills, rocky steps, beach walking, and short technical sections. The trail’s constant ankle-challenging terrain, sand transitions, and multiple ascents/descents force stabilized core engagement, eccentric leg work, and upper-body balance during stream crossings — a dynamic total-body session. Overnight camping requires permits.
Requirements / prerequisites (and low-cost alternatives)
- Must-have: valid camping permit to go past certain points; waterproof layers, quick-dry clothing, sturdy trail shoes, and contingency for sudden sea and weather changes. Permits are limited and sometimes issued only walk-in or via state channels.
- Low-cost alternatives: long coastal bluff hikes, packed-sand mixed trails, or local trails with alternating terrain.
Step-by-step beginner implementation
- Day segments: don’t attempt the full 11-mile one-way as a beginner. Start with Keʻe Beach to Hanakāpīʻai lookout (~2 miles) and turn back.
- Footwork practice: train on sand and rock transitions; include single-leg balance drills at home.
- Multiple surfaces: practice switching from packed trails to soft sand within a single workout to mimic Kalalau’s demands.
Beginner modifications and progressions
- Modify: day-hike the first 2–4 miles and return. Reserve camping permits only when you can manage multi-hour exposure and have reliable navigation.
- Progress: add overnight backpacks and progress to successive overnight segments, working up to the full 11-mile one-way.
Recommended frequency / duration / metrics
- Frequency: multi-day treks 1–3 times per season with shorter coastal training hikes weekly.
- KPIs: ability to manage sand-to-rock transitions without stumbles, pack comfort during 6–8 hour days, and recovery speed.
Safety, caveats, common mistakes
- Permits and rules: camping past certain points requires a permit; verify current permit process and availability.
- Ocean & trail hazards: dangerous surf can make coastal travel risky; don’t gamble on exposed beaches during high surf.
- Common mistakes: attempting long beach sections without foot/ankle conditioning, carrying too much weight, and ignoring permit requirements.
Mini-plan (2–3 steps)
- Hike Keʻe Beach → Hanakāpīʻai lookout (2 miles), practice ascending and descending sandy slopes.
- Repeat with a 10–12 lb pack; practice quick-dry clothing and shoe changes.
- Add a seaside short run (5–10 minutes) to train stabilizers on uneven sand.
4. Inca Trail to Machu Picchu (Peru)
What it is and core benefits
The classic Inca Trail is an ancient high-altitude route with steep stone staircases, long uphill approaches, and several high passes. Packed with stair-climbing, loaded-pack carrying, and balance over uneven stonework, the trail builds powerful quads, calves, posterior chain, and a resilient core — plus the aerobic benefits of sustained ascent at altitude. Permit limits and guided-tour rules apply.
Requirements / prerequisites (and low-cost alternatives)
- Must-have: permit (limited daily), a licensed guide is typically required, acclimatization time in Cusco (recommended 2–3 days), trekking boots, layering for cold nights. Book permits in advance. Machu Picchu Reservations
- Low-cost alternatives: day hikes around high valleys, stair-climb sessions, or multi-day local treks at moderate altitude.
Step-by-step beginner implementation
- Acclimatize: spend 48–72 hours near 3,300 m (Cusco) doing light activity and ensuring good sleep.
- Stair conditioning: practice long stair climbs with a pack and take walk-jog intervals to simulate stone steps.
- Pacing at altitude: go slower than at sea level — focus on controlled breathing and short rest breaks.
Beginner modifications and progressions
- Modify: consider the shorter day options to Machu Picchu or alternative treks that approach similar scenery with reduced altitude exposure.
- Progress: build to multi-hour stair sessions and longer multi-day treks with incremental pack weight.
Recommended frequency / duration / metrics
- Frequency: consider one high-altitude trek per year with structured base training (eight–12 weeks) beforehand.
- KPIs: ability to hike at steady pace at altitude for 4–6 hours, stable sleep quality at elevation, and symptom-free acclimatization.
Safety, caveats, common mistakes
- Permit limits: Inca Trail permits are capped and must be booked early; alternate treks are available if sold out.
- Altitude illness: learn early symptoms and have a plan to descend; medication and pacing strategies are tools — consult a clinician before travel.
- Common mistakes: skipping acclimatization, overexerting on first days, and ignoring permit/guide requirements.
Mini-plan (2–3 steps)
- Spend 48 hours in Cusco doing two gentle day walks.
- Train with stair sessions (3× weekly) building to 1,000–1,500 steps continuous with a 10–15 lb pack.
- On the trail, move slow and steady, hydrate frequently, and sleep low if symptoms start.
5. Tongariro Alpine Crossing (North Island, New Zealand)
What it is and core benefits
A dramatic one-day alpine crossing across volcanic terrain, Tongariro forces continuous ascents and descents, technical rocky sections, and exposed ridgelines. The constantly changing surface requires dynamic balance, hip and ankle stabilization, and repeated leg power bursts — excellent for muscular endurance and functional total-body conditioning.
Requirements / prerequisites (and low-cost alternatives)
- Must-have: alpine gear in winter (crampons/ice axe), layered clothing, windproof shell, proper shoes, and a fitness baseline for a 6–8 hour day. DOC recommends planning for varied weather.
- Low-cost alternatives: long mixed terrain day hikes with elevation and exposure; volcanic rock walks that require steady footing.
Step-by-step beginner implementation
- Weather check: always verify alpine forecasts and DOC updates on access and hazards.
- Pacing: plan for a 6–8 hour point-to-point day; use shuttle services to manage logistics.
- Technique: use short, deliberate steps on scree and rocks; keep hips square and core engaged on wind-exposed ridges.
Beginner modifications and progressions
- Modify: split the crossing into shorter sections or choose less exposed nearby tracks to build confidence.
- Progress: add technical training (rock hopping, balance drills) and off-trail micro-intervals to improve grip and ankle resilience.
Recommended frequency / duration / metrics
- Frequency: one alpine crossing per season with regular weekly strength/hill sessions.
- KPIs: completion time, ability to maintain steady ascent pace, and recovery rate (how quickly heart rate returns to baseline after steep climbs).
Safety, caveats, common mistakes
- Weather & exposure: alpine conditions change rapidly — be prepared to turn back. DOC manages visitor info and may close access in poor conditions. Doc.govt.nz
- Common mistakes: underestimating sun/wind exposure, lacking crampons in winter, and attempting without shuttles/logistics sorted.
Mini-plan (2–3 steps)
- Plan logistics with a shuttle; start early and carry 2–3 L water and wind layers.
- Maintain 30–45 minute steady-pace blocks with 5–10 minute snack/rest breaks.
- On steep sections, shorten stride and use poles if available.
6. Platteklip Gorge — Table Mountain (Cape Town, South Africa)
What it is and core benefits
Platteklip Gorge is the direct, steep ascent of Table Mountain. Though relatively short in distance, it gains a lot of elevation quickly (rough granite steps and steep sections), making it an intense lower-body strength and power workout. The route’s rocky steps and uneven surfaces force ankle and hip stabilizer engagement; adding a weighted pack will recruit core and shoulders.
Requirements / prerequisites (and low-cost alternatives)
- Must-have: good shoes, sun protection, water; Table Mountain weather can change fast so layered clothing is wise. Some operators charge for guided experiences or cable-car rides for descent.
- Low-cost alternatives: stair climbs on steep urban routes, quarry steps, or local mountain stairs.
Step-by-step beginner implementation
- Start with partial climbs: do 30–45 minute uphill repeats on a local steep trail to build leg strength.
- Form: keep chest up, short powerful steps, and use poles only if balance is an issue.
- Descent control: descend slowly with bent knees to protect joints.
Beginner modifications and progressions
- Modify: hike to the lower saddle or do multiple shorter repeats rather than the full ascent.
- Progress: add pack weight, increase reps per session, and practice controlled downhill intervals.
Recommended frequency / duration / metrics
- Frequency: 1–2 steep ascents per week with cross-training (strength or mobility) on off days.
- KPIs: time to summit, readiness to repeat within a week, and changes in resting heart rate over several weeks.
Safety, caveats, common mistakes
- Heat & exposure: sun and wind can be intense; always ask local sources about trail conditions. SANParks
- Common mistakes: racing all-out uphill drains energy for descent; beginner hikers should pace conservatively.
Mini-plan (2–3 steps)
- Hike Platteklip to Upper Cableway Station with a light pack; focus on steady breathing.
- Do two more short uphill repeats later in the week with lighter weight.
- Finish with 5–10 minutes of hip/glute activation work.
7. West Coast Trail — Vancouver Island (British Columbia, Canada)
What it is and core benefits
The West Coast Trail is a multi-day coastal mega-hike with roots, ladders, muddy sections, beach walking, and variable footing. Negotiating ladders, carrying a multi-day pack, and repeatedly climbing and descending on slippery sections demands full-body strength — shoulders and arms help on ladders and hauling packs, while legs and core handle the constant verticality. The trail is one of the most complete functional workouts you can buy in nature.
Requirements / prerequisites (and low-cost alternatives)
- Must-have: permit/registration through Parks Canada, ability to carry multi-day pack, waterproof gear, and sturdy boots. Book well in advance and be prepared for long days.
- Low-cost alternatives: multi-day lake-to-lake treks or coastal walks with varied footing and occasional ladders or boardwalks.
Step-by-step beginner implementation
- Guided start: for your first time, consider a guided company to learn ladder/rope techniques and seashore travel.
- Pack practice: do long training walks with the exact pack and footwear you’ll use.
- Beach and mud training: practice on softer ground and puddly trails to train stabilizers.
Beginner modifications and progressions
- Modify: select a shorter entry/exit section (many hikers do 4–6 day segments rather than the full end-to-end route).
- Progress: build to 6–8 day trips with increasing pack weight and multi-day nutrition practice.
Recommended frequency / duration / metrics
- Frequency: one multi-day coastal trek per season with regular pack walks for training.
- KPIs: ability to carry full pack for 6–8 hours, ladder proficiency, and resilience to wet conditions.
Safety, caveats, common mistakes
- Permit & tide planning: sections are tide-dependent; plan crossings carefully and obey Parks Canada guidance.
- Common mistakes: underpreparing for wet feet, attempting the whole trail without multi-day experience, and ignoring tide tables.
Mini-plan (2–3 steps)
- Do a two-day coastal training trip with a 20–25 lb pack.
- Practice ladder climbs at a crag or via ferrata (if available) or in a gym with step-ups and pull-ups for upper body.
- Work on quick drying and foot care routines.
Practical add-ons
Quick-start checklist / warm-up (portable)
- Checklist: supportive boots, layered clothing, hat, sunglasses, 2–3 L water, snacks (carbs + protein), small first-aid kit, map/GPS, poles, lightweight rain shell, and sunscreen.
- Warm-up (6 minutes total): 2 min brisk march on the spot, 1 min leg swings each side, 1 min hip circles, 1 min dynamic lunges, finish with 30 seconds of shoulder rolls and gentle trunk twists.
Troubleshooting / common pitfalls
- Problem: early-onset fatigue — reduce pace, shorten steps, and refuel earlier.
- Problem: blisters — change socks mid-hike, use friction patches, and ensure properly fitted boots.
- Problem: unexpected weather — always have a lightweight waterproof and an emergency shelter (space blanket or bivvy).
How to measure progress (simple, trail-relevant metrics)
- Time to complete a fixed route — measure on the same trail across weeks.
- Elevation per hour — track how many vertical meters/feet you can gain per hour.
- Functional strength — number of uphill repeats with a set pack weight.
- Recovery — time for resting heart rate and soreness to normalize.
4-week starter roadmap (designed for a beginner who wants to prepare for a full-body hike)
Week 1 — Base & mobility
- 3× week: 30–45 minute brisk walks on mixed terrain.
- 2× week: 20 minutes strength (bodyweight squats, lunges, planks, push-ups).
- Weekend: 60–90 minute longer walk with easy hills.
Week 2 — Intensity & specificity
- 2× week: hill repeats (6–8 × 2 minutes uphill).
- 2× week: strength (add single-leg work, farmer carries).
- Weekend: 2–3 hour hike with light pack.
Week 3 — Load & technical skill
- 1× long hike with 10–15 lb pack (4–5 hours).
- 2× strength sessions focusing on posterior chain (deadlift variations, step-ups).
- 1× technical practice (rocky footing or stair sets).
Week 4 — Taper & rehearsal
- 2× shorter hikes (90–120 minutes) focusing on efficient pacing and nutrition.
- 2× mobility/strength maintenance sessions.
- Final practice: a full simulated day with the pack you’ll use and all gear.
FAQs (8–12 concise answers)
1. Do I need to be very fit to attempt these trails?
No — each trail has entry-level options and progressions. Start with the modified, day-hike versions and follow a 4-week plan to build baseline fitness.
2. How much water should I carry?
Carry 2–3 liters for typical day hikes; in hot or remote conditions, increase that amount. Check park pages for water availability.
3. Will hiking build muscle?
Yes — uphill hiking and loaded packs build lower-body strength; technical terrain and ladders recruit upper body and core. For visible muscle gains, complement hiking with strength training.
4. How do I avoid altitude sickness on Inca Trail?
Acclimatize slowly (2–3 days in Cusco), stay hydrated, ascend conservatively, and consult a clinician about medications if you have risk factors. CDC
5. Are permits required for these trails?
Some require permits or registrations (Half Dome, Inca Trail, Kalalau campsites, West Coast Trail). Check official pages and book early.
6. How often should I hike to see fitness improvements?
Aim for at least one long (2–4 hour) hike each week plus 1–2 shorter hill or strength sessions. Consistency over months produces the best results.
7. What’s the best footwear?
Sturdy, well-fitted hiking boots or trail shoes with ankle support for technical terrain; break them in ahead of long trips.
8. Are trekking poles worth it?
Yes — poles reduce knee load on descents, improve balance on uneven ground, and allow a light upper-body workout when poling effectively.
9. How should I train specifically for ladders and ropes?
Combine upper-body pull strength (pull-ups, rows) with grip training and step-ups; practice technique at low heights before big ladders. Parks Canada
10. How do I prevent blisters on long hikes?
Use moisture-wicking socks, tape hotspots preemptively, change socks mid-hike if wet, and ensure properly fitting boots.
11. Can hiking replace gym workouts?
Hiking can replace many aerobic and functional strength sessions, but targeted gym work (heavy lifts, mobility) complements and speeds strength gains. Mayo Clinic
12. How do I Leave No Trace while training for a big hike?
Plan, stay on trails, pack out waste, avoid creating new campsites, and follow local regulations. Keep group sizes small and minimize fires. Leave No Trace
Conclusion
These seven trails together represent a global menu of full-body hiking workouts: steep granite slabs, coastal ladders, volcanic ridgelines, high-altitude staircases, and deep canyon switchbacks. Pick a trail that matches your timeline and fitness level, train consistently, pack smart, and treat every hike as both a workout and a stewardship opportunity. The mountains, coasts, and passes will challenge your body — and reward your effort richly.
Ready to feel stronger on the trail? Lace up, pick a route, and start your first week of training today.
References
- Bright Angel Trail (overview) — U.S. National Park Service. Published page. . National Park Service
- Bright Angel Trail (day hike PDF) — Grand Canyon National Park, NPS (trail PDF). Published (PDF). . National Park Service
- Half Dome Day Hike / permit information — Yosemite National Park (NPS). Published: page updated (see site). . National Park Service
- Half Dome permits (details on day-hiker quotas) — Yosemite National Park (NPS) permits page. Published (recently updated). . National Park Service
- Kalalau Trail (official state parks page) — Division of State Parks, Hawaiʻi Department of Land & Natural Resources. Published (state page). . Hawaii DLNR
- Kalalau Trail camping & permit info (state camping reservation) — Hawaii Camping reservation system (park permits). . camping.ehawaii.gov
- Inca Trail permits & availability — IncaTrail.org (information on permit caps and management). Published (site info). . Inca Trail to Machu Picchu
- Machupicchu.gob.pe (official site & online tickets) — Peruvian government (Ministry of Culture) site for Machu Picchu (tickets & circuits). and https://www.machupicchu.gob.pe/online-tickets/. machupicchu.gob.pe
- Tongariro Alpine Crossing (DOC) — Department of Conservation, New Zealand (official crossing page). . Doc.govt.nz
- Tongariro Crossing planning & FAQ — Tongariro Crossing planning page (visitor info). . Tongariro Alpine Crossing
- Platteklip Gorge / Table Mountain hikes (SANParks) — Table Mountain National Park activities and routes, SANParks. . SANParks
- Platteklip Gorge route details — Hike Table Mountain / route overview (local guide info). . Hike Table Mountain

