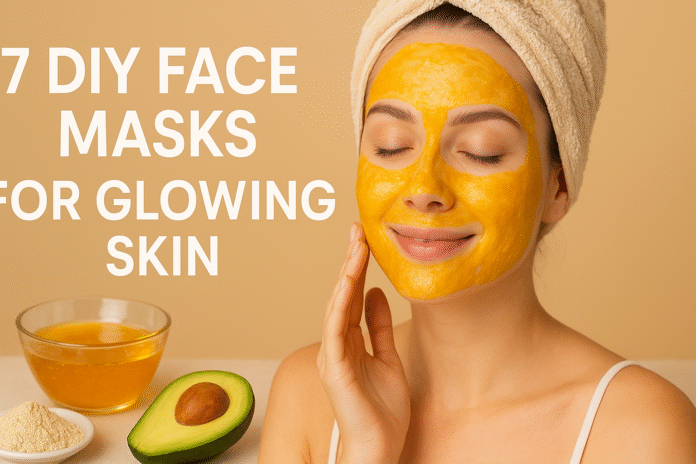
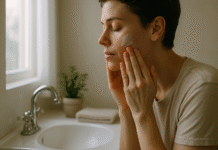
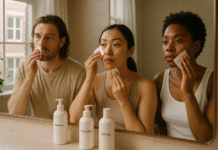
If you want a quick, affordable way to brighten, soothe, and hydrate your complexion, homemade face masks are a wonderful place to start. This article gives seven beginner-friendly DIY face masks that target glow, clarity, and softness — plus step-by-step recipes, safety notes, troubleshooting, a 4-week starter plan, and practical measures so you can track real progress. Whether you’re dry, oily, combination, or just curious about natural skincare, you’ll learn what each mask does, how and how often to use it, and exactly what to avoid.
Medical disclaimer: this article offers general information about topical skin care. It is not medical advice. If you have an active skin condition (eczema, rosacea, severe acne, open wounds, infection, or a known allergy), or if you are unsure how your skin will react, consult a licensed dermatologist before trying new treatments.
Key takeaways
- Seven safe, simple masks (honey + oatmeal; turmeric + yogurt; avocado + honey; banana + yogurt; green tea + aloe; egg white + oat; kaolin clay + rosewater) cover hydration, mild exfoliation, antioxidant protection, and oil control.
- Patch testing and frequency are essential — most masks are safe 1–3 times per week; avoid citrus and strong acids more often.
- Low-cost equipment: a bowl, spoon, measuring spoons, blender or fork, and clean washcloth are enough.
- Track results with weekly photos and simple metrics (hydration, texture, redness, breakouts).
- Safety first: raw egg and potent ingredients can cause reactions; always patch-test and stop if irritation occurs.
How this guide is organized (quick read)
Each mask below is an H2 section. For every mask you’ll get:
- What it is & benefits
- Requirements and low-cost alternatives
- Step-by-step instructions
- Beginner modifications and progressions
- Recommended frequency/duration
- Safety, caveats, and common mistakes
- A tiny 2–3 step sample mini-plan
After the masks you’ll find a quick-start checklist, troubleshooting, how to measure progress, a 4-week starter roadmap, FAQs (8–12 concise answers), a conclusion, and a full References list.
1. Honey + Oatmeal Mask — Soothing, hydrating, gentle exfoliation
What it is and core benefits
This mask blends two pantry staples: raw (or unprocessed) honey and finely ground oats. It’s calming, hydrating, and mildly exfoliating. Honey acts as a humectant (attracts and retains moisture) and has natural antimicrobial and wound-healing properties when used topically. Oats (especially colloidal oatmeal) soothe inflammation, reduce dryness and itch, and gently polish dead skin cells.
Requirements / prerequisites
- Ingredients: 1 tablespoon raw honey, 1 tablespoon finely ground oats (or colloidal oatmeal).
- Tools: Small bowl, spoon, blender or spice grinder (optional for oats), clean towel.
- Cost: Very low — ingredients usually <$5 and last multiple uses.
- Low-cost alternatives: If you don’t have oat flour, pulse rolled oats in a blender until fine. Maple syrup can be used if honey unavailable (but it lacks the same antimicrobial profile).
Step-by-step instructions (beginner-friendly)
- Grind 2 tablespoons rolled oats into a fine powder (or use 1 tbsp colloidal oatmeal).
- Mix the oatmeal with 1 tablespoon raw honey in a bowl to form a spreadable paste.
- On clean skin, apply an even layer over face (avoid the eye area).
- Gently massage for 30–60 seconds if you want light physical exfoliation.
- Leave on for 10–15 minutes.
- Rinse with lukewarm water using circular motions, pat dry, and follow with a moisturizer.
Beginner modifications and progressions
- Simplify: Use only honey (thin layer) as a quick hydrator.
- Progress: Add 1 teaspoon plain yogurt for lactic acid gentle chemical exfoliation (if not sensitive).
- For oilier skin: Swap half the honey for a small amount of lemon-free diluted apple cider vinegar (patch test first).
Recommended frequency / duration / metrics
- Frequency: 1–3 times per week.
- Duration: 10–15 minutes per application.
- Progress metrics: Skin softness (scale 1–10), reduction in redness/itch after 24 hours, fewer flaky patches.
Safety, caveats, and mistakes to avoid
- Use raw honey only if you have no allergy to bee products.
- Do a patch test on the inner forearm for 24 hours if you’ve never used honey or oats on your skin.
- Rinsing thoroughly avoids sticky residue that can attract dust.
- Avoid putting honey inside a broken cut or an open sore without medical advice.
Mini-plan (2–3 steps)
- Cleanse face.
- Apply honey + oat mask for 15 minutes.
- Rinse and moisturize.
2. Turmeric + Yogurt Mask — Brightening & anti-inflammatory glow
What it is and core benefits
Turmeric contains curcumin, a compound with antioxidant and anti-inflammatory properties that can support wound healing and help reduce inflammation-related discoloration. Yogurt supplies lactic acid for gentle exfoliation and moisture. Together, turmeric + yogurt can brighten dull skin and smooth texture — but turmeric can stain skin and clothing and may cause contact sensitivity in some people. Healthline
Requirements / prerequisites
- Ingredients: ½–1 teaspoon turmeric powder, 1–2 tablespoons plain yogurt (full fat for extra moisture).
- Tools: Bowl, spoon, towel (expect staining), cotton pads for cleanup.
- Cost: Low.
- Low-cost alternatives: If you don’t have yogurt, use a small splash of milk (milk contains lactic acid but milder).
Step-by-step instructions
- Mix turmeric and yogurt into a smooth paste (thinner consistency if you have acne-prone skin).
- Apply a thin layer to clean skin, avoiding hairline and clothing.
- Leave for 10 minutes only (to reduce risk of yellow staining and irritation).
- Rinse thoroughly using a gentle cleanser to remove yellow tint; use a cotton pad soaked in micellar water if some staining remains.
- Pat dry and apply a moisturizer.
Beginner modifications and progressions
- Simplify: Dab turmeric only onto small dark spots mixed with a bit of honey.
- Progress: Make a paste with yogurt and a pinch of rice powder for extra mild exfoliation.
- For sensitive skin: Reduce turmeric to a pinch or do a diluted turmeric rinse.
Recommended frequency / duration / metrics
- Frequency: Once per week initially.
- Duration: 5–10 minutes for first uses, up to 10 minutes if well tolerated.
- Progress metrics: Reduction in dullness/spotted discoloration over 4–8 weeks; photographic record every week.
Safety, caveats, and common mistakes
- Turmeric can stain clothes, towels, grout, and temporarily tint light skin; remove promptly.
- Contact dermatitis from topical turmeric has been reported; always patch test for 48 hours before first use.
- Do not mix with strong acids (high-concentration glycolic or salicylic acid products) on the same day.
- Avoid leaving on too long; longer contact increases staining and irritation risk.
Mini-plan (2–3 steps)
- Clean face.
- Apply thin turmeric + yogurt mask for 8 minutes.
- Rinse carefully; follow with moisturizer and SPF if daytime.
3. Avocado + Honey Mask — Deep hydration and barrier support
What it is and core benefits
Avocado is rich in monounsaturated fatty acids, vitamins (A, D, E), and antioxidants that support barrier function and help skin retain moisture. Paired with honey, this mask deeply moisturizes dry, flaky skin and leaves complexions soft. Research on avocado oil and topical use supports its moisturizing and wound-healing potential, making it a strong choice for dry or mature skin. PMC
Requirements / prerequisites
- Ingredients: 2 tablespoons ripe avocado (mashed) + 1 teaspoon raw honey.
- Tools: Fork or small blender, bowl, spoon.
- Cost: Moderate (fresh produce).
- Low-cost alternatives: Use mashed banana if avocado unavailable (banana is also hydrating).
Step-by-step instructions
- Mash a ripe avocado half until smooth.
- Stir in raw honey until blended.
- Apply to cleansed face, avoiding eyes.
- Leave on for 10–20 minutes.
- Rinse with lukewarm water and apply a hydrating moisturizer.
Beginner modifications and progressions
- Simplify: Use mashed avocado alone as a quick overnight spot treatment (small amount).
- Progress: Add 1 teaspoon plain yogurt for extra lactic acid exfoliation (if tolerated).
- For oily skin: Use avocado oil instead of whole avocado; apply a thin layer.
Recommended frequency / duration / metrics
- Frequency: 1–2 times per week for dry skin; once weekly for normal skin.
- Duration: 10–20 minutes.
- Progress metrics: Improved skin softness and decreased flaky patches in 1–2 weeks.
Safety, caveats, mistakes
- Avocado can congest very acne-prone skin for some people; test a small patch first.
- Fresh masks spoil quickly — do not store for multiple days; discard leftovers.
- Avoid if you have a known latex or avocado allergy.
Mini-plan (2–3 steps)
- Cleanse face.
- Apply avocado + honey mask for 15 minutes.
- Rinse and follow with moisturizer.
4. Banana + Yogurt Mask — Hydration, brightening, and barrier repair
What it is and core benefits
Bananas add vitamins and potassium and help lock in moisture; yogurt adds lactic acid and enzymes for gentle exfoliation. This combo is a soothing, softening mask for dull or dehydrated skin and works well as a low-irritation option for beginners.
Requirements / prerequisites
- Ingredients: ½ ripe banana, 1 tablespoon plain yogurt.
- Tools: Fork or blender, bowl.
- Cost: Low.
- Low-cost alternatives: Omit yogurt if you have intolerance; a small splash of milk offers mild lactic acid.
Step-by-step instructions
- Mash banana until smooth.
- Stir in yogurt to create a spreadable paste.
- Apply for 10–15 minutes on cleansed skin.
- Gently rinse and moisturize.
Beginner modifications and progressions
- Simplify: Use banana only for 10 minutes.
- Progress: Add teaspoon honey for extra humectant action.
- For oily skin: Use only a thin layer and rinse after 8–10 minutes.
Recommended frequency / duration / metrics
- Frequency: 1–2 times per week.
- Duration: 10–15 minutes.
- Progress metrics: Softer skin, subtle brightening over two weeks.
Safety, caveats, and mistakes
- Banana can oxidize and brown; use fresh mash and rinse thoroughly.
- Avoid if allergic to banana or dairy (substitute dairy-free yogurt).
Mini-plan (2–3 steps)
- Clean face.
- Apply banana + yogurt mask for 12 minutes.
- Rinse, moisturize.
5. Green Tea + Aloe Vera Mask — Antioxidant, calming, and post-sun soothing
What it is and core benefits
Green tea contains catechins (powerful antioxidants) that help neutralize free radicals and protect skin from environmental stressors. Aloe vera gel soothes inflammation and supports skin healing. Used together, they make a refreshing, antioxidant-rich mask that’s excellent after sun exposure or for redness. Research highlights green tea catechins’ antioxidant action for skin, and aloe has support for wound healing and soothing in topical use.
Requirements / prerequisites
- Ingredients: 1 green tea bag (brewed and cooled) or 1 tablespoon cooled green tea, 1–2 tablespoons pure aloe vera gel.
- Tools: Bowl, spoon, clean cloth.
- Cost: Very low.
- Low-cost alternatives: Replace brewed green tea with matcha powder (use less; patch test).
Step-by-step instructions
- Brew 1 green tea bag in ¼ cup hot water, let cool to room temperature.
- Mix 1–2 tablespoons aloe vera gel with 1 tablespoon cooled green tea.
- Apply a thin layer to face; leave 10–15 minutes.
- Rinse or wipe off with a damp cloth; follow with moisturizer.
Beginner modifications and progressions
- Simplify: Apply aloe vera gel alone (excellent for sunburn relief).
- Progress: Add a teaspoon of honey for extra humectant effect.
- For oily/acne-prone skin: Use diluted brewed green tea as a toner between steps.
Recommended frequency / duration / metrics
- Frequency: 2–3 times per week, or after sun exposure.
- Duration: 10–15 minutes.
- Progress metrics: Reduced redness, calmer skin sensation, fewer reactive flare-ups.
Safety, caveats, mistakes
- Use pure aloe vera gel without alcohol/fragrances to avoid irritation.
- If using matcha, avoid inhalation and do a small patch test.
- People with green tea allergy are rare but should avoid topical application.
Mini-plan (2–3 steps)
- Cool brewed green tea; mix with aloe.
- Apply mask for 12 minutes.
- Rinse, finish with SPF if daytime.
6. Egg White + Oat Mask — Temporary tightening, oil control (use with caution)
What it is and core benefits
Egg white masks are traditionally used for a temporary tightening effect and to reduce surface oiliness. Oats add soothing benefits and help prevent over-drying. However, raw egg whites carry a small risk of bacterial contamination (salmonella) and can trigger egg allergy symptoms in susceptible people. Many skin experts caution against using raw egg topically for these reasons and emphasize patch testing and careful hygiene. Yahoo
Requirements / prerequisites
- Ingredients: 1 egg white (fresh), 1 tablespoon finely ground oats.
- Tools: Bowl, fork, clean towel.
- Cost: Low.
- Low-cost alternatives: For tightening without eggs, try a thin yogurt mask or a clay mask (see next section).
Step-by-step instructions
- Separate an egg white into a clean bowl (discard yolk or save for cooking).
- Whisk briefly until slightly frothy.
- Stir in ground oats for mild texture.
- Apply thinly to clean, dry skin.
- Leave for 8–10 minutes only (until it feels tacky).
- Rinse carefully with warm water and cleanse to remove any residue.
Beginner modifications and progressions
- Simplify: Use just whipped egg white for a short 8-minute session.
- Progress: Use pasteurized liquid egg whites from the store to reduce bacterial risk.
- Alternative for oil control: Use kaolin clay mask (next section).
Recommended frequency / duration / metrics
- Frequency: No more than once per week; several sources recommend avoiding frequent raw egg use.
- Duration: 8–10 minutes.
- Progress metrics: Feeling of reduced oiliness immediately after use; track sebum levels subjectively and acne flares.
Safety, caveats, and common mistakes
- Do not use raw egg if you have an egg allergy.
- Use pasteurized egg whites if possible to reduce infection risk.
- Avoid using mask on broken skin.
- Rinse thoroughly — egg residue on skin can be hard to remove and may attract bacteria.
Mini-plan (2–3 steps)
- Cleanse and dry face.
- Apply egg white + oat mask for 8 minutes.
- Rinse thoroughly and moisturize.
7. Kaolin Clay + Rosewater + Honey Mask — Detoxifying, brightening, and balanced
What it is and core benefits
Kaolin (white) clay is a gentle clay that absorbs excess oil and impurities without over-drying the skin. Mixed with rosewater for hydration and honey for humectancy, this mask clarifies pores and refines texture while maintaining moisture. Clay masks are a staple for combination and oily skin types. Kaolin is one of the gentlest clays, suitable for sensitive skin when used briefly.
Requirements / prerequisites
- Ingredients: 1 tablespoon kaolin clay powder, 1 teaspoon rosewater (or cooled green tea), ½ teaspoon honey.
- Tools: Non-metal bowl and spoon (metal can react with clay), towel.
- Cost: Low to moderate.
- Low-cost alternatives: Bentonite clay is more powerful for oil control but can be drying; use kaolin for sensitive skin.
Step-by-step instructions
- In a non-metal bowl, mix kaolin clay with rosewater until it forms a creamy paste.
- Stir in honey and blend.
- Apply a thin layer to the T-zone or whole face.
- Leave 8–12 minutes (do not let it fully dry to a powdery state if you have dry skin).
- Rinse with lukewarm water and pat dry.
Beginner modifications and progressions
- Simplify: Use a small clay spot-treatment on oily areas.
- Progress: For deeper cleansing, add a drop or two of tea tree oil (avoid if sensitive).
- For dry skin: Keep application time under 8 minutes and add more rosewater to keep paste moist.
Recommended frequency / duration / metrics
- Frequency: 1–2 times per week for combination/oily skin.
- Duration: 8–12 minutes.
- Progress metrics: Reduced surface oiliness, smaller-looking pores, less shine midday.
Safety, caveats, mistakes
- Avoid leaving clay masks to fully harden for long periods if your skin is dry — that can strip natural oils.
- Patch test any essential oil additions.
- Use non-metal tools to mix (aluminum can interact with some clays).
Mini-plan (2–3 steps)
- Mix kaolin + rosewater + honey.
- Apply for 10 minutes.
- Rinse and moisturize.
Quick-start checklist (what to have before you begin)
- Cleanser appropriate to your skin type.
- Small bowl, spoon, measuring spoons.
- Fresh ingredients (honey, yogurt, avocado, banana, turmeric, oats, aloe vera, green tea, kaolin clay).
- Clean towels and cotton pads.
- Patch-test area (inner forearm).
- Camera or phone for weekly photos to track progress.
- Notebook or phone note to record sensations, frequency, and results.
Troubleshooting & common pitfalls
- Problem: Mask caused redness or burning.
- Stop use immediately. Rinse with cool water. Apply a plain moisturizer or aloe vera. If symptoms persist, contact a dermatologist.
- Problem: Yellow staining from turmeric.
- Rinse with a gentle cleanser, use a cotton pad with micellar water, or apply a tiny amount of oil to lift the turmeric before washing. Use fewer minutes next time.
- Problem: Breakouts after mask.
- If new breakouts appear, reduce frequency, simplify ingredients (e.g., honey-only), and ensure you rinse thoroughly. Consider a non-comedogenic moisturizer.
- Problem: Mask is too runny or too thick.
- Add small amounts of oats or clay to thicken; water, yogurt, or rosewater to thin.
- Problem: Masks spoil (bad smell or mold).
- Discard any leftover fresh ingredient masks after one use. Do not store homemade masks more than 24 hours.
How to measure progress and results (simple, practical metrics)
Track these over four weeks:
- Weekly photos (same lighting and no makeup) — compare texture and tone.
- Skin softness score (1–10) after routine each week.
- Redness/irritation count (number of days with noticeable redness).
- Breakout tally (count new pimples each week).
- Hydration test — press the back of your hand or cheek; measure how quickly thirsty/dry it feels in hours.
Record baseline (week 0) then weekly. Expect subtle improvements (softness, fewer flaky patches) within 1–2 weeks; pigmentation and texture may need 4–8 weeks.
4-week starter plan (simple roadmap for visible improvement)
Goal: Build a routine that targets glow, hydration, and mild exfoliation without irritation.
Week 1 — Build habit & begin patch testing
- Day 1 (Mon): Cleanse → Honey + Oatmeal mask (10–15 min) → Moisturize.
- Day 3 (Wed): Cleanse → Green Tea + Aloe mask (10 min) → Moisturize.
- Day 5 (Fri): Cleanse → Kaolin Clay on T-zone (8 min) → Moisturize.
- Patch test turmeric and egg white on inner forearm (24–48 hrs).
Week 2 — Add gentle brightening
- Day 1 (Mon): Turmeric + Yogurt (8–10 min, if patch test OK) → Cleanse → Moisturize.
- Day 3 (Wed): Avocado + Honey (15 min) → Moisturize.
- Day 5 (Fri): Honey + Oatmeal (10–15 min).
Week 3 — Focus on balance
- Day 1 (Mon): Green Tea + Aloe (10–12 min).
- Day 3 (Wed): Kaolin Clay on T-zone (8–10 min).
- Day 5 (Fri): Banana + Yogurt (10–12 min).
Week 4 — Evaluate & refine
- Use the metrics to evaluate: keep the masks that improved softness and reduced issues; drop ones that caused any irritation.
- Try optional egg white + oat once if patch test OK and past masks tolerated.
- Make a plan for month 2: increase honey/oat to 2–3x weekly for dry skin; clay masks 1/week for oily skin.
Beginner modifications and how to scale up safely
- Always start slow: try a mask once and wait 48–72 hours for reactions before making it a routine.
- Scale up gradually (from once weekly to 2–3 times weekly) as long as no irritation.
- Substitute-store-bought single-ingredient serums or masks if you want consistency and preservative stability.
- Keep a simple evening routine: cleanse → mask (if scheduled) → gentle moisturizer. Use SPF every morning when using exfoliating masks.
FAQs (10 concise practical answers)
1. Are DIY masks as effective as store-bought products?
DIY masks can be effective for hydration and mild exfoliation, but store-bought products often contain standardized concentrations, preservatives, and proven actives at consistent pH levels. Use DIY for gentle, natural care; choose commercial products for specific clinical concerns.
2. Can I leave a mask on overnight?
Most DIY masks should not be left on overnight (except very light humectant layers like a thin drizzle of honey applied as a short occlusive overnight treatment). Fresh-ingredient masks can spoil and cause irritation.
3. How long before I see results?
Immediate changes: softness and glow. For texture and pigmentation improvements, expect 4–8 weeks of consistent weekly applications.
4. Are these masks safe for acne-prone skin?
Some masks (clay, green tea) are well-suited for oily/acne-prone skin. Avocado, banana, and heavy oils may clog pores for susceptible individuals. Patch test and use clay-based masks for oil control.
5. Is turmeric safe for all skin tones?
Turmeric can temporarily tint light skin yellow; it may be less visible on darker skin but can still stain clothing. Patch-test for sensitivity first.
6. Can I mix these masks with my active treatments (retinoids, acids)?
Avoid using masks with acids or potent ingredients on the same day as strong retinoids or professional chemical peels. Gentle routines are fine, but don’t layer aggressive treatments without guidance.
7. How should I patch test?
Apply a pea-sized amount of the mask to the inner forearm or behind the ear and leave for 24–48 hours. Look for redness, itching, or swelling.
8. Do I need to use sunscreen after using these masks?
Yes. Exfoliation (even mild) can make skin more sun-sensitive. Use broad-spectrum SPF daily.
9. Can I use essential oils in masks?
Essential oils are potent and can irritate skin; only use tiny drops and patch test. Avoid photosensitizing oils (like bergamot) before sun exposure.
10. How should I store leftover mask mixtures?
Most fresh-ingredient masks should be made fresh and discarded after use. If you must store, refrigerate for no more than 24 hours, and discard if smell or color changes.
Evidence & practical safety tips (integrated advice)
- Use pasteurized ingredients (like pasteurized egg whites) if available to lower bacterial risk.
- Keep everything sanitary — wash bowls and spoons before and after.
- If you experience swelling, severe burning, or breathing difficulty after a patch test, seek urgent medical help.
Conclusion
DIY face masks are a low-cost, enjoyable way to add targeted care to your skin routine — whether you want hydration, gentle exfoliation, antioxidant protection, or oil control. Start slowly, patch test, track results, and favor non-irritating recipes if you have sensitive skin. With consistent use and the simple 4-week plan above, you can expect a softer, more glowing complexion. Try one recipe this week and notice how your skin responds.
Try one mask tonight — small change, visible glow.
References
- Honey in dermatology and skin care: a review, Journal of Cosmetic Dermatology, 2013. PubMed
- Colloidal Oatmeal Cream 1% as Add-on Therapy in Hand Eczema (study summary), PMC, 2020. PMC
- Potential of Curcumin in Skin Disorders, PMC, 2019. PMC
- Lactic Acid Chemical Peeling in Skin Disorders, PMC, 2024. PMC
- Avocado oil for skin: 8 benefits and how to use it, Medical News Today, 2018. Medical News Today
- Green Tea Catechins and Skin Health, PMC, 2024. PMC
- Aloe vera for treating acute and chronic wounds, PMC. PMC
- Why Not to Use Egg White for Your Face, Risks & Why It Doesn’t Work, Healthline. Healthline
- Innovative Honey-Based Product and Its Beneficial Effects, PMC, 2024. PMC
- Colloidal Oatmeal: What Is It and What Are Its Benefits?, Cleveland Clinic, 2024. Cleveland Clinic


