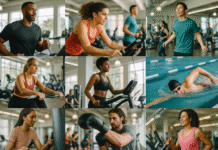
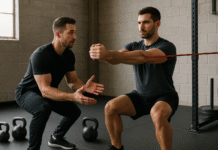
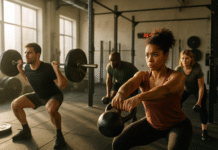
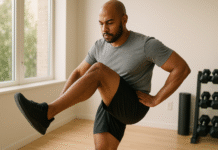
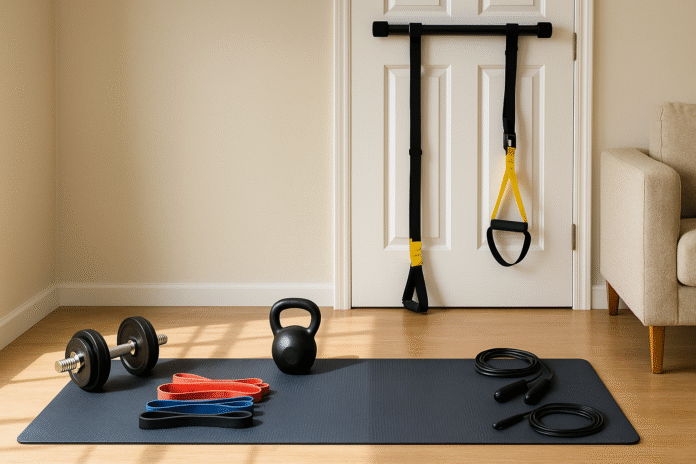
Building a home gym shouldn’t feel like turning your living room into a commercial facility. With a small, smartly chosen set of tools, you can train strength, cardio, mobility, and core without wasting money or space. In this guide to 7 must-have fitness equipment for your home gym, you’ll learn exactly what to buy, why it matters, how to use each item safely, and how to progress from true beginner to comfortably advanced. You’ll also get a quick-start checklist, a warm-up you can use anytime, a troubleshooting section for common hiccups, a metrics playbook for tracking results, and a simple 4-week starter plan that blends everything together.
Disclaimer: The following information is educational and general. Check with a qualified health professional before starting any new exercise program, especially if you have medical concerns, are pregnant, or have been inactive.
Key takeaways
- Start small, train big: A handful of compact tools covers full-body strength, conditioning, and mobility without a huge budget or room.
- Progress beats perfection: Learn baseline form, then add reps, sets, load, or tempo over time for steady gains.
- Mix modes: Alternate strength days and short, intense cardio finishers to build muscle, endurance, and metabolic health.
- Measure what matters: Track reps, load, rest, RPE (effort), and weekly consistency to see tangible improvements.
- Safety first: Warm up, use controlled tempo, keep clear space, and respect recovery—your next workout depends on it.
1) Adjustable Dumbbells
What it is & core benefits
Adjustable dumbbells are compact handles with plates that lock or dial to different loads. They enable push, pull, hinge, squat, and carry patterns without a rack of fixed weights. Expect improved total-body strength, bone density stimulus, and balanced development (each arm must work).
Requirements & budget-friendly alternatives
- Space: ~1–2 square feet plus a small training area.
- Budget: Adjustable sets vary widely; start with a range that covers your current level and expected year-one progress.
- Alternatives: Fixed dumbbells (buy used), filled water jugs (temporary), or weighted backpack for goblet squats/rows.
Step-by-step beginner setup
- Choose a baseline: Pick a load you can press or row for 8–12 reps with 2 reps “in the tank” (RPE ~8).
- Learn the big six: Goblet squat, hip hinge/RDL, floor press, one-arm row, overhead press, loaded carry.
- Use a controlled tempo: 2 seconds down, brief pause, 1–2 seconds up.
Beginner modifications & progressions
- Easier: Reduce load, cut sets, or use shorter ranges (e.g., elevated hip hinge).
- Harder: Increase load 2–5% when you hit the top of your rep range, add sets, slow the eccentric (3–4 seconds), or use unilateral variations (split squats).
Frequency, duration & metrics
- 2–3 strength sessions/week, 30–45 minutes.
- Track load, reps, sets, RPE, and rest times (60–120 seconds).
- Aim for 5–10% volume progression across 4–6 weeks.
Safety & common mistakes
- Don’t yank weights off the floor—hip hinge first.
- Keep wrists neutral when pressing/rowing.
- Avoid overly loose collars or dial systems that aren’t locked.
Mini-plan example
- A1 Goblet squat 3×8
- A2 One-arm row 3×10/side
- B1 Floor press 3×8
- B2 Farmer’s carry 3×30–45 seconds
2) Resistance Bands (Long Loops & Tubes)
What it is & core benefits
Loop bands and tube bands add constant tension through the range of motion, train joints with joint-friendly loading, and are ultra-portable. They’re excellent for rows, presses, pull-aparts, hip work, and warm-ups.
Requirements & budget-friendly alternatives
- Space: Minimal; a shoebox can hold a full set.
- Budget: Low compared to weights; choose light, medium, heavy.
- Alternatives: Tights or stockings (very light), towels (isometric pulls).
Step-by-step beginner setup
- Anchor safely: Use a sturdy door anchor or fixed point at chest level.
- Learn angles: Chest-height row/press; overhead triceps; low-anchor biceps/rows; high-anchor pulldowns.
- Control the return: Keep tension as the band pulls you back.
Beginner modifications & progressions
- Easier: Step closer to the anchor; choose lighter bands.
- Harder: Step farther away; combine bands; slow tempo; pause at peak contraction.
Frequency, duration & metrics
- Use on strength days to hit accessory work (10–15 minutes).
- Track band thickness, anchor distance, and reps to 1–2 shy of failure.
Safety & common mistakes
- Inspect for cracks; store out of sun/heat.
- Don’t let bands snap back—control both directions.
- Keep shoulders down/back; don’t shrug during rows/presses.
Mini-plan example
- Band row 3×12–15
- Band chest press 3×10–12
- Band pull-apart 2×15–20
- Monster walk 2×20 steps
3) Kettlebell
What it is & core benefits
A kettlebell’s offset mass makes it ideal for hinge-dominant power (swings), total-body strength (goblet squats), and core stability (rack/farmer’s carries). It blends strength and conditioning in short sessions.
Requirements & budget-friendly alternatives
- Space: Small footprint but allow a clear swing arc.
- Budget: Start with one bell you can goblet squat for 8–10 reps.
- Alternatives: A backpack loaded with books (for squats/hinges), dumbbell swing (careful with grip).
Step-by-step beginner setup
- Learn the hinge: Soft knees, hips back, neutral spine.
- Start with deadlifts before swings to groove the pattern.
- Progress to two-hand swings, then goblet squats and farmer’s carries.
Beginner modifications & progressions
- Easier: Deadlifts only; shorter sets (10–15 seconds).
- Harder: Heavier bell, one-hand swings, cleans, presses, snatches (after coaching).
Frequency, duration & metrics
- 2–3 sessions/week, 15–25 minutes.
- Track total swings, set duration, and rest; keep technique crisp.
Safety & common mistakes
- Don’t squat-swing (hinge at hips).
- Keep bell close during backswing; avoid overextending at the top.
- Use a non-slip surface; clear the area.
Mini-plan example
- KB deadlift 3×8
- Two-hand swing 8×15 seconds work / 45 seconds rest
- Goblet squat 3×8–10
4) Pull-Up Bar (Doorway or Wall-Mount)
What it is & core benefits
A pull-up bar unlocks vertical pulling: pull-ups, chin-ups, hangs, and knees-to-chest. Expect improved lats, upper back, arms, and grip, plus shoulder health from controlled hanging.
Requirements & budget-friendly alternatives
- Space: Doorway or dedicated wall/ceiling mount.
- Budget: Low–moderate; ensure weight rating and proper installation.
- Alternatives: Band-assisted pulldowns (anchor high) or inverted rows under a sturdy table or with a suspension trainer.
Step-by-step beginner setup
- Start with hangs: 10–30 seconds, 2–3 sets.
- Use assistance: Loop a band on the bar for assisted pull-ups or perform negatives (jump up, slow lower).
- Train 2–3 times/week, alternating grips (overhand, neutral, underhand).
Beginner modifications & progressions
- Easier: Feet-assisted (chair), thicker band, partial range.
- Harder: Reduce assistance, weighted pull-ups, slower eccentrics, pause at top.
Frequency, duration & metrics
- 10–20 total quality reps across sets; add 1–2 reps each week.
- Track max hang time, best unassisted rep count, and band thickness.
Safety & common mistakes
- Confirm the mount is secure before every session.
- Don’t kick/swing violently; keep ribs down and shoulders packed.
- Avoid going to absolute failure early—protect elbows/shoulders.
Mini-plan example
- Dead hang 3×20–30 seconds
- Band-assisted pull-up 4×4–6
- Eccentric-only pull-up 2×3 (3–5 seconds down)
5) Suspension Trainer (Bodyweight Straps)
What it is & core benefits
Suspension straps (door- or ceiling-anchored) let you adjust body angle to scale difficulty instantly. They challenge core stability on every rep and cover rows, presses, squats, hinges, and single-leg work.
Requirements & budget-friendly alternatives
- Space: A doorway or overhead anchor with 2–3 meters of clear floor.
- Budget: Moderate for branded kits; budget sets work if stitched/anchored well.
- Alternatives: Rings (similar idea), sturdy towels over a closed door for very light rows (use caution).
Step-by-step beginner setup
- Set anchor height: Chest level for rows/presses, higher for squats/hinges.
- Find your angle: The more you lean, the harder it gets.
- Own neutral: Ribs down, glutes lightly on, straps stay taut.
Beginner modifications & progressions
- Easier: Step feet away from anchor; shorten set duration.
- Harder: Walk feet under anchor, single-arm work, one-leg squats, tempo pauses.
Frequency, duration & metrics
- 2–3 total-body sessions/week, 20–40 minutes.
- Track body angle (foot placement), reps to RPE 7–8, and time under tension.
Safety & common mistakes
- Check door/anchor before every session.
- Keep wrists neutral; don’t let hips sag during rows/presses.
- Don’t “saw” the straps—keep even pressure.
Mini-plan example
- Suspension row 4×8–10
- Suspension push-up 3×6–10
- Assisted single-leg squat 3×6/side
6) Jump Rope
What it is & core benefits
A jump rope is a compact, high-return tool for cardiovascular fitness, coordination, footwork, and calf/ankle strength. Short intervals elevate heart rate fast and pair well with strength sessions.
Requirements & budget-friendly alternatives
- Space: A clear 2×3 meter area with enough ceiling clearance.
- Budget: Low; basic speed rope is fine.
- Alternatives: Shadow jumping (no rope), marching high knees, or step-ups.
Step-by-step beginner setup
- Adjust rope so handles reach roughly armpit height when the rope is stood on.
- Start with single bounces; keep elbows close, turn from the wrists.
- Use intervals: 20–40 seconds work, 20–40 seconds rest.
Beginner modifications & progressions
- Easier: Slow pace, lower volume, march steps between jumps.
- Harder: Longer intervals, fewer rests, alternate-foot, high-knees, double-unders (advanced).
Frequency, duration & metrics
- 2–4 sessions/week, 5–15 minutes.
- Track total jumps, interval time, and RPE (aim for 6–8 on work sets).
Safety & common mistakes
- Use supportive shoes and a mild-give surface.
- Keep jumps low; avoid excessive knee lift or landing heavy on heels.
- Stop if you feel sharp pain in shins or Achilles.
Mini-plan example
- EMOM 10 min: 30 seconds jump rope, 30 seconds rest
- Finish with 2×60-second easy pace to cool down
7) Exercise Mat (Yoga/Workout Mat)
What it is & core benefits
A good mat protects joints, adds grip, and defines your training space. It supports ground work—planks, dead bugs, hip bridges, mobility—and prevents slipping during standing movements.
Requirements & budget-friendly alternatives
- Space: Roll-up; store upright.
- Budget: Low–moderate; aim for 5–8 mm for general training (thicker for knees, thinner for balance work).
- Alternatives: Folded blankets or carpet squares (temporary).
Step-by-step beginner setup
- Unroll on a flat, non-slippery surface.
- Test grip with a downward dog or plank; if you slide, clean the mat.
- Keep a small towel handy for sweat to maintain traction.
Beginner modifications & progressions
- Easier: Use thicker mat for kneeling moves; elevate hands on blocks.
- Harder: Add tempo to core holds, progress to side planks and hollow holds.
Frequency, duration & metrics
- Use daily for warm-ups, mobility, and core finishers (5–15 minutes).
- Track hold times (planks), breaths per rep (mobility), and pain-free range.
Safety & common mistakes
- Don’t train on a curled or torn edge; trip hazard.
- Clean regularly to avoid slipping.
- If wrists/knees ache, pad appropriately or modify angle.
Mini-plan example
- Glute bridge 3×12
- Dead bug 3×6/side (slow)
- Front plank 3×20–40 seconds
Quick-Start Home Gym Checklist & 5-Minute Warm-Up
Checklist
- Clear a 2×3 meter training area.
- Store gear in a bin or shelf you can access quickly.
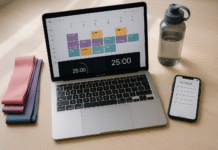
- Keep a water bottle, small towel, and clock/timer nearby.
- Test anchors (door, wall, ceiling) before the first workout.
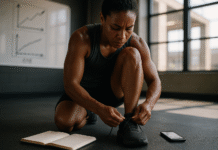
- Set up a simple tracking sheet (notebook or app).
5-Minute Warm-Up (Any Session)
- Breathing reset (30–45 seconds): Lie on back, feet on floor, 5 slow nasal breaths—exhale fully.
- Global mobility (2 minutes): 10 hip circles/side, 10 arm circles, 10 cat-cows, 10 thoracic rotations.
- Pattern prep (2 minutes):
- Bodyweight squats ×10 (pause in bottom for 2 breaths)
- Hip hinge reach ×10
- Push-up position shoulder taps ×10
- Light band pull-aparts ×15
Troubleshooting & Common Pitfalls
- “My knees hurt when I squat.”
Widen stance a hair, let knees track over toes, sit “between” your legs, and reduce depth. Try a box squat to a chair and use a goblet hold for counterbalance. - “My lower back feels the hinge.”
You’re likely rounding. Practice the hip hinge with a dowel along head–spine–tailbone. Keep the bell/dumbbell close to shins, brace abs like someone’s poking you. - “Bands feel inconsistent.”
Note your anchor distance/height each session. Step in/out by the same amount. If a band is nicked or dry, replace it—consistency and safety matter. - “I can’t do a single pull-up.”
That’s normal. Accumulate time under the bar: dead hangs, negatives, and band-assisted reps. Celebrate the first clean unassisted single—then build doubles. - “My grip gives out first.”
Use farmer’s carries, dead hangs, and chalk or a towel for sweat. Slightly lower reps on rows/presses and add a grip-only set at the end. - “Cardio bores me.”
Keep it short and punchy: 5–12 minute jump rope intervals after strength. Rotate foot patterns. Track total jumps and try to beat last week by 20–50. - “I miss days and lose momentum.”
Use a flexible floor: If you miss Day 2, do it next day and slide everything by one. Consistency over calendar perfection.
How to Measure Progress (Strength, Endurance, Mobility)
Strength
- Performance: Heavier dumbbells for same reps; more reps at same load; steadier tempo.
- Benchmarks: Goblet squat bodyweight × 8–10 reps; one-arm row bodyweight × 12–15 reps (across sets with rest).
- Tracking: Log load × reps × sets and RPE. Hit the top of the rep range two sessions in a row? Nudge load up 2–5%.
Endurance & Conditioning
- Performance: Shorter rest between sets with equal quality; more total swings or jump intervals.
- Benchmarks: 10×15-second swings with crisp form; 10-minute EMOM of 30-second jump rope efforts without trips.
- Tracking: Record total working time, average HR (if you use a monitor), and perceived exertion.
Mobility & Control
- Performance: Deeper, pain-free squat; longer stable planks; smoother transitions.
- Benchmarks: 60-second front plank with steady breathing; hips below knee level in loaded goblet squat without heel lift.
- Tracking: Note range (e.g., “heels down at bottom squat”), hold times, and ease of motion (1–10).
A Simple 4-Week Starter Plan (Total-Body, 3 Days/Week)
How to use this plan
- Train 3 non-consecutive days (e.g., Mon/Wed/Sat).
- Each session: Warm-up (5 min) → Strength block (25–35 min) → Finisher (5–10 min) → Short cool-down.
- Choose loads that leave 1–2 reps in reserve on the first week, then progress.
Week 1: Learn & Groove
Day A
- Goblet squat 3×8
- One-arm row 3×10/side
- Floor press 3×8
- Finisher: Jump rope 6×30 sec easy/30 sec rest
Day B
- KB deadlift 3×8
- Suspension row 3×8–10
- Band pull-apart 2×15–20
- Finisher: Two-hand swings 6×15 sec / 45 sec rest
Day C
- Split squat (bodyweight or light goblet) 3×6/side
- Overhead press (DB) 3×6–8
- Dead bug 3×6/side (slow)
- Finisher: EMOM 8—20 sec jump, 40 sec rest
Week 2: Build Volume Slightly
- Add 1 set to the first two moves of each day (e.g., 4× instead of 3×).
- Keep finishers the same; tidy up form and breathing.
Week 3: Add Load or Tempo
- Increase dumbbell/kettlebell weight 2–5%, or add a 3-second eccentric on presses and rows.
- For swings, add one interval per session (e.g., 7×15 sec).
- For jump rope, keep total time similar but try fewer trips or a slightly faster cadence.
Week 4: Consolidate & Test
- Keep the same structure; in the final session, try a mini test:
- Goblet squat AMRAP at Week-3 load (stop 1–2 reps shy of form break).
- Pull-up progression test: Longest dead hang or max band-assisted reps.
- 10-minute jump rope: Count total uninterrupted jumps.
Recovery guidelines (Weeks 1–4)
- Sleep 7–9 hours when possible.
- Walk daily 20–30 minutes.
- If sore, choose mobility + light bands or take an extra rest day.
FAQs
1) How much space do I really need for a functional home gym?
About a 2×3 meter area works for most workouts. Swings and jump rope need a clear arc and ceiling clearance; otherwise, nearly everything is compact.
2) What should I buy first if my budget is tight?
Start with resistance bands and a mat for the lowest cost, then add adjustable dumbbells or a kettlebell. Those three unlock full-body programs.
3) How often should I train as a beginner?
Aim for 2–3 strength days per week with at least a day between, plus short cardio (jump rope) 2–4 times weekly. Keep sessions 25–45 minutes.
4) Can I build real muscle at home without machines?
Yes. Progressive overload using dumbbells, bands, kettlebells, and bodyweight—plus adequate protein and sleep—builds muscle effectively when done consistently.
5) I can’t do a pull-up. Should I still get a bar?
Yes. Use it for dead hangs, band-assisted reps, and negatives. You’ll build grip and back strength even before your first full pull-up.
6) Are kettlebell swings safe for beginners?
They are safe when you first learn the hip hinge and start with light sets. If in doubt, practice deadlifts and get the hinge pattern right before swinging.
7) Do I need a bench?
Nice to have, not essential. A mat, floor presses, and elevated setups (stacked mats/blocks) substitute well when space or budget is tight.
8) How do I know if I’m progressing?
You’ll lift heavier loads, do more reps at the same load, reduce rest, or move with better control. Keep a simple log and review weekly.
9) What if jump rope bothers my shins?
Shorten intervals, keep jumps low, choose a slightly softer surface, and add calf/ankle mobility. Substitute shadow jumping or step-ups temporarily.
10) Can bands replace weights entirely?
Bands can drive solid strength gains, especially for beginners and accessory work. Many lifters thrive on hybrid programs using both bands and free weights.
11) How long before I notice results?
Consistency for 4–6 weeks usually yields noticeable strength and energy improvements. Visible physique changes often follow with ongoing training and nutrition.
12) What’s the fastest way to warm up?
Spend 5 minutes: breathing reset → joint circles → pattern prep. Don’t skip this—warm tissue and practiced patterns pay off in performance and safety.
Conclusion
You don’t need a garage full of machines to get strong, fit, and confident—you need a small set of high-leverage tools and a plan. Adjustable dumbbells, bands, a kettlebell, pull-up bar, suspension trainer, jump rope, and a reliable mat cover every major pattern and energy system you’ll train this year. Start simple, log your sessions, and let steady progression do the heavy lifting.
CTA: Roll out your mat, pick one tool, and complete your first 15-minute session today—your future workouts will thank you.
References
- Physical Activity Guidelines for Americans, 2nd edition — U.S. Department of Health and Human Services. 2018. https://health.gov/sites/default/files/2019-09/Physical_Activity_Guidelines_2nd_edition.pdf
- Physical activity: Key facts and recommendations — World Health Organization. 2022 (fact sheet, regularly updated). https://www.who.int/news-room/fact-sheets/detail/physical-activity
- Progression Models in Resistance Training for Healthy Adults — Medicine & Science in Sports & Exercise (Position Stand). 2009. https://pubmed.ncbi.nlm.nih.gov/19589905/
- Strength training: Get stronger, leaner, healthier — Harvard Health Publishing. 2019 (updated). https://www.health.harvard.edu/fitness/strength-training-get-stronger-leaner-healthier
- How to warm up before exercising — NHS. 2019 (updated). https://www.nhs.uk/live-well/exercise/how-to-warm-up-before-exercising/
- Jump rope: A simple, effective workout — Cleveland Clinic Health Essentials. 2021. https://health.clevelandclinic.org/jump-rope-workout
- Kettlebell training and performance: evidence overview — Journal of Strength and Conditioning Research (summary via PubMed: kettlebell swing/strength findings). 2012. https://pubmed.ncbi.nlm.nih.gov/22535921/
