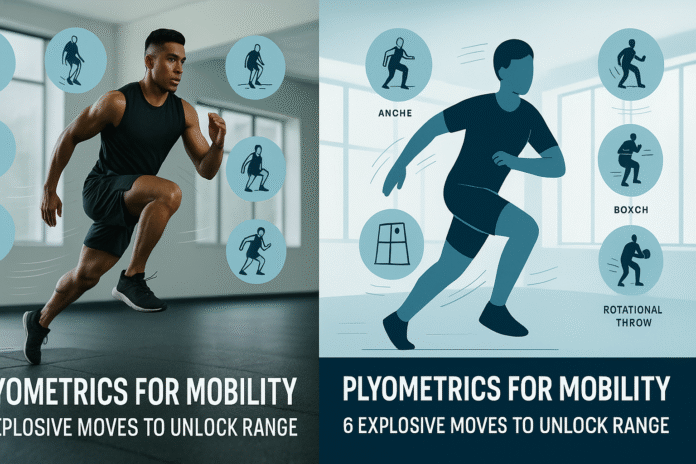
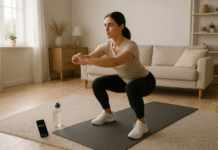
Plyometrics aren’t just for jumping higher or sprinting faster—they can also be a powerful tool for boosting mobility. By using fast, elastic muscle actions and crisp landings, plyometric drills train you to access more usable range of motion, coordinate joints through bigger arcs, and control those ranges at speed. This guide shows you exactly how to add plyometrics to your fitness regimen for mobility gains, with six step-by-step moves, progressions, safety tips, and a simple four-week plan.
Disclaimer: The guidance below is educational and general. If you have pain, a history of injury, or medical conditions, consult a qualified health professional before beginning.
Key takeaways
- Plyometrics can improve active range of motion by teaching your body to load and express force through fuller joint angles at speed.
- Good landings come first. Master soft, quiet, and balanced landings before you chase height or distance.
- Start light and low. Two sessions per week, 48–72 hours apart, with beginner volumes are plenty for results.
- Measure what matters. Track jump height, a simple knee-to-wall ankle test, and video of your landings.
- Progress gradually. Increase amplitude, range, or intent before adding reps. Quality over quantity always.
What “plyometrics for mobility” really means
Mobility isn’t only about passive flexibility; it’s about controlling range under load and speed. Plyometrics train the stretch-shortening cycle—your muscles and tendons load like springs, then release energy explosively. When you practice this in multiple planes with deliberate landings, you don’t just get “springier.” You also gain:
- Active mobility: usable joint range during real movements.
- Dynamic stiffness where you need it, softness where you don’t: ankles that flex deeply then rebound, hips that rotate and absorb force, and a thoracic spine that turns freely while your pelvis stays stable.
- Better coordination: the ability to hit angles (triple flexion and triple extension) precisely and repeat them.
Below you’ll find six plyometric moves curated for mobility across the ankles, knees, hips, and thoracic spine. For each, you’ll get benefits, setup, exact steps, beginner options, progressions, frequency, safety checks, and a tiny “mini-plan” to plug into today’s session.
Quick-start checklist (do this before your first session)
- Footwear & surface: Supportive trainers on a firm, slightly forgiving surface (rubber floor, turf, wood). Avoid concrete.
- Warm-up (8–12 minutes):
- 3–5 minutes light cardio (brisk walk, bike, jump rope easy).
- Dynamic mobility: ankle rocks (10/side), leg swings front/back and side/side (10/10), hip circles (10/side), walking lunges with reach (8/side), T-spine openers (thread-the-needle x 6/side).
- Movement prep: bodyweight squats (10), glute bridge holds (2 × 20s), A-skips (2 × 15 m), low pogo bounces (2 × 10).
- Rules of the road: Land softly (quiet feet), knees track over the middle toes, posture tall, exhale on landing to “catch” the ribs down, eyes forward.
- Stop if you feel pain (sharp or lingering). Fatigue should never degrade landing quality.
The Top 6 Plyometric Moves for Boosting Mobility
1) Ankle Pogo Hops (Two-Foot to Single-Leg)
What it is & core benefits
Rhythmic, low-amplitude vertical hops using minimal knee bend to load and unload the ankles. Benefits include improved ankle dorsiflexion access, Achilles tendon elasticity, and foot intrinsic engagement. They’re a gentle entry to plyometrics and a direct route to springy, more mobile ankles.
Requirements & low-cost alternatives
- Equipment: none.
- Space: a 2 × 2 m clear area.
- Alternative if impact is an issue: calf raise “quick drops” (rise onto toes, then quick but soft drop to mid-foot, 2 × 10).
Step-by-step (beginner)
- Stand tall, feet hip-width, ribs stacked over pelvis.
- Lift heels 1–2 cm, pop up using ankles (not knees), then land mid-foot and let heels kiss the ground quietly.
- Keep hops low (2–5 cm). Think “stiff springs” through the ankle while staying relaxed above.
- Breathe out lightly as you land to maintain trunk control.
Beginner modifications & progressions
- Easier: Hands on hips, slower rhythm, 2–3 sets × 10–15 bounces.
- Harder: Single-leg pogos; add a forward/backward or side-to-side micro-shift; increase time under tension (20–30 seconds).
- Mobility emphasis: Add a knee-over-toe focus on landings (let the knee track forward as the heel kisses down) without collapsing the arch.
Recommended frequency/duration/metrics
- 2–3 sets × 10–20 bounces; 1–3 times per week.
- Metric: Knee-to-wall ankle test before/after (measure distance from big toe to wall where knee just touches without heel lifting).
Safety, caveats & common mistakes
- Don’t let the arch collapse or the knees cave inward.
- Keep hops small—this is about rhythm and range, not jumping high.
- If Achilles or plantar fascia feel irritated, cut volume and frequency, and sub in isometric calf holds (2 × 30s).
Sample mini-plan
- 2 sets × 15 two-foot pogos → 2 × 10 single-leg pogos/side → Walk 20 m focusing on toe-off.
2) Lateral Skater Hops
What it is & core benefits
Powerful side-to-side bounds that build frontal-plane hip mobility, ankle eversion control, and dynamic balance. Great for knees that tend to cave inward and for athletes needing lateral agility.
Requirements & low-cost alternatives
- Equipment: none (cones optional to set targets).
- Alternative: Side step-downs from a 10–20 cm step to practice hip control without leaving the ground.
Step-by-step (beginner)
- Start on the left foot, soft bend in knee/hip, right foot off floor.
- Push off left, bound right 30–60 cm, and stick the landing on the right foot (2–3 seconds), knee over middle toes.
- Keep hips square, torso tall, arms drive naturally.
- Repeat back to the left.
Beginner modifications & progressions
- Easier: Decrease bound distance; tap the free foot lightly for balance on landing.
- Harder: Increase distance; add continuous rhythm (no long stick); add a mini-hop on the landing leg to challenge ankle range.
- Mobility emphasis: On each stick, sit into the hip (small extra range) without the knee collapsing.
Recommended frequency/duration/metrics
- 3 × 6–10 bounds/side; 1–2 times per week.
- Metrics: landing quietness, balance time (2–3 s holds), and video to check knee tracking.
Safety, caveats & common mistakes
- Don’t twist the torso toward the landing side; keep chest forward.
- Avoid over-striding—if you can’t stick quietly, hop shorter.
- Keep the foot tripod (big toe, little toe, heel) contacting the floor.
Sample mini-plan
- 3 × 6/side sticks → 2 × 10 m continuous skater hops → 1 × 20 m lateral shuffle (low stance).
3) Split-Squat Jumps (Alternating Lunge Jumps)
What it is & core benefits
Explosive jumps from a split stance that train hip flexor lengthening, ankle dorsiflexion on the front leg, and upright trunk control. These expand usable lunge depth and clean up gait mechanics.
Requirements & low-cost alternatives
- Equipment: none.
- Alternative: Explosive split-squat rises (no flight; push hard up, heels stay down, then soft return).
Step-by-step (beginner)
- Start in a lunge: front foot flat, back heel lifted, torso tall.
- Dip a couple of centimeters, punch the floor and jump.
- Switch legs mid-air and land softly in the opposite lunge, knees tracking forward over toes, back heel high.
- Reset posture on each rep.
Beginner modifications & progressions
- Easier: No switch; perform a small jump and land in the same split.
- Harder: Increase lunge depth before take-off; add a stick (2 seconds) to claim the new range; hold light dumbbells later.
- Mobility emphasis: On landing, allow the front knee to translate forward (heel down) as the back hip opens.
Recommended frequency/duration/metrics
- 3 × 5–8 total reps/side; 1–2 times per week.
- Metrics: front-knee travel distance without heel lift (use a tape), posture (no trunk lean), and landing quietness.
Safety, caveats & common mistakes
- Front heel must stay down; if it pops up, reduce depth.
- Keep pelvis square; avoid over-arching the lower back when opening the back hip.
- Stop when landings get loud or wobbly.
Sample mini-plan
- 2 × 6 same-leg split jumps (no switch) → 2 × 6 alternating split jumps → Walk-back rest 45–60 s per set.
4) Box Jump to Soft Landing (Step-Down Reset)
What it is & core benefits
A forward jump onto a box that rewards good hip-knee-ankle alignment and teaches deep, quiet landings. By stepping down between reps, you focus on quality over fatigue.
Requirements & low-cost alternatives
- Equipment: stable box or step (start 20–45 cm).
- Alternative: Squat jump to stick (no box).
Step-by-step (beginner)
- Stand an arm’s length from the box, feet shoulder-width.
- Hinge slightly, load the arms back, then swing and jump onto the box.
- Land softly with whole foot on the box, knees tracking forward over toes, torso tall.
- Stick 2 seconds, step down (don’t jump down), reset.
Beginner modifications & progressions
- Easier: Lower box; reduce countermovement depth.
- Harder: Slightly higher box; add a paused deep landing (hips lower) to express controlled range; progress to a countermovement + reach overhead to challenge trunk.
- Mobility emphasis: Own a little more hip and ankle flexion on every stick—no butt-wink, ribs down, heels flat.
Recommended frequency/duration/metrics
- 3–5 sets × 3–5 reps; 1–2 times per week.
- Metrics: landing sound (quiet), knee tracking, and box height only after form is perfect.
Safety, caveats & common mistakes
- Never pick a box so high you need to tuck knees to chest.
- Step down to spare tendons when volume is modest.
- Don’t let knees slam inward on landing.
Sample mini-plan
- 4 × 3 reps at 30–45 cm → 60–90 s rest, focus on deep but controlled landings.
5) Depth Drop to Stick (Absorb, Don’t Rebound)
What it is & core benefits
Step off a low box, drop, and freeze the landing. This builds eccentric control, ankle dorsiflexion range, and teaches the body to dissipate force through hip-knee-ankle coordination—vital for safer cutting, squatting, and running mechanics.
Requirements & low-cost alternatives
- Equipment: 15–30 cm box or step.
- Alternative: Countermovement squat to stick (no box).
Step-by-step (beginner)
- Stand on the box’s edge, step off (don’t jump).
- Land on both feet at the same time, hips and knees flexing, heels down, torso tall.
- Stick the landing for 2–3 seconds, then walk back.
- Use arms to balance; keep eyes forward.
Beginner modifications & progressions
- Easier: Lower box; partial squat on landing.
- Harder: Slightly higher box (still modest); progress to depth drop → small jump only when sticks are perfect.
- Mobility emphasis: Aim for a little more knee-over-toe on each stick while keeping heels down and arches active.
Recommended frequency/duration/metrics
- 3–5 sets × 3–5 reps; 1–2 times per week.
- Metrics: landing quietness, knee-to-wall change over 4–6 weeks, and video side view for ankle/knee angles.
Safety, caveats & common mistakes
- Do not rebound immediately—this is not a depth jump yet.
- If heels lift, lower the box or reduce depth.
- If knees cave in, reduce height and slow the tempo.
Sample mini-plan
- 3 × 5 sticks from 20 cm → 2 × 3 sticks from 30 cm if perfect → easy ankle rocks (8/side) between sets.
6) Medicine Ball Rotational Scoop Toss (Against Wall or to Partner)
What it is & core benefits
A fast, ground-up rotation with a medicine ball that trains thoracic mobility, hip-pelvis dissociation, and elastic recoil through the trunk. Upper-body plyometrics count, too—especially when mobility is your goal.
Requirements & low-cost alternatives
- Equipment: 2–4 kg soft med ball; sturdy wall or partner 3–4 m away.
- Alternative: Band-resisted tall-kneeling rotations (fast but no release).
Step-by-step (beginner)
- Stand side-on to the wall, feet shoulder-width, ball at hip on wall-side.
- Load: rotate away from wall as the back hip internally rotates and front hip externally rotates, ribcage stacked.
- Drive the ground, whip the hips and torso, and scoop-toss the ball into the wall from belly-button height.
- Catch on the rebound or let it drop; reset.
Beginner modifications & progressions
- Easier: Lighter ball; half-speed throws; split stance for more base.
- Harder: Increase speed; move farther from wall; add a step-behind for more range and rhythm.
- Mobility emphasis: Focus on separating pelvis and ribcage—hips turn first, ribs follow, then arms.
Recommended frequency/duration/metrics
- 3–5 sets × 4–6 throws/side; 1–2 times per week.
- Metrics: throw distance (to partner) or rebound speed/sound (to wall), video to check rib-pelvis timing and thoracic rotation.
Safety, caveats & common mistakes
- Avoid hyper-extending the lower back; keep ribs down.
- Don’t collapse the front knee inward on the drive.
- Choose a wall that won’t damage or ricochet unpredictably.
Sample mini-plan
- 3 × 5/side standing scoop toss → 2 × 4/side step-behind scoop toss → Walk 20 m with arm swings to reset.
How to structure a mobility-focused plyometric session
A. Warm-up (8–12 minutes)
- Light cardio → dynamic mobility → movement prep (see checklist above).
B. Skill primer (3–5 minutes)
- Drills that pattern your session’s key ranges: ankle rocks, hip airplanes, tall-kneeling rotations.
C. Main plyometrics (15–20 minutes)
- Pick 2–3 moves from the list:
- One ankle/landing emphasis (pogos or depth drops)
- One frontal-plane emphasis (skater hops)
- One hip/thoracic emphasis (split-squat jumps or med-ball tosses)
D. Buffer work (optional, 8–10 minutes)
- Isometric calf holds (2 × 30–45 s), glute med holds (side-lying or banded), low box step-downs for control.
E. Cooldown (3–5 minutes)
- Easy walk, controlled breathing (3–5 slow exhales), then optional gentle static stretches for calves, hip flexors, or T-spine.
Troubleshooting & common pitfalls
- Landings get loud or sloppy. Cut the height/distance by 25–50% and add a 2-second stick. Quality first.
- Heels keep popping up. Lower the amplitude, cue “knees forward, ribs down,” and add isometric calf holds between sets.
- Knees cave inward. Narrow the stance slightly, think “press the floor apart,” and shorten bounds.
- Ankles ache after sessions. Reduce frequency to once per week for two weeks, switch box jumps to squat-to-sticks, and use softer surfaces.
- Thoracic rotation feels stuck. Add more step-behind variations and tall-kneeling rotations before med-ball work.
- Too sore between sessions. Keep total foot contacts in the beginner range and separate sessions by 48–72 hours.
- Progress stalls. Progress intent (throw harder, jump crisper) before you add reps or height.
Measuring progress (simple, objective, doable at home)
- Knee-to-wall ankle test: Measure distance (cm) from big toe to wall with heel down and knee just touching—track both sides weekly.
- Jump height or box height: Only increase when landings stay silent and aligned for all reps.
- Video your landings (front and side): Look for knees over middle toes, heels down, torso tall, and smooth deceleration.
- Reactive feel: For pogos, count clean, rhythmical bounces in 20 seconds without losing posture.
- Throw distance/speed: Mark a line or count rebounding speed on med-ball throws.
A simple 4-week starter plan (mobility focus)
Schedule: 2 sessions per week (e.g., Monday & Thursday). Keep lifts or cardio on alternate days.
Warm-up each session as outlined (8–12 minutes).
Week 1 — Groove the landings
- Ankle Pogos: 3 × 15 (two-foot)
- Lateral Skater Hops (sticks): 3 × 6/side (2–3 s stick)
- Box Jumps (low): 4 × 3 (step down, deep soft landing)
- Optional: Tall-kneeling rotations 2 × 8/side
Week 2 — Own a little more range
- Ankle Pogos: 2 × 15 two-foot → 2 × 10 single-leg/side
- Split-Squat Jumps (no switch): 3 × 6/side
- Depth Drops (20–30 cm): 3 × 4 sticks
- Med-Ball Rotational Toss: 3 × 4/side (light ball)
Week 3 — Add intent, keep control
- Single-Leg Pogos: 3 × 12/side
- Lateral Skater Hops (continuous): 4 × 8/side
- Box Jumps (moderate): 5 × 3 (reach overhead, step down)
- Med-Ball Rotational Toss (step-behind): 3 × 5/side
Week 4 — Consolidate and test
- Depth Drops (30 cm): 4 × 3 sticks
- Split-Squat Jumps (alternating): 3 × 6 total/side
- Ankle Pogos: 2 × 20 (rhythm focus)
- Med-Ball Rotational Toss: 3 × 6/side (crisp)
Weekly checkpoints:
- Re-measure knee-to-wall on Day 1 each week.
- Re-film box jump landings (front/side) in Weeks 1 and 4.
- If any joint is cranky for >24 hours, repeat the previous week’s progression or drop one set from each drill.
Safety notes you shouldn’t skip
- Surface & shoes matter. Use a firm, slightly forgiving surface and supportive footwear.
- Respect volume. As a beginner, keep total foot contacts per session conservative; focus on quality.
- Recovery time. Leave 48–72 hours between plyometric days.
- Pain ≠ progress. Stop if you feel sharp pain, instability, or swelling.
- Context counts. Heavier lifting phases or high-mileage running blocks may warrant fewer or gentler plyometric contacts.
Frequently asked questions
1) Can plyometrics really improve mobility, not just power?
Yes. Mobility is control through range at speed. Plyometrics train you to access and stabilize greater ankle, knee, hip, and thoracic ranges during movement. With consistent practice, you’ll notice deeper, quieter landings and smoother direction changes—clear signs of better active mobility.
2) How often should I do these if my main goal is mobility?
Two sessions per week work well for most people, separated by at least 48 hours. A third session is possible if volumes are very low and recovery is strong.
3) How do I know when to progress a drill?
When all reps are quiet, balanced, and aligned (knees over toes, heels down, trunk stable). Progress amplitude (slightly deeper landings or longer bounds) before reps or box height.
4) What if my ankles are stiff and I can’t keep heels down?
Lower the amplitude, add more ankle rocks in the warm-up, and use depth drops to stick from a very low step. Isometric calf holds and slow eccentric calf raises complement this well.
5) I have knee pain—are plyometrics off-limits?
Not necessarily, but get clearance from a clinician. Start with low-amplitude pogos and box jump sticks (step down) and avoid continuous rebounding until pain-free.
6) Do I need a medicine ball?
No. You can simulate the pattern with a light resistance band or even broomstick rotations to groove rib-pelvis timing. A ball adds helpful feedback when you’re ready.
7) Can I pair these with strength training?
Absolutely. Do plyometrics after your warm-up and before heavy lifts while you’re fresh. On lower-body lifting days, keep plyo volume modest.
8) How long until I notice mobility changes?
Many people notice cleaner landings and a better ankle test within 3–4 weeks. Structural changes take longer; give it 6–12 weeks of consistent practice.
9) Are continuous jump-roping or burpees “plyometrics”?
They can include plyometric elements, but for mobility goals, deliberate sticks, angle control, and multi-planar hops are more targeted than metabolic movements.
10) What’s the biggest mistake beginners make?
Chasing height and speed before earning quiet landings. Mobility gains come from owning range, not just visiting it.
11) Do I need to stretch after?
Optional. If you like it, add brief, gentle static stretches for calves and hip flexors after your cooldown. The main mobility driver is the quality plyometric practice itself.
12) How do I measure thoracic rotation improvements without fancy tools?
Film your med-ball scoop toss from above hip level. Over weeks, look for smoother sequencing (hips → ribs → arms) and a crisper rebound at the same ball weight.
Conclusion
Mobility lives at the intersection of range, control, and speed. Plyometrics meet you exactly there—teaching ankles to load and spring, hips to rotate cleanly, knees to track with confidence, and your trunk to transmit force without compensation. Start with small, quiet landings, add intent inch by inch, and let these six moves reshape how your joints move in the real world.
Call to action: Pick two moves from the list and run the Week-1 session today—film your landings, measure your ankle test, and start stacking quiet, controlled range.
References
- CURRENT CONCEPTS OF PLYOMETRIC EXERCISE, National Center for Biotechnology Information, 2015. https://pmc.ncbi.nlm.nih.gov/articles/PMC4637913/
- Plyometric Exercises, National Strength and Conditioning Association, n.d. https://www.nsca.com/education/articles/kinetic-select/plyometric-exercises/
- TSAC Module 4.0–4.5 (Programming Fundamentals), National Strength and Conditioning Association, n.d. https://www.nsca.com/contentassets/53f36e5db26a4729b251fb794c166af1/tsac-module-4.0–4.5.pdf
- A review of the acute effects of static and dynamic stretching on performance, PubMed, 2011. https://pubmed.ncbi.nlm.nih.gov/21373870/
- Acute effects of muscle stretching on physical performance, range of motion, and injury incidence in healthy active individuals: a systematic review, PubMed, 2016. https://pubmed.ncbi.nlm.nih.gov/26642915/
- Effects of Plyometric Training on Physical Performance: An Umbrella Review, National Center for Biotechnology Information, 2023. https://pmc.ncbi.nlm.nih.gov/articles/PMC9832201/
- Effects of plyometric training on measures of physical fitness among racket sports athletes: a systematic review and meta-analysis, National Center for Biotechnology Information, 2023. https://pmc.ncbi.nlm.nih.gov/articles/PMC10726777/
- Effects of plyometric training on health-related physical fitness in untrained participants, Nature, 2024. https://www.nature.com/articles/s41598-024-61905-7
- Effects of plyometric training on health-related physical fitness in untrained participants (PubMed record), PubMed, 2024. https://pubmed.ncbi.nlm.nih.gov/38760392/
- Effects of plyometric training on muscle–tendon mechanical properties and behavior, National Center for Biotechnology Information, 2021. https://pmc.ncbi.nlm.nih.gov/articles/PMC8554776/
