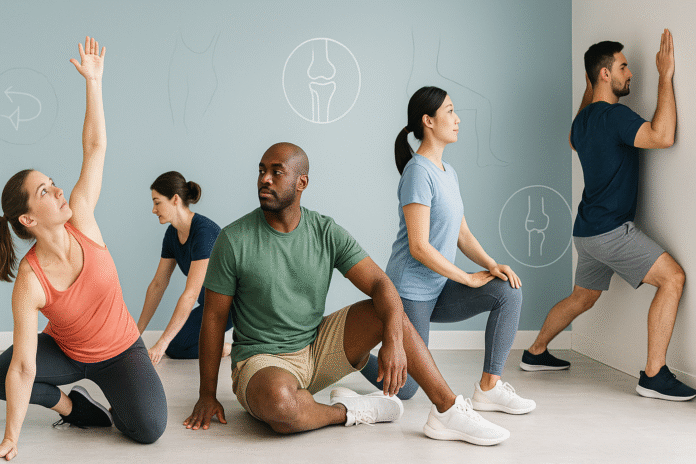
If your hips feel sticky after long workdays, your shoulders protest every time you reach overhead, or your squat stalls just shy of parallel, you don’t need a complete training overhaul—you need a smarter mobility routine. This guide breaks down the top 5 mobility exercises for improving flexibility and range of motion, with step-by-step instructions, beginner modifications, safety notes, progressions, and a simple plan to make mobility stick. Whether you’re a desk-bound beginner, a weekend lifter, or a field sport athlete, you’ll get exactly what to do, how often to do it, and how to measure results.
Medical disclaimer: The advice in this article is educational and not a substitute for personalized medical guidance. If you have pain, injury, or a medical condition, consult a qualified health professional before starting or modifying your routine.
Key takeaways
- Mobility is trainable. A few targeted drills performed consistently can expand your usable range of motion (ROM) without sacrificing strength.
- Dosage matters. For most muscles and joints, aim to accumulate about 60 seconds of work (holds or slow reps) per position and repeat across 2–4 sets, several days per week.
- Match the method to the moment. Use dynamic repetitions in warm-ups; save longer static holds for cool-downs or stand-alone sessions.
- Progress on purpose. Track simple metrics (e.g., knee-to-wall distance for ankles, 90/90 hip angle, deep-squat depth) weekly.
- Keep it pain-free. Work in a comfortable range; gentle discomfort is okay, sharp pain is not.
Before you start: quick warm-up checklist
A cold muscle is like a stiff rubber band—pull too fast and it bites back. Spend 3–5 minutes warming up before your mobility block:
- Whole-body pulse (60–90 seconds): brisk walk in place, light jump rope, or marching with arm swings.
- Joint prep (60–90 seconds): gentle neck turns, shoulder circles, hip circles, ankle pumps.
- Breathing reset (30–60 seconds): in through the nose, out through the mouth; ribcage down and stacked over the pelvis to avoid over-arching the low back.
Optional but helpful: 30–60 seconds of light self-massage per muscle group with a foam roller or ball before longer stretches. It can reduce short-term stiffness and often makes the following drills feel smoother.
1) World’s Greatest Stretch (Lunge with T-Spine Rotation)
What it is & why it works
A full-body “bang-for-buck” sequence that targets hip flexors, adductors, hamstrings, calves, and thoracic (mid-back) rotation—all in one flowing pattern. It restores hip extension for better stride mechanics and upright posture, while the thoracic reach improves overhead and pressing positions.
Requirements & low-cost alternatives
- Equipment: exercise mat (optional), folded towel or pad for the back knee.
- Alternative: Split-stance hip flexor stretch plus side-lying “open book” rotations if kneeling is uncomfortable.
Step-by-step (per side)
- Long lunge set-up: Right foot forward, left knee on the floor behind you. Hands on the ground inside your right foot. Spine long.
- Hip sink: Gently shift hips forward until you feel a stretch in the front of the left hip. Keep ribs stacked, glute on the back leg lightly engaged.
- Elbow drop: Lower your right elbow toward the floor by your right instep (as close as comfortable) for 2–3 slow breaths.
- Thoracic rotation: Plant left hand; reach your right arm up and rotate your ribcage to the right. Think “chest follows hand.” 2–3 slow breaths.
- Hamstring rock-back: Shift hips back, straighten the front knee as tolerated, keep spine long (hinge from hips). 2–3 slow breaths.
- Flow: Return to the lunge and repeat steps 2–5 for the prescribed time, then switch sides.
Beginner modifications
- Place both hands on yoga blocks for more space.
- Keep the back knee under the hip if long lunge bothers the front knee.
- Skip the elbow drop and just rotate if hip pinch appears.
Progressions
- Add a light overhead reach with the rotating arm.
- Transition to a Spiderman lunge with reach (back knee off the floor) for dynamic warm-ups.
- Contract-relax: lightly squeeze the front-hip muscles for 3–5 seconds, relax, then sink a few millimeters deeper.
Frequency, duration & metrics
- 2–4 sets of 30–60 seconds of continuous flow per side, 3–6 days/week.
- Note your stride length in the lunge (knee comfort, torso uprightness) and rotation depth (how far your chest turns without the front knee caving). Film a 10-second clip weekly for an easy visual check.
Safety & common mistakes
- Don’t over-arch the low back to “find” hip extension—tuck the back-hip glute gently.
- Keep the front foot flat; if the heel lifts, shorten the lunge.
- Rotation comes from the ribcage, not cranking the shoulder.
Mini-plan example
- Warm-up: 60 seconds easy cardio.
- Flow: 2 rounds per side of steps 2–5.
- Finish: 5 hamstring rock-backs, slow and smooth.
2) 90/90 Hip Flow (External & Internal Rotation)
What it is & why it works
Hips need both external and internal rotation for pain-free squats, lunges, running gait, and simply sitting cross-legged. The 90/90 position trains both directions in a supported, spine-friendly manner while teaching your pelvis to move without your low back compensating.
Requirements & low-cost alternatives
- Equipment: mat, cushion, yoga blocks if tight.
- Alternative: Seated figure-4 stretch (for external rotation) and prone femur internal-rotation “windshield wipers” if sitting upright is hard.
Step-by-step
- Sit tall with the right leg in front, knee and ankle at roughly 90 degrees; left leg behind you, also 90 degrees at the hip and knee.
- Square your chest toward the front shin. Hinge forward from the hips (not the spine) until you feel a stretch in the right glute. Breathe 3–5 cycles.
- Switch sides by lifting the knees and rotating through the hips to land in the mirror position (left leg in front).
- For internal rotation bias, stay tall and gently press the rear knee down while keeping the rear foot grounded.
- Flow slowly between sides, prioritizing posture and smooth breathing.
Beginner modifications
- Sit on a cushion or folded blanket to reduce hip flexion demand.
- Place a block under the hands to avoid rounding the back.
- Bring the front foot closer to the body (less than 90°) to slacken the stretch.
Progressions
- Hover transitions: Keep feet planted and “float” the knees through the switch without using hands.
- Front-leg lift-offs: In the forward fold, gently try lifting the front ankle 1–2 cm off the floor for 3–5 seconds to build active end-range control, then relax and fold a bit deeper.
- Add a contract-relax (light 3–6-second glute squeeze) before each fold to coax a touch more range.
Frequency, duration & metrics
- 2–4 sets of 5–8 slow switches (or accumulate 60–90 seconds per side), 4–7 days/week.
- Track how upright you can sit without rounding, the angle of the front shin relative to your torso, and whether your rear knee can comfortably contact the floor.
Safety & common mistakes
- Avoid forcing the knees; all movement should be from the hips.
- If you feel pinch in the front hip, back off and sit higher.
- Keep breathing; don’t brace as if lifting a weight.
Mini-plan example
- Prep: 30 seconds seated breathing, ribs stacked.
- Flow: 6 switches, 30-second fold per front side.
- Finish: 3 front-leg lift-offs (2–3 seconds) per side.
3) Ankle Dorsiflexion Knee-to-Wall Mobilization
What it is & why it works
Limited ankle dorsiflexion (shin traveling over the foot) can cap squat depth, stress the knees, and alter gait. The knee-to-wall drill is a precise, self-measurable way to improve ankle range while keeping the heel grounded.
Requirements & low-cost alternatives
- Equipment: a wall, tape measure or ruler (optional but useful), flat shoe or barefoot.
- Alternative: Seated ankle pumps and calf stretching if weight-bearing is uncomfortable.
Step-by-step (per side)
- Stand facing a wall with your right foot a few centimeters away. Heel on the floor.
- Drive the right knee gently toward the wall over your middle toes without letting the heel lift or the arch collapse.
- If the knee taps the wall easily, slide the foot back 1–2 cm and try again. If it can’t touch, move the foot closer.
- Find the farthest distance where your knee can just contact the wall with the heel down. Perform 10–15 slow reps, lightly bouncing off the wall at end range.
- Note the distance between big toe and wall (in cm) for progress tracking. Switch sides.
Beginner modifications
- Hold the wall for balance.
- Work at a reduced distance and build gradually.
- If tightness is in the calf, alternate with standing calf rocks (small knee bends) for 30–45 seconds.
Progressions
- Split-squat rocks: Place the back foot behind you and shift the front knee over toes for loaded end-range reps.
- Band distraction: Loop a light band around the ankle, pulling forward, as you do knee-to-wall reps.
- Slant board or wedge to increase the angle, then repeat the knee-over-toe movement.
Frequency, duration & metrics
- 2–3 sets of 10–15 reps per side, 5–7 days/week.
- Track toe-to-wall distance (cm) and a bodyweight squat filmed from the side to see if heels stay down and depth improves.
Safety & common mistakes
- Keep the heel down at all times; range beyond that is “borrowed” from the mid-foot.
- Knee should line up with second/third toe—don’t dive inward.
- If you feel pinching at the front of the ankle, start closer to the wall and move slower.
Mini-plan example
- Warm-up: 15 ankle pumps.
- Main: 2 sets of knee-to-wall, recording best distance.
- Finish: 10 split-squat rocks focusing on heel contact.
4) Cat-Camel to Thread-the-Needle (Thoracic Spine Mobility)
What it is & why it works
Your thoracic spine (mid-back) should flex, extend, and rotate. If it’s stiff, your shoulders and low back often compensate. This sequence blends gentle spinal motion (cat-camel) with rotational opening (thread-the-needle) to restore rotation for pressing, rowing, and daily reaching tasks.
Requirements & low-cost alternatives
- Equipment: mat; yoga block or pillow if knees/wrists are sensitive.
- Alternative: Side-lying open book rotations if kneeling is uncomfortable.
Step-by-step
- Quadruped set-up: Wrists under shoulders, knees under hips, spine neutral, light brace.
- Cat-camel x 5–8 reps: Inhale as you extend (chest forward, tailbone back), exhale as you round (push the floor away). Move slowly, vertebra by vertebra.
- Thread-the-needle: From neutral, slide your right arm under your chest, palm up, letting the right shoulder and side of the head rest gently on the floor. Hips stay stacked above knees.
- Rotate open: Press through the left hand and rotate your ribcage gently toward the left, breathing into the back and side ribs for 3–5 breaths.
- Reset and repeat on the other side.
Beginner modifications
- Place a block under the head for support.
- Limit range during cat-camel if you feel cranky low-back extension.
Progressions
- Hand-behind-head rotations: From quadruped, place one hand lightly behind your head; rotate elbow toward the opposite wrist and then open toward the ceiling for 6–8 reps per side.
- Tall-kneeling open book: Elevates the torso to challenge ribcage mobility with hip control.
- Pair with a pec doorway stretch (20–30-second hold) after the set to maintain the new range.
Frequency, duration & metrics
- 2–3 sets of 5–8 cat-camel reps + 3–5 breaths per thread, 4–7 days/week.
- Track ability to stack ribs over pelvis without low-back arching and how far you can rotate without the hand peeling off the floor for balance.
Safety & common mistakes
- Keep motion smooth and pain-free; no forcing end ranges.
- Don’t push into neck discomfort—support the head if needed.
- During rotation, keep hips still; motion should come from the ribcage.
Mini-plan example
- Flow: 6 cat-camel reps → 3 breaths per thread each side.
- Finish: 20–30-second pec doorway stretch.
5) Shoulder CARs + Wall Slides (with Optional Pec Opener)
What it is & why it works
CARs (controlled articular rotations) are slow, deliberate joint circles that teach you to own the shoulder’s end ranges. Wall slides reinforce upward rotation of the shoulder blade and overhead control. Pairing them with a brief pec doorway stretch reduces front-of-shoulder tightness that limits overhead reach.
Requirements & low-cost alternatives
- Equipment: wall space; light mini-band (optional).
- Alternative: Seated scapular clocks (slide shoulder blades up/down/in/out) and stick-assisted overhead reach if the wall is not available.
Step-by-step
A) Shoulder CARs (each arm separately)
- Stand tall, ribs stacked, fist lightly clenched.
- Slowly raise your right arm forward and up as far as you can without shrugging.
- At the top, turn the thumb down (internally rotate) and continue the circle behind you.
- Keep the rest of the body still; imagine moving one joint at a time.
- Complete 2–3 slow circles in each direction.
B) Wall slides
- Stand with back, back of head, and hips lightly touching the wall. Elbows at 90°, wrists and hands on the wall (“goalpost” position).
- Gently slide your forearms up the wall, keeping contact as high as you can without arching your back or shrugging.
- Pause, exhale, and slide back down. Perform 8–12 reps.
C) Optional pec opener
- Step into a doorway, forearm on the frame, elbow slightly below shoulder height. Turn your chest away until you feel a light stretch across the front of the shoulder for 20–30 seconds. Switch sides.
Beginner modifications
- Do CARs seated; smaller circles are fine.
- Place a rolled towel behind the low back during wall slides to cue neutral spine.
- If wrists can’t stay on the wall, keep elbows/hands slightly in front of the wall and focus on shoulder blade motion.
Progressions
- Band wall slides: Mini-band around wrists to cue external rotation and scapular control.
- Lift-offs: At end range of wall slides, lightly lift wrists 1–2 cm from the wall for 2–3 seconds, then return with control.
- Tempo CARs: 5–10 seconds per quarter-circle to build motor control.
Frequency, duration & metrics
- Daily or near-daily: 2–3 CARs each direction per shoulder + 1–2 sets of 8–12 wall slides.
- Track overhead reach (can you keep ribs down and arms by ears?), elbow-to-wall contact consistency, and any decrease in pinching sensations.
Safety & common mistakes
- Move slowly; CARs are not arm swings.
- No pain in the front of the shoulder; reduce range if you feel a pinch.
- Keep ribs stacked; avoid turning wall slides into a back bend.
Mini-plan example
- Flow: 2 slow CARs each way per side → 10 wall slides → optional 20-second pec doorway stretch.
Troubleshooting & common pitfalls
- “I don’t feel it where I should.” Re-set posture: ribs stacked over pelvis, long spine, and breathe out gently to reduce bracing. Often this unlocks the intended stretch.
- “Everything feels tight.” Start with lighter dynamic reps (short holds, more movement), then add one longer hold at the end of the set.
- “My heels pop up in squats.” Double down on the ankle knee-to-wall drill and place small plates under your heels temporarily during strength work while you build range.
- “My low back takes over.” In all drills, keep a slight exhale at end range, imagine zipping the ribs down, and move from the target joint.
- “I’m sore the next day.” Mild soreness is normal; sharp joint pain is not. Reduce volume to one set per position and keep motion dynamic for a week, then rebuild.
- “I forget to do it.” Attach mobility to an existing habit: after brushing teeth, post-run, or as a 5-minute desk break.
How to measure progress (simple, objective tests)
- Ankle dorsiflexion (knee-to-wall): Record the toe-to-wall distance (cm) at which the knee just touches with heel down. Test weekly.
- Hip rotation (90/90): Take a quick photo from the side. Track how upright you can sit and whether the rear knee reaches the floor without compensations.
- Overhead reach (shoulder): Stand against a wall and try to keep ribs down while sliding arms overhead. Note if hands reach higher with the low back neutral.
- Hamstring/lower-back flexibility: Optional sit-and-reach once every 2–4 weeks to confirm changes.
- Deep squat snapshot: Film a 5-second air squat from the side—do your hips drop lower with heels down and torso more upright?
Tip: Create a simple note or spreadsheet with your weekly numbers/photos. Small, steady changes—1–2 cm more knee-to-wall, a cleaner overhead reach, an extra few degrees of hip rotation—add up quickly.
A simple 4-week starter plan (10–15 minutes/session)
Weekly rhythm: 4 sessions/week (e.g., Mon–Tue–Thu–Sat). Add short 3–5 minute “micro-mobility” breaks on off days if you like.
Session template (10–15 min):
- Warm-up: 90 seconds easy cardio + 6 joint circles.
- Main Block A (hips/ankles): World’s Greatest Stretch (60–90 seconds/side) → 90/90 Flow (6 switches) → Knee-to-Wall (12 reps/side).
- Main Block B (spine/shoulders): Cat-Camel (6 reps) → Thread-the-Needle (3–4 breaths/side) → Shoulder CARs (2 each way/arm) → Wall Slides (10 reps).
- Optional finisher: 20–30-second pec doorway stretch.
Week 1
- Aim for the minimum dose: 1 round of Block A + 1 round of Block B (about 10 minutes).
- Take baseline videos/photos for the tests above.
Week 2
- Bump to 2 rounds of either Block A or Block B (alternate by day).
- Add front-leg lift-offs in 90/90 (2–3 per side).
Week 3
- Keep two rounds for both blocks if time allows (15 minutes).
- Add split-squat rocks after knee-to-wall (8 reps/side).
- Try banded wall slides if control is solid.
Week 4
- Maintain volume, slow the tempo: 3–5-second pauses at end range in each drill.
- Re-test all measures and note what improved most. Plan next month by leaning into the drills that moved your numbers.
FAQs
1) What’s the difference between mobility and flexibility?
Flexibility is your passive range—how far a joint can be moved when relaxed. Mobility is your usable range—how far you can control a joint actively. You’ll train both here: dynamic reps for mobility, holds for flexibility.
2) Should I stretch before lifting or running?
Use dynamic versions in warm-ups (flows, controlled reps). Save longer static holds for after training or separate sessions, especially if you’re about to do heavy strength or explosive work.
3) How long should I hold a stretch?
For most adults, accumulating about 60 seconds per position (e.g., 3 × 20 seconds or 2 × 30 seconds) works well. Older adults often benefit from 30–60-second holds per repetition.
4) How often should I do mobility work?
2–3 days per week is a solid start; near-daily short sessions produce faster results. Consistency beats marathon sessions.
5) Is foam rolling necessary?
Not required, but 30–60 seconds per muscle can make stretches feel easier and temporarily increase ROM. Use it as a quick warm-up, not a replacement for movement.
6) Can mobility work reduce injury risk?
Mobility helps you access positions with better control, which supports safer technique. It’s one piece of the puzzle along with strength, load management, sleep, and skill.
7) I feel pinching in the front of my hip during 90/90. What do I do?
Back off range, sit on a cushion to tilt the pelvis forward, and keep the spine long. Mild stretch is okay; pinch is your cue to modify.
8) How soon will I see results?
Many people notice easier motion right away from dynamic drills. More durable changes usually show up within 2–6 weeks of consistent practice.
9) Can I do these on rest days?
Yes—mobility pairs perfectly with rest or low-intensity cardio. Keep sessions light and focus on breathing.
10) Are long static stretches bad for strength?
Very long holds performed immediately before maximal strength or power efforts can temporarily reduce performance. Shorter, controlled doses or dynamic reps are better pre-workout.
11) What if I only have five minutes?
Do World’s Greatest Stretch (60–90 seconds/side), knee-to-wall (10 reps/side), and 2 shoulder CARs each direction. That’s a potent “mini.”
12) Can older adults do this routine?
Absolutely. Favor slower holds (30–60 seconds), use cushions/blocks for support, and progress gradually while keeping everything pain-free.
Conclusion
Mobility isn’t about extreme contortion—it’s about owning the positions you need for life, sport, and pain-free training. With just five well-chosen drills, a few minutes most days, and simple metrics to keep you honest, you’ll open up tight hips, free stubborn ankles, smooth out your thoracic rotation, and reclaim confident overhead motion.
CTA: Roll out a mat, set a 10-minute timer, and start your first round today—your future joints will thank you.
References
- American College of Sports Medicine position stand: Quantity and quality of exercise for developing and maintaining cardiorespiratory, musculoskeletal, and neuromotor fitness in apparently healthy adults — American College of Sports Medicine (ACSM) via PubMed, 2011. https://pubmed.ncbi.nlm.nih.gov/21694556/
- Current Concepts in Muscle Stretching for Exercise and Rehabilitation — International Journal of Sports Physical Therapy via PubMed Central, 2012. https://pmc.ncbi.nlm.nih.gov/articles/PMC3273886/
- Effect of Acute Static Stretch on Maximal Muscle Performance: A Systematic Review — Sports Medicine via PubMed, 2012. https://pubmed.ncbi.nlm.nih.gov/21659901/
- Acute Effects of Static Stretching on Muscle Strength and Power: An Attempt to Clarify Previous Caveats — Frontiers in Physiology via PubMed Central, 2019. https://pmc.ncbi.nlm.nih.gov/articles/PMC6895680/
- Revisiting the Stretch-Induced Force Deficit: A Systematic Review and Meta-Analysis — Journal of Sport and Health Science via ScienceDirect, 2024. https://www.sciencedirect.com/science/article/pii/S2095254624000693
- Chronic Effects of Stretching on Range of Motion: A Systematic Review with Meta-Analysis — Journal of Sport and Health Science via ScienceDirect, 2024. https://www.sciencedirect.com/science/article/pii/S2095254623000571
- Static Stretch Training versus Foam Rolling Training Effects on Joint Range of Motion: A Systematic Review with Meta-Analysis — Sports Medicine, 2024. https://link.springer.com/article/10.1007/s40279-024-02041-0
