
























By Ada L. Wrenford
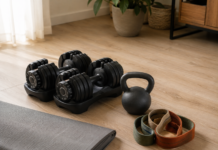
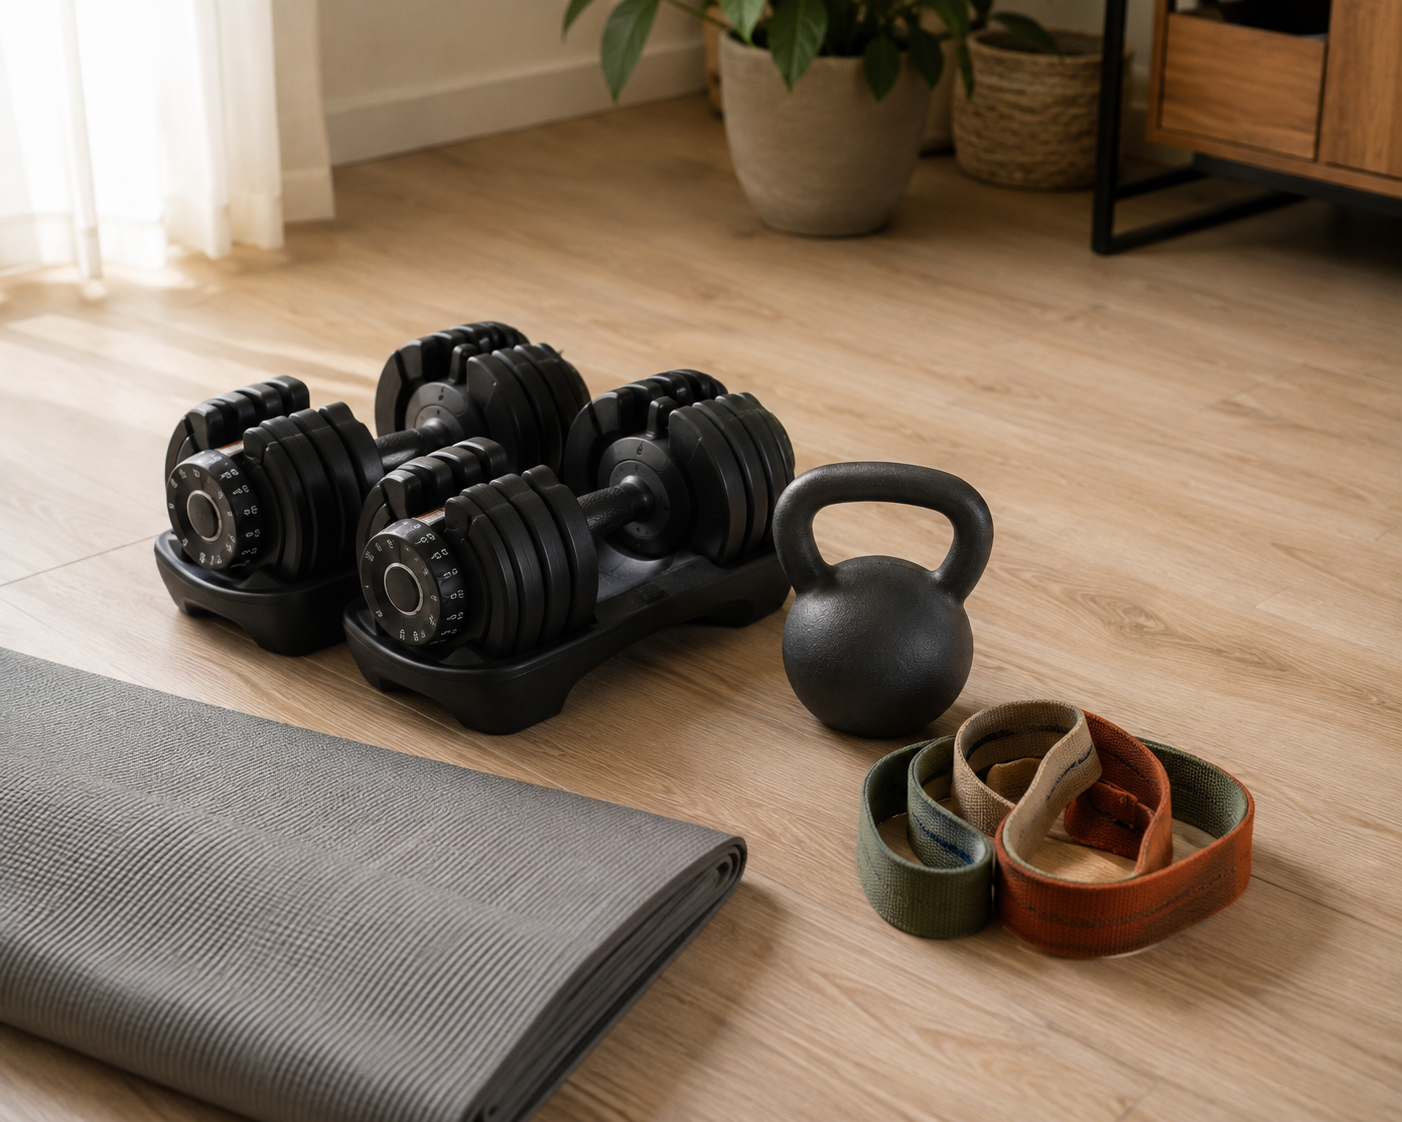
You have a corner of a bedroom, maybe a hundred dollars to spend, and three very different pieces of equipment staring back at you from a shopping cart. Adjustable dumbbells promise gym-style strength work without the gym. A kettlebell looks like it could do everything in one oddly shaped chunk of iron. Resistance bands take up almost no space and cost less than a dinner out. All three get recommended constantly, and all three solve slightly different problems, which is exactly why picking just one first trips people up.
This guide walks through what each tool is actually good at, where each one falls short, and how to decide which one earns the first spot in your home gym based on your body, your goals, your space, and your budget. We’ll also cover a realistic order to add the other two later, because most people who stick with home strength training eventually own all three.
Quick Verdict
Buy adjustable dumbbells first if you want the fastest path to visible strength gains and can afford $150-$400.
Buy a kettlebell first if your goal is conditioning, fat loss, and full-body movement in short sessions, and you’re comfortable learning technique from video or a coach.
Buy resistance bands first if your budget is under $50, you travel often, you’re returning from an injury, or you’re brand new to structured exercise and want a low-intimidation entry point.
What Each Tool Actually Does Well
Before comparing them side by side, it helps to understand what each piece of equipment is built for. They overlap on paper (all three can build strength) but they load your muscles differently, and that difference matters more than most buying guides admit.
Adjustable Dumbbells
Adjustable dumbbells are a pair of handles with a stack or dial system that lets you change the weight in seconds, usually somewhere between 5 and 50+ pounds per hand depending on the model. They replace an entire dumbbell rack with two objects, which is the whole appeal for anyone short on space.
The strength-training benefit is straightforward: dumbbells apply constant, predictable resistance through gravity. That makes it easy to track progress. If you did 8 reps of a shoulder press at 20 pounds last week and manage 8 reps at 22.5 pounds this week, you know you got stronger. This kind of measurable overload is central to how strength training guidelines are built. The CDC recommends muscle-strengthening activity on two or more days a week that works all major muscle groups, including the legs, hips, back, abdomen, chest, shoulders, and arms, and dumbbells are one of the most direct ways to hit that list systematically.
Where they fall short: dumbbells are heavy and, even the adjustable kind, are not especially portable. A 400-pound-capacity set often weighs more than 40 pounds per handle at the top end, and the mechanisms (especially dial-style) don’t love being dropped, kicked, or left in a hot car.
Kettlebells
A kettlebell is a single cast-iron or steel ball with a handle, and its offset center of mass is the whole point. That imbalance forces your core, hips, and grip to stabilize constantly, which is why kettlebell movements (swings, cleans, snatches, Turkish get-ups) tend to work several muscle groups and your cardiovascular system in the same rep.
Mayo Clinic lists kettlebells alongside barbells, dumbbells, and medicine balls under free weights in its strength training overview, and recommends strength work for all major muscle groups at least twice a week, with a single set of 12 to 15 repetitions at a challenging weight generally being enough to see results for most people. A kettlebell swing session can deliver that muscular stimulus while also raising your heart rate more than a slow dumbbell set would, which is why kettlebells are popular with people who want strength and conditioning in the same 20-minute window.
The catch is technique. A kettlebell swing loaded with poor hip-hinge mechanics puts real strain on the lower back, and this is a case where a few sessions with a qualified coach or a genuinely good instructional video are worth more than any amount of extra rep volume. If you have an existing back issue or you’re new to hinge-pattern movements, this is a reasonable place to be cautious and to check in with a doctor or physical therapist before loading up.
Resistance Bands
Resistance bands (flat loop bands, tube bands with handles, or fabric mini-bands) create resistance through elastic tension rather than gravity. The harder you stretch a band, the more resistance it provides, which means the resistance curve is different from a dumbbell: bands are typically hardest at full stretch and easiest at the starting position, the opposite of how a dumbbell feels in a curl.
That variable resistance is a real advantage for certain goals. Physical therapy clinics use bands constantly for rehab work because the light starting resistance protects a healing joint while the increasing tension still challenges the muscle through the rest of the range. Bands are also nearly weightless, cost far less than iron or steel, and travel in a laptop bag, which makes them the only realistic strength-training option for someone who splits time between a home office and hotel rooms.
Their limitation is durability and precision. Bands wear out, especially with friction against rings, buckles, or rough flooring, and a snapped band under tension can cause a painful welt or worse if it recoils toward your face. They also make it harder to know exactly how much resistance you’re applying compared with a labeled dumbbell, which can make tracking progress feel less concrete.
Side-by-Side Comparison
Here’s how the three stack up across the factors that actually decide a first purchase.
Matching the Tool to Your Situation
Buying guides that just rank equipment by “best overall” skip the part that actually matters: your circumstances. Here’s how the decision tends to shake out for common situations.
Small apartment, no gym experience
Start with resistance bands. The cost is low enough that a wrong choice doesn’t sting, the movements are forgiving on joints while you learn basic patterns like rows, presses, and squats, and there’s nothing heavy to store or accidentally drop on a downstairs neighbor’s ceiling. Once a set of bands feels too easy for an exercise, that’s your signal to add a dumbbell or kettlebell.
Want visible muscle growth as the main goal
Go with adjustable dumbbells. Muscle growth responds well to progressive overload, gradually increasing the resistance over weeks and months, and dumbbells make that progression simple to measure and repeat. A dial or pin-adjustable set covering roughly 5 to 50 pounds per hand covers the vast majority of home strength programs for beginners through intermediate lifters.
Short on time, want conditioning and strength together
A kettlebell is the efficient choice. A 15 to 20 minute kettlebell circuit (swings, goblet squats, presses, rows) can raise your heart rate and load your posterior chain in the same session, which appeals to anyone trying to fit training around a packed schedule. Just budget time for learning the hip hinge properly first, ideally from a certified instructor or a well-reviewed instructional series, before adding load or speed.
Recovering from injury or managing a chronic condition
Bands first, and loop in a physical therapist or physician before starting anything new. The adjustable, low-starting-tension nature of bands makes them a common tool in rehab settings, and the ability to fine-tune resistance by changing band thickness or anchor distance gives you more control than a fixed-weight dumbbell would during early-stage recovery.
Traveling frequently or working from multiple locations
Bands, without much competition. A set of five loop bands weighs under a pound combined and rolls up smaller than a pair of socks. Some travelers pair bands with a single moderate kettlebell kept at home for the days they’re not on the road, which covers both worlds without hauling iron through an airport.
Building a permanent home gym on a real budget
Dumbbells first, kettlebell second, bands third, added roughly a season apart so the cost spreads out and you actually learn to use each tool instead of letting it collect dust. That order front-loads the equipment with the clearest strength-tracking data, which tends to keep people motivated during the first few months when habit-forming matters most.
“The best piece of home gym equipment is the one you’ll actually pick up on a Tuesday evening when you’re tired. Cost and space matter, but consistency is what turns any of these three tools into results.”
A Realistic Path: Buying All Three Over Time
Most people who keep training at home for more than a year end up owning all three tools. Here’s a sensible order and rough timeline if you’re building a full setup rather than choosing just one.
Suggested Buying Timeline
- Month 1: Pick the single tool that matches your primary goal from the sections above. Learn 4-6 core movements well before adding anything else.
- Month 2-3: Track your sessions. If you’re consistently training on at least two non-consecutive days a week (matching general strength-training guidance), you’ve earned tool number two.
- Month 4-6: Add the tool that covers your current gap. Dumbbell owners often add a kettlebell for conditioning; band owners often add dumbbells once bodyweight-plus-band feels too light; kettlebell owners often add bands for shoulder and rotator cuff work that a bell handles awkwardly.
- Month 6+: Round out the set with whichever tool remains, sized for how your training has actually evolved rather than how you guessed it would.
Safety and Form Considerations
All three tools are safe for most healthy adults when used with reasonable technique and appropriate loading, but each carries its own common failure point worth knowing before you buy.
With adjustable dumbbells, the two most common issues are dropping a partially-locked weight (check the locking mechanism every time you change plates) and using momentum instead of controlled muscle tension on exercises like curls and lateral raises. With kettlebells, the swing and clean movements rely on hip-hinge mechanics rather than squatting or lifting with a rounded back, and rushing this learning phase is the most frequent cause of strain. With bands, inspect for small nicks or thinning before each use, always anchor them to something that won’t slip or fail, and keep your face out of the band’s potential recoil path.
If you’re new to exercise, pregnant, over 65, or managing a heart condition, joint problem, or previous injury, it’s worth checking with a doctor or physical therapist before starting a new resistance training routine, and any of these three tools can be adapted to a medically cleared plan once you have that go-ahead.
Budget Snapshot
If cost is the deciding factor, here’s a realistic range for a starter setup of each, based on typical retail pricing for entry-to-mid-tier products as of 2026.
- Resistance band set (5 loop bands + door anchor): roughly $15-$50
- Single kettlebell, mid-weight (25-35 lb): roughly $30-$90
- Adjustable dumbbell pair (5-50 lb per hand): roughly $150-$400
- All three combined, entry-level of each: roughly $200-$540
Prices vary by brand, weight capacity, and how the mechanism is built (pin-select systems are typically cheaper than dial-select systems at the same weight range), so treat these as planning ranges rather than fixed quotes.
What to Look For When Buying Each Tool
Once you’ve settled on which tool goes first, the next question is which specific product. A few practical shopping criteria save people from returns and regret.
Choosing adjustable dumbbells
Check the weight increments first. Some sets jump in large steps (5 or 10 pounds at a time), which can make small progressions difficult once you’re pressing or curling near your current ceiling; sets with 2.5-pound increments give more room for gradual overload. Look at the locking mechanism next: pin-select systems tend to be simpler and cheaper to repair, while dial systems are faster to adjust but have more moving parts that can wear out. Finally, measure your available floor space and confirm the handle length works if you have larger hands, since some compact designs use shorter handles that feel cramped on heavier presses.
Choosing a kettlebell
Handle diameter and texture matter more than most first-time buyers expect. A handle that’s too thick makes swings and cleans harder on the grip, especially for people with smaller hands, while a rough or unfinished handle can tear up palms during higher-rep sets. Competition-style kettlebells keep the same size across all weights (only the density changes), which some people prefer for consistent technique as they size up; cast-iron “classic” kettlebells vary in size with weight, which can feel more natural for general fitness use. Pick a starting weight based on honest strength, not aspiration. Many coaches suggest new female exercisers start in the 15-25 pound range and new male exercisers in the 25-35 pound range for swings, though individual strength varies enough that these are only starting points, not rules.
Choosing resistance bands
Fabric bands (mini loop bands used mostly for hips and glutes) tend to outlast rubber loop bands because they resist rolling and snapping. For tube-style bands with handles, check that the tubing connects to the handle with a secure clip rather than a simple knot, since knots are a common failure point. Buy a set with at least four resistance levels so you have room to progress a single movement over months rather than needing to rebuy bands every few weeks. A door anchor attachment expands the usable exercises considerably (rows, presses, and pull-apart variations) and is worth the few extra dollars if it isn’t already included.
Common Mistakes to Avoid With Each Tool
A few avoidable errors show up again and again with first-time buyers of each tool, and knowing them ahead of time can shortcut a lot of trial and error.
With adjustable dumbbells, the most common mistake is buying a lower weight capacity than needed because it seemed like plenty at the time. Lower-body exercises like goblet squats and Romanian deadlifts use far more weight than shoulder or arm exercises, so a set that feels generous for curls can feel limiting within a few months once your legs catch up. It’s usually smarter to buy slightly more capacity than you think you need at the start.
With kettlebells, the common mistake is skipping the hinge pattern entirely and turning a swing into a squat-and-lift movement, which shifts strain toward the lower back and knees instead of the hips and glutes where it belongs. Spending even one or two sessions specifically drilling the hip hinge, with just bodyweight or a light band, pays off across every kettlebell movement that follows.
With resistance bands, the common mistake is anchoring them to something unstable, like a doorknob or a light piece of furniture, and testing full tension for the first time in that setup. A band that slips its anchor under load can snap back hard. Anchoring to a solid door frame with a proper door anchor, or looping around a fixed structural post, removes most of that risk.
How These Tools Compare to a Gym Membership
It’s worth addressing the option some readers are silently weighing against all three: just joining a gym instead. A typical gym membership runs somewhere in the neighborhood of $30-$60 a month in most U.S. markets, which adds up to $360-$720 a year, more than the cost of owning all three home tools combined after the first year. Gyms offer equipment variety and, for some people, the accountability of a scheduled trip out of the house works better than a routine that depends entirely on self-motivation at home.
Home equipment wins on convenience and total cost over time, and it removes the most common excuse (no time to travel to and from a gym) that derails consistency for busy people. The two approaches aren’t mutually exclusive either. Plenty of people keep a light home setup of bands and one kettlebell for days they can’t make it to the gym, treating the home tools as a backup rather than a replacement.
Frequently Asked Questions
Do I really need to buy all three eventually, or can I just pick one and stick with it?
You can absolutely build a complete strength routine around just one tool. Dumbbells alone can support years of progressive training, a single kettlebell can carry a full-body conditioning program, and bands alone are enough for many rehab and maintenance goals. Owning all three simply adds variety and covers a few movement patterns each tool does awkwardly on its own.
Are resistance bands actually effective, or are they just for beginners?
Bands are used well beyond beginner training, including in physical therapy and professional sports conditioning, because the accommodating resistance (harder at full stretch) challenges muscles differently than a fixed weight does. They’re less effective than heavier free weights for maximal strength and size goals in advanced lifters, but for general strength, joint-friendly training, and travel, they hold up as a legitimate long-term tool rather than a placeholder.
How much weight range do I need in an adjustable dumbbell set?
Most beginners are well served by a set adjustable from about 5 to 50 pounds per hand, which covers everything from lateral raises (light) to goblet squats or rows (heavier). If you already have some lifting background, a higher top end (65-90 lb per hand) gives more room to grow before you outgrow the set.
Is a kettlebell dangerous for a first-time exerciser?
Not inherently, but the swing and ballistic movements that make kettlebells effective also demand correct hip-hinge technique. First-timers do well starting with a lighter bell (around 15-25 lb for most adults, adjusted individually), learning the hinge pattern slowly, and getting form feedback from a qualified coach, video series, or in-person class before adding speed or weight.
What size resistance bands should a beginner buy?
A set with 4-5 bands spanning light to heavy tension (often color-coded) gives enough range to progress an exercise as you get stronger, and to scale a single movement up or down for different muscle groups (legs typically need heavier tension than shoulders, for example).
Can I lose weight using just one of these tools?
Weight management depends mainly on overall activity level and nutrition, not the specific tool used for resistance training. That said, kettlebell circuits tend to elevate heart rate more within a session, which some people find useful for combining strength and cardio work in less time. Any of the three, used consistently alongside the aerobic activity levels recommended by health authorities (150 minutes of moderate activity weekly), can support a broader weight-management plan.
References
- Centers for Disease Control and Prevention. “Physical Activity Guidelines for Adults.” cdc.gov/physical-activity-basics/guidelines/adults.html
- Mayo Clinic. “Strength training: Get stronger, leaner, healthier.” mayoclinic.org
- NHS. “Strength exercises.” nhs.uk/live-well/exercise/strength-exercises