






















By Amara Williams
A rowing machine looks like one of the safer pieces of equipment in a gym. It is seated, low-impact, and the motion feels smooth once you get the rhythm down. Yet ask any physical therapist who treats recreational athletes and you will hear the same pattern come up again and again: rowers showing up with a stiff, achy lower back that flares up a day or two after a hard erg session. The machine itself is not the problem. The sequence of movements a person uses on it is almost always what determines whether the lower back stays protected or ends up absorbing forces it was never built to handle stroke after stroke.
This guide breaks down exactly how to use a rowing machine without wrecking your lower back, phase by phase, so you can build the kind of stroke that lets your legs and hips do the heavy lifting while your spine stays in a supported, neutral position. It also covers the errors that quietly load the lumbar spine, and how to structure your training volume so a single overzealous session does not undo weeks of good technique.
Why Rowing Form Matters for Your Lower Back
Indoor rowing recruits more muscle mass per stroke than almost any other cardio machine. A full stroke pulls in the legs, glutes, hips, back, shoulders, and arms in a specific sequence, and that sequence is the entire point. When the order is followed correctly, the largest and strongest muscles (the quadriceps, hamstrings, and glutes) generate most of the power, and the lower back mainly acts as a stable transmission line between the legs and the upper body. When the sequence breaks down, the lumbar spine gets pulled into a role it was never designed to play: generating force through repeated flexion and extension under load.
Research backs up how common this problem actually is. A scoping review published in the International Journal of Sports Physical Therapy found that low back pain prevalence among rowers ranges from roughly 6 to 66 percent over a 12-month period, with incidence rates between 1.5 and 3.7 injuries per 1,000 training hours, and the low back was identified as the single most commonly injured site among rowers across the studies reviewed. Separately, World Rowing has reported that between 30 and 50 percent of rowers experience an episode of low back pain within any given year, compared with roughly 3 to 18 percent of the general population. That gap is not because rowing is inherently dangerous. It is because poor technique under repeated load, especially on an indoor machine where the resistance and pace are easy to escalate, places outsized demand on the lumbar spine.
Two risk factors show up consistently in the research: a prior history of low back pain, and high volumes of ergometer training, particularly single sessions that run past the 30-minute mark. Both of those are modifiable. You cannot always control old injuries, but you can control how you move on the machine and how much volume you take on in a given week. That is where technique and programming come in.
Setting Up the Machine Before You Start
Good technique starts before the first stroke, at the point where you adjust the machine to fit your body. A rowing machine set up incorrectly will nudge even an experienced rower toward the exact compensations that stress the lumbar spine, so it is worth spending sixty seconds on setup every time you sit down.
Adjust the footplate height so the strap crosses the widest part of your foot, roughly at the ball of the foot, rather than higher up near the ankle or lower toward the toes. A footplate set too low forces your knees excessively high at the catch, which tends to pull the lower back into flexion to compensate. A footplate set too high shortens your leg drive and shifts more of the workload onto your arms and back.
Check the seat and rail for a smooth, unobstructed glide, and make sure the monitor is positioned where you can read your stroke rate without twisting or craning your neck forward, since a poor sightline often drags the upper back and shoulders out of a neutral position over a long session. Finally, take two or three slow, exaggerated practice strokes at very light resistance before ramping up to your working pace. Those few slow strokes give you a chance to feel where your hips are hinging and where your spine is holding steady, which is much easier to notice at a slow pace than once you are pulling hard at a race pace.
The Four-Phase Stroke: A Step-by-Step Technique Guide
Every rowing stroke breaks into four phases: the catch, the drive, the finish, and the recovery. Learning to execute each phase correctly, in order, is the single most effective way to keep the lumbar spine out of harm’s way. Concept2, the company whose ergometers are the standard in most gyms and training facilities, teaches this exact sequence to new rowers and elite athletes alike.
Step 1: The Catch
The catch is your starting position at the front of the slide, and it sets up everything that follows. Sit tall with your shins vertical, heels able to lift slightly off the footplate if needed, and your knees bent but not jammed into your chest. Hinge your torso forward from the hip joints, not from the waist, until your shoulders sit just ahead of your hips. Keep your spine long and neutral rather than rounded, your arms straight, and your shoulders relaxed and level rather than hunched up toward your ears.
A useful cue here is to imagine a straight line running from your tailbone through the crown of your head. If that line bends noticeably at your lower back rather than at your hips, the catch position is already asking your lumbar spine to do work it should not be doing before the stroke has even started.
Step 2: The Drive
The drive is where power gets generated, and the order of operations matters more here than in any other phase. Press through your legs first, driving your heels down and extending your knees. Only once your legs are close to straight should your torso begin swinging back through the vertical position. Your arms come last, pulling the handle in toward your lower ribs only after the legs and hips have done the majority of the work.
This legs-then-back-then-arms order is not a stylistic preference. It is the mechanism that protects your spine. The legs are the biggest, strongest muscle group involved in rowing, so front-loading the drive with leg power means your lumbar spine is simply along for the ride, stabilized by your core rather than generating force through repeated bending. Rowers who reverse this order, yanking with the arms and back before the legs have finished extending, convert a leg-dominant movement into a back-dominant one, and that shift is a major contributor to strain.
Step 3: The Finish
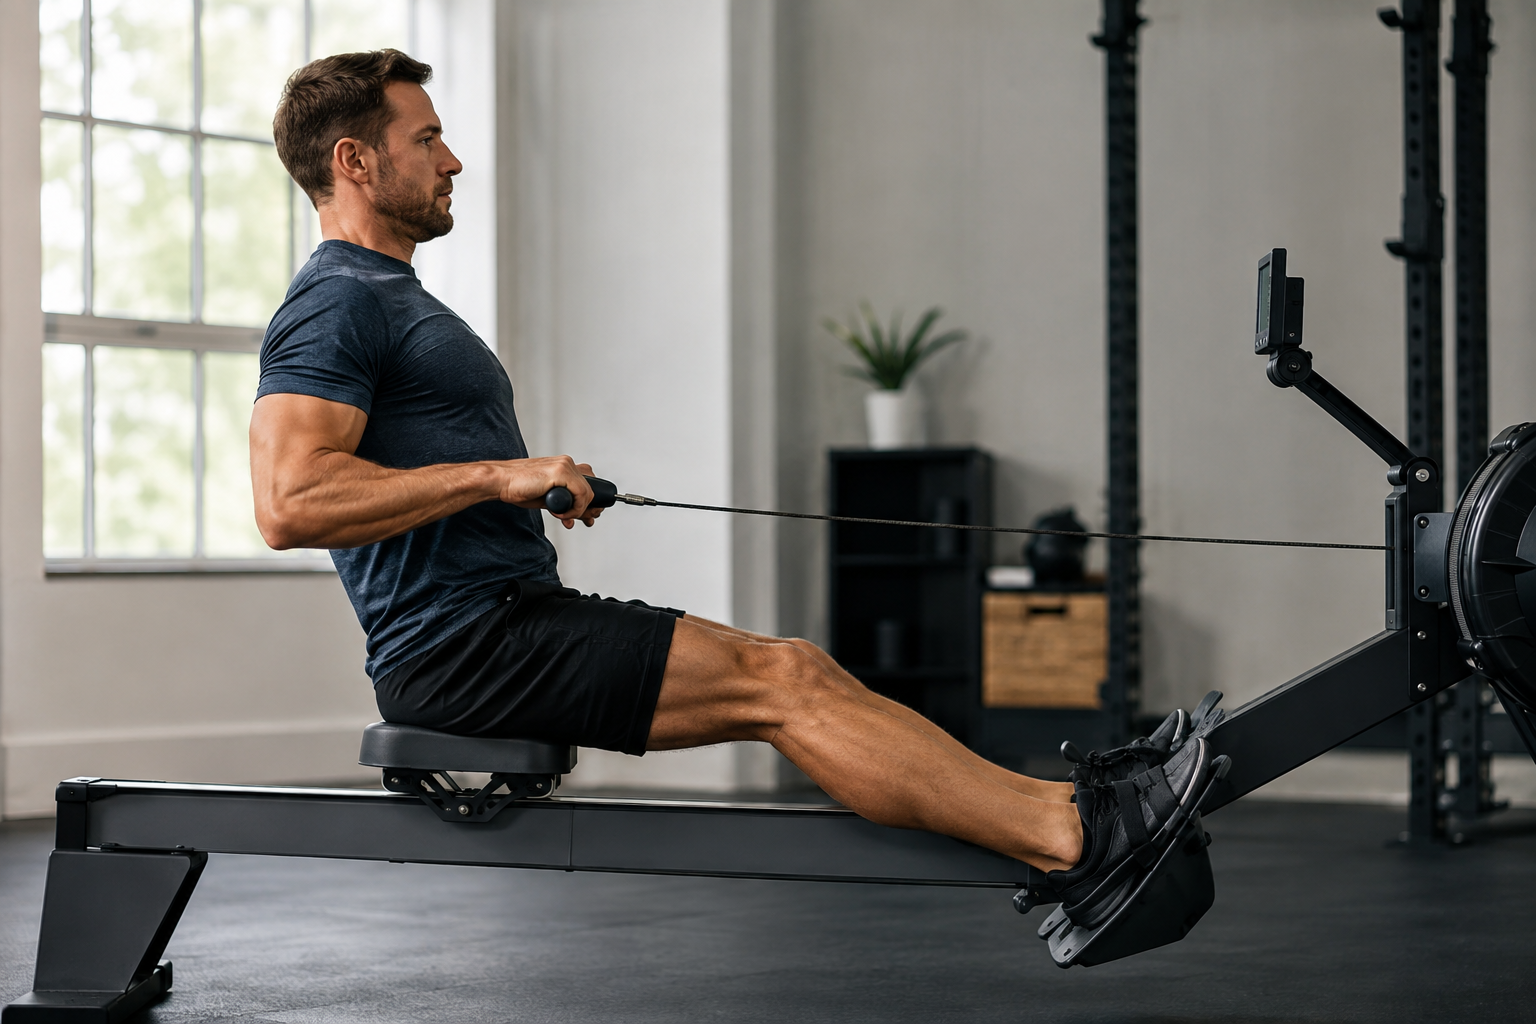
At the finish, your legs are fully extended, your torso is leaning back slightly past vertical, and the handle sits lightly against your body just below the ribs. Your shoulders stay low and relaxed, your wrists stay flat, and your core stays braced to support the slight backward lean. Some coaches cue rowers to exhale sharply as they reach the finish, which helps engage the deep core muscles, including the transverse abdominis, that stabilize the lumbar spine during this end-range position.
The finish is also where fatigue tends to show up first. As a session gets longer, rowers often start leaning back further than necessary or collapsing through the chest to compensate for tired legs. Both patterns increase lumbar loading, which is part of why session duration is such a strong predictor of back pain risk.
Step 4: The Recovery
The recovery is the return to the catch, and it should mirror the drive in reverse, just slower and more controlled. Extend your arms fully first, releasing the handle away from your body. Once your hands have cleared your knees, hinge forward from your hips, keeping your spine straight rather than rounding through the lower back. Only after your torso has hinged forward should your knees bend and the seat glide forward on the rail, bringing you back to the catch position.
This sequence mirrors the eccentric phase of a deadlift: hinge at the hips first, then let the knees bend, rather than folding forward through the lumbar spine and letting the knees drift in early. Rowers who let their knees bend before their hips hinge often end up rounding through the lower back to make room, which repeats a small, invisible bit of lumbar flexion hundreds of times over the course of a workout.
Technique Checklist: What Correct Form Looks Like at Each Phase
Use the table below as a quick self-check during your next session, or record yourself from the side and compare your position at each phase.
| Phase | Spine Position | Key Cue |
|---|---|---|
| Catch | Neutral, hinged forward from the hips | Shins vertical, shoulders just ahead of hips |
| Drive | Neutral, moving through vertical | Legs first, then back, then arms |
| Finish | Neutral, slight lean past vertical | Core braced, shoulders low, exhale |
| Recovery | Neutral, hinging forward from hips | Arms out, then hips hinge, then knees bend |
Common Form Errors That Stress the Spine
Even rowers who understand the four phases in theory tend to drift into a handful of predictable errors once fatigue sets in or the pace picks up. Recognizing these patterns is often the fastest way to fix them.
Watch out for these five lumbar-loading errors:
- Rounding at the catch. Reaching further forward by curling the lower back instead of hinging from the hips, often to chase a longer stroke length.
- Shooting the seat. Letting the legs extend before the torso swings back, which leaves the arms and back to snap the handle in and skips the protective leg-first sequence.
- Over-leaning at the finish. Collapsing backward past a slight lean rather than stopping the swing with braced abdominal and back muscles, often to squeeze out extra stroke length.
- Bending the knees before hinging the hips on the recovery. This forces the lower back to round to make space for the knees, repeating small flexion loads on every stroke.
- Racing the stroke rate late in a session. Rushing the recovery when tired causes rowers to skip the hip hinge entirely and yank the body forward, a pattern closely tied to what researchers call spinal creep, where repeated flexion gradually dulls the protective reflexes in spinal tissue.
If you notice any of these patterns showing up in the back half of a workout, that is usually a signal that your session length has outpaced your current technical endurance, not a signal to push through by gritting your teeth.
Programming Considerations: Volume, Intensity, and Recovery
Technique alone will not fully protect your lower back if your training volume outpaces your body’s ability to recover. Programming decisions matter just as much as stroke mechanics, and the two are closely linked, since fatigue is exactly when form tends to break down.
Session Length
Research has repeatedly flagged prolonged ergometer sessions, especially those lasting longer than about 30 minutes, as a meaningful risk factor for low back pain, independent of stroke rate or resistance setting. If you are newer to rowing, building up session length gradually over several weeks gives your postural muscles time to adapt to holding a hinged position under repeated load. A reasonable starting point for most beginners is three to four sessions per week of 15 to 20 minutes, increasing duration only once form stays consistent through the final two minutes of a workout.
Weekly Volume
Total weekly training volume, not just single-session length, has also been linked to back pain risk in the research literature. Stacking multiple long, high-intensity erg sessions back to back without adequate recovery days compounds cumulative load on the lumbar spine. Spacing harder rowing sessions with at least one rest day, or alternating them with lower-impact activities like walking or mobility work, gives spinal tissues time to recover their normal stiffness and shock-absorbing capacity between sessions.
Intensity and Resistance Setting
The damper setting on most indoor rowing machines controls air resistance, not difficulty in the way many beginners assume. A higher damper setting increases resistance per stroke, which can tempt rowers to rely more heavily on their arms and back to move the handle rather than their legs. Most coaches recommend a moderate damper setting, generally in the range of three to five on a Concept2-style scale, paired with a focus on generating power through the legs. Chasing a harder-feeling pull by cranking the damper up is rarely worth the added lumbar load.
Warm-Up and Trunk Conditioning
A short warm-up of five to ten minutes at low resistance, combined with a few minutes of hip hinge and glute activation drills, primes the exact movement pattern the stroke depends on. Off the machine, building dynamic trunk endurance through exercises like planks, bird dogs, and controlled hip hinges tends to transfer better to rowing than long isometric holds alone, since the stroke itself is a repeated, dynamic movement rather than a static one.
Signs You Should End the Session Early
Even with solid technique and a sensible training plan, it helps to know the warning signs that a session has gone on too long for your current fitness or recovery state. A dull ache that sets in low in the back during the final few minutes of a workout, a sensation of the lower back rounding that you cannot correct with a cue, or a stroke rate that keeps climbing while your split times get slower are all signals that fatigue has outpaced your technical control. None of these signs mean you have caused permanent damage, but they are a reasonable cue to stop, stretch, and finish the workout at a lighter effort rather than grinding through the final minutes on willpower alone.
It is also worth distinguishing between muscular fatigue, which feels like a generalized tiredness across the back and legs, and a sharp or localized pain that stays in one spot. Muscular fatigue is a normal part of training. A sharp, localized pain, especially one that persists after you stop rowing or that radiates into a hip or leg, is a different category of signal and is worth addressing with rest and, if it does not resolve within a week or two, a conversation with a physical therapist.
Putting It All Together
Learning how to use a rowing machine without wrecking your lower back comes down to two connected habits: following the legs-back-arms sequence on the drive and the arms-hips-knees sequence on the recovery, and matching your session length and weekly volume to your current technical endurance rather than your cardiovascular ambition. Neither habit requires special equipment or advanced coaching. It requires paying attention to your position at each phase of the stroke, particularly as fatigue sets in, and being willing to shorten a session rather than let your form fall apart in the last few minutes.
Most cases of rowing-related low back pain are not caused by a single dramatic moment. They build gradually from hundreds of strokes performed with a slightly rounded spine or a rushed recovery. The encouraging part is that the fix is just as gradual and just as accessible: clean up the sequence, respect your volume limits, and give your body the recovery time it needs between sessions.
Frequently Asked Questions
Is a rowing machine bad for your lower back?
A rowing machine is not inherently bad for your lower back. Most reported back pain in rowers is linked to technique breakdown and excessive training volume rather than the machine itself. Rowing with a neutral spine and a legs-first drive sequence keeps the lumbar spine well supported throughout the stroke.
What is the most common technique mistake that causes lower back pain on a rowing machine?
Rounding the lower back at the catch and recovery, rather than hinging from the hips, is one of the most common mistakes. It shows up especially as rowers fatigue and start rushing the stroke, letting the knees bend before the hips hinge on the way back to the catch.
How long should a beginner row on an ergometer before working up to longer sessions?
Most beginners do well starting with sessions of 15 to 20 minutes, three to four times per week, and increasing duration gradually only once their form holds steady through the entire workout. Research has associated single sessions longer than roughly 30 minutes with a higher risk of low back pain.
Should I use a higher damper setting to make my rowing workout harder?
Not necessarily. The damper setting controls air resistance rather than overall workout intensity, and a higher setting can encourage rowers to pull more with their arms and back instead of their legs. A moderate setting, paired with a strong leg drive, is generally recommended over maxing out the damper.
What core exercises help support the lower back for rowing?
Dynamic exercises that mimic the hip hinge pattern used in rowing, such as bird dogs, planks with controlled breathing, and Romanian deadlifts, tend to transfer well. Building trunk endurance through movement rather than relying solely on static holds better prepares the core for the repeated demands of a rowing stroke.
When should I see a professional about lower back pain from rowing?
If pain persists beyond a couple of weeks, radiates down a leg, or is accompanied by numbness or weakness, it is worth having it evaluated by a physical therapist or physician. Most rowing-related back pain that stems from technique issues improves once the stroke sequence and training volume are corrected, but persistent or worsening symptoms deserve a professional assessment.
References
- Concept2. “Indoor Rowing Technique on the Concept2 RowErg.” https://www.concept2.com/training/rowing-technique
- World Rowing. “Back pain in rowing – update on current understanding.” https://www.worldrowing.com/news/back-pain-rowing-update-current-understanding
- International Journal of Sports Physical Therapy. “Examining the Peer-Reviewed Published Literature Regarding Low Back Pain in Rowing: A Scoping Review.” https://ijspt.scholasticahq.com/article/67836-examining-the-peer-reviewed-published-literature-regarding-low-back-pain-in-rowing-a-scoping-review
- The Row House. “6 Steps to Proper Rowing Form & Technique.” https://blog.therowhouse.com/6-steps-to-proper-rowing-form-and-technique