



























By Mateo Rivera
The trail had been easy to follow for the first ninety minutes: a wide dirt path, orange blazes every fifty yards, cell signal flickering between one and two bars. Then the path split at a boulder field, the blazes stopped, and the phone in my pocket read “No Service.” That moment, standing at an unmarked fork with a dying flashlight app and no idea which branch led back to the trailhead, is the moment this guide is written for. Getting turned around on a trail is common, uncomfortable, and almost always avoidable with a handful of physical wayfinding skills that do not depend on a signal bar.
This is not a general “how to start hiking” article. It is a focused, step-by-step walkthrough of the specific skills that keep a hiker, trail runner, or walker oriented when the phone stops being useful: reading physical trail markers, using a paper map and compass or a pre-downloaded offline GPS track, basic dead reckoning, what to do the moment you realize you are lost, and how to plan a trip so that someone knows where to look for you if things go wrong.
Why Signal-Free Navigation Skills Still Matter
It is tempting to treat a phone’s mapping app as a complete substitute for traditional navigation. It is not, for a simple reason: apps depend on a charged battery, a working GPS chip, and often a data connection for map tiles that were not downloaded in advance. Batteries drain faster in cold weather, screens crack, and phones get dropped in creeks. A 2022 study in Scientific Reports that modeled real search and rescue incident data noted that “thousands of people are reported lost in the wilderness in the United States every year,” and that as time passes without a fix on the person’s location, the search area grows and the odds of a fast recovery shrink (Ferguson et al., Scientific Reports, 2022). The same research analyzed 65 documented hiker search cases and found that lost hikers most often kept moving in a general direction (55.9 percent of cases) or tried to stay on a route or trail (37.7 percent), with only a small share wandering at random (5.5 percent). In other words, most people who get lost are not making wild, chaotic decisions. They are making reasonable but under-informed ones, which is exactly what a few navigation fundamentals can fix.
The core idea of this guide: a paper map, a compass, and the ability to read the trail itself will get you back to the trailhead even on a day when every screen in your pack is dead. Digital tools are excellent backups to that skill set, not replacements for it.
Before You Go: The Three Things That Prevent Getting Lost
Most navigation problems on trails are solved before you ever put a boot on the dirt. The American Hiking Society’s guidance on lost hikers frames prevention plainly: bring maps and a compass on every hike, know how to use them, and do not rely on a phone’s GPS as your only backup (American Hiking Society, “Lost Outdoors”). Combine that with a plan someone else knows about, and you have removed most of the risk before you start walking.
Step-by-Step: How to Navigate a Trail Without Phone Signal
Once you are on the trail, wayfinding without a live signal comes down to a repeatable loop: know where you are, confirm it against something physical, and reset your mental clock. Here is that process broken into concrete steps.
Study the map and set a bearing before you start walking
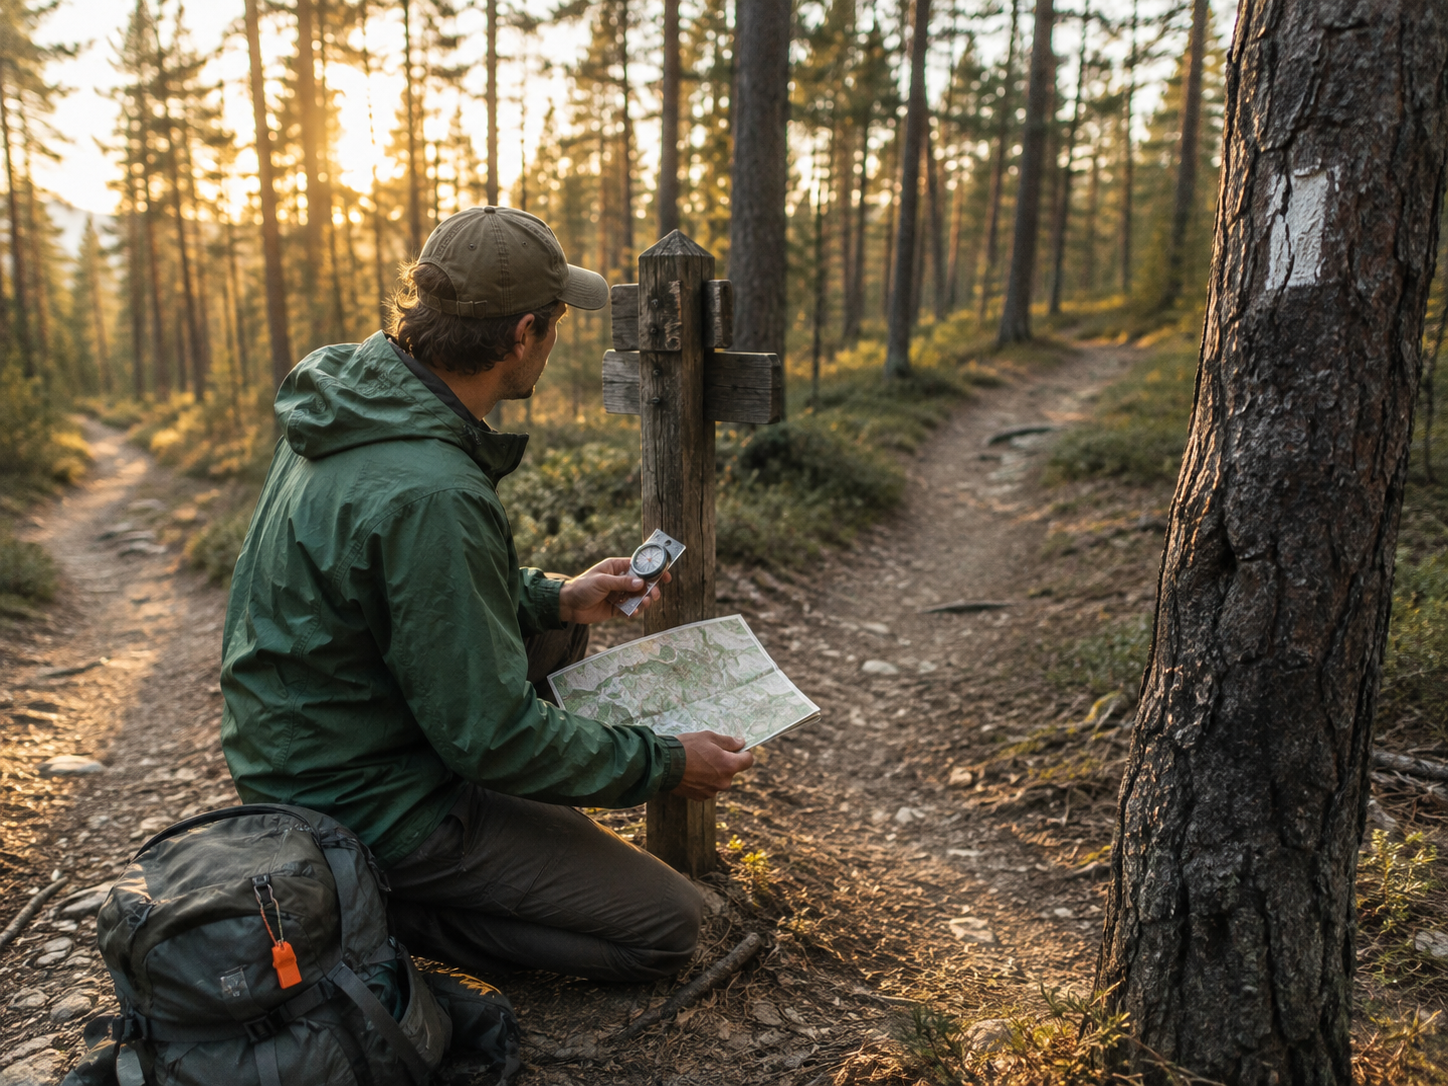
At the trailhead, while you still have both hands and a clear head, unfold the paper map, orient it to north using your compass, and trace the route you plan to take. REI Co-op’s navigation guidance puts it directly: “Regular map readers rarely get lost,” because studying the terrain ahead of time builds a mental picture you can compare against as you walk (REI Co-op Expert Advice, “How to Use a Compass”). Note major landmarks you expect to pass, such as a stream crossing, a ridge, or a trail junction, and roughly when you expect to reach each one.
Identify and follow physical trail markers
Most maintained trails are marked with painted blazes, metal or plastic diamond markers, or stacked-rock cairns above the treeline. On the Appalachian Trail, for example, the official route is marked with “2 inch by 6 inch white painted rectangles” placed at regular intervals, with blue blazes marking side trails to water or shelters (Appalachian Trail Conservancy, “Navigation and Tools”). Learn the marking system for the specific trail network you are on before you start, since colors and shapes vary by region and land manager.
Check your position against the map every fifteen to twenty minutes
Do not wait until you feel lost to look at the map again. Every time the trail crosses a stream, climbs a noticeable hill, or passes a junction, find that same feature on your paper map. This habit, sometimes called “handrailing” a known feature, keeps the gap between where you think you are and where you actually are small enough to correct easily.
Use dead reckoning between known points
Dead reckoning means estimating your position using a known starting point, a compass bearing, your walking pace, and elapsed time, rather than a satellite fix. If you know you started at a junction, are walking on a bearing of roughly 40 degrees, and have been moving at your normal pace for 25 minutes, you can estimate how far along that bearing you have traveled and cross-check it against the map’s contour lines and distance scale. It is not exact, but it narrows your likely location enough to keep you oriented between clear landmarks.
Track your turnaround time, not just your distance
Set a hard clock time by which you turn back, regardless of how close you feel to a destination. Do not treat any printed sign or app estimate as a precise number. A 2025 validation study published in Medicina compared real GPS-recorded hiking times on 25 trails against mountain signage and two popular hiking apps, and found that, on average, signage overestimated actual hiking time by roughly 30 minutes and the two apps tested overestimated by 49 to 69 minutes (Bonato et al., Medicina, 2025). That average cushion sounds reassuring, but the same study found the spread around each estimate was wide, roughly plus or minus an hour, meaning a fair share of individual hikes still took longer than predicted. Set your own turnaround time from your actual pace on similar terrain, not from a single sign or app number.
If you lose the trail, stop immediately and use the STOP method
The instant you notice you have not seen a blaze, marker, or familiar feature in longer than expected, stop walking. Continuing forward “to see if the trail picks back up” is the most common way a small navigation error turns into a real search and rescue situation. Use the STOP framework below before you take another step.
If you cannot self-correct, stay put and signal
If ten to fifteen minutes of calm map-and-terrain review does not resolve your location with reasonable confidence, stop trying to walk your way out. The American Hiking Society’s guidance is direct on this point: once genuinely lost, “stay put. Rescuers will be looking for you where they know you’ve been hiking” (American Hiking Society, “Lost Outdoors”). Begin signaling for help using sound, sight, and, if you carry one, a satellite messenger or personal locator beacon.
The STOP Method: A Decision Framework for the Moment You Realize You’re Lost
S – T – O – P
| Stop | Freeze where you are. Do not keep walking while you figure things out. Every additional step can move you further from the point rescuers would search first. |
| Think | Recall the last landmark, junction, or blaze you clearly remember. Note the time and how long ago that was. Breathe. The American Hiking Society notes that “the worst possible thing you can do upon realizing you are lost is to panic,” since panic makes it harder to think clearly or hear other hikers (“Lost Outdoors”). |
| Observe | Pull out the map and compass. Look for identifiable terrain: a ridgeline, a drainage, a distant peak. Compare it to what the map shows near your last known point. |
| Plan | Decide on one course of action: retrace your exact steps to the last known point, or, if you cannot safely do that, stay put and signal. Do not pick a new, unverified direction and start walking on a guess. |
“Don’t put yourself in more danger by wandering further from a known location.”
— American Hiking Society, “Lost Outdoors”
Reading Trail Markers and Blazes
Trail marking systems are not universal, so the first rule is to check the specific system used on the land you are visiting, usually posted at the trailhead kiosk. That said, some conventions are common across many trail networks in the United States.
If you go more than a few minutes without seeing a marker, that absence is itself information. It usually means you have either drifted off the maintained trail onto a game path or unofficial route, or missed a turn at the last junction. Treat a marker gap as your cue to stop and check the map rather than pushing forward hoping one appears.
Map and Compass Basics Worth Practicing at Home
You do not need a survival course to use a map and compass competently, but you do need to practice before you rely on it. Two concepts matter most for a day hiker: reading contour lines and adjusting for declination.
Contour lines tell you the shape of the land
On a topographic map, contour lines connect points of equal elevation. REI’s guidance explains that “when lines are close together, elevation is changing rapidly in short distance and the terrain is steep,” while widely spaced lines mean gentle slopes (REI Co-op Expert Advice, “How to Read a Topo Map”). Every fifth line is usually bolder and labeled with an elevation, which makes it easier to judge how much climbing or descending lies ahead of you on a given stretch of trail.
Declination changes your bearing
A compass needle points to magnetic north, not true north, and the gap between the two, called declination, varies by location and shifts slowly over time. REI notes that “in the continental U.S., declination can vary from nearly 20 degrees east in places on the West Coast to nearly 20 degrees west in places on the East Coast,” and that a 15-degree error on a mile-long hike can put you roughly a quarter mile off target (REI Co-op Expert Advice, “How to Adjust the Declination on a Compass”). Check the current declination for your hiking area before your trip, either from the map’s margin notes or from NOAA’s published data, and adjust your compass or your math accordingly.
“A 15 degree error, for example, on a mile-long hike puts you a quarter-mile away from your destination.”
— REI Co-op Expert Advice, on compass declination
Taking a bearing: what it looks like in practice
A bearing is simply the direction you want to walk, expressed in degrees measured clockwise from north. Zero degrees is due north, 90 is due east, 180 is due south, and 270 is due west, with everything else falling somewhere in between. The diagram below walks through the idea visually, using a bearing of roughly 35 degrees, a direction between north and northeast, as an example.
How a Compass Bearing Works
The red needle always points to magnetic north (adjusted for declination). Your bearing, roughly 35° in this example, is the clockwise angle between north and the direction-of-travel line pointing at your destination. Walk that heading, picking a landmark along the way, then re-check the needle once you reach it.
Two Practical Scenarios
Scenario 1: Fog rolls in above treeline
You are following cairns along a ridge when fog drops visibility to thirty feet. The next cairn is not visible. Rather than guessing a direction, you stop, take a compass bearing toward the last cairn you can still confirm, and hold that bearing carefully while moving toward it in short, deliberate steps. Once at that cairn, you repeat the process for the next one, cairn to cairn, using the compass to keep a straight line between each rather than drifting with the terrain.
Scenario 2: A trail runner misses a junction
You are running and realize the singletrack under your feet feels narrower and less worn than it should. You have not seen a trail marker in about ten minutes, longer than your usual spacing. You stop, check your watch against your planned pace, and estimate you likely missed a junction roughly eight to ten minutes back. Rather than continuing forward on an unfamiliar path, you retrace your route to the last confirmed junction and look more carefully for the marker you missed.
What Not to Rely On
- A live phone GPS dot with no offline map downloaded. Once you leave cell coverage, most mapping apps stop loading new map tiles even though the blue location dot may still move, leaving you with a location on a blank or partially loaded screen.
- Phone battery as your only power source. Cold weather and screen use accelerate drain, and REI’s navigation guidance is blunt about it: “batteries can die and gadgets can malfunction” (REI Co-op Expert Advice, “How to Use a Compass”).
- Following other hikers’ footprints. Footprints can belong to someone who is also off-route, and they do not tell you where that person was actually trying to go.
- Crowd-sourced app time estimates as a hard schedule. As noted above, published research found meaningful gaps between app-predicted hiking times and real ones.
- Memory alone for a long or unfamiliar route. “I think I remember this turn” is a common last thought before a wrong turn; cross-check memory against the map every time.
Building Navigation Confidence Before You Need It
Wayfinding skills fade if they are only ever tested during an emergency. The most reliable way to make map-and-compass navigation feel natural on a stressful day is to practice it on easy, low-stakes ones. Before your next trip to unfamiliar terrain, spend twenty minutes on a trail you already know well and treat it like a drill: orient your map at the trailhead, take a bearing to a landmark you can already see, and estimate your pace over a known quarter-mile stretch. Comparing your estimate to the actual distance tells you how accurate your personal dead reckoning tends to be, which is far more useful to know in advance than during a fogged-in ridge walk.
It also helps to study the specific marking conventions of the land manager you are visiting. National forest, state park, and national park trail systems do not all use identical blazes, and some multi-use trail networks rely more heavily on numbered junction posts than painted marks. A few minutes reading the trailhead kiosk or the land manager’s trail guide before you start walking often answers questions that would otherwise come up mid-hike, when you have no signal to look them up.
Trail runners face a version of this problem that hikers often do not: covering ground quickly enough that a missed junction can put real distance behind you before it registers. If you run trails regularly, it is worth deliberately slowing to a walk at any junction, unmarked fork, or braided section of trail, confirming the correct path, and only then resuming pace. The few seconds that costs is far cheaper than the extra miles of backtracking a missed turn creates.
Frequently Asked Questions
Do I really need a paper map if I have an offline GPS app?
Yes. An offline app is a strong backup, but a screen can crack, freeze, or run out of battery. A paper map has no battery to lose and lets you see the wider terrain around your route at a glance, which most phone screens compress into a small, hard-to-read area.
What is the single most important habit for not getting lost?
Checking your position against a landmark or marker every fifteen to twenty minutes rather than waiting until something feels wrong. Small position checks catch small mistakes before they compound into a real problem.
Should I keep walking if I think I’m close to finding the trail again?
No. That instinct is exactly how a short delay turns into a long one. Stop, use the STOP method, and confirm your position with the map and compass before moving again. If you cannot confirm it within a short, calm review, stay where you are and signal for help instead of continuing to search on foot.
How do I find the magnetic declination for where I’m hiking?
Many printed topographic maps list the local declination in the margin. If yours does not, the National Oceanic and Atmospheric Administration publishes current declination data by location, which REI’s compass guidance recommends checking since declination shifts gradually over time.
What should I pack specifically for navigation, beyond a phone?
A paper map of the actual area, a baseplate compass, a whistle, and, for longer or more remote trips, a satellite messenger or personal locator beacon. These are grouped as the “navigation” category within the well-known Ten Essentials list used by outdoor educators (REI Co-op Expert Advice, “The Ten Essentials”).
Is dead reckoning accurate enough to rely on completely?
Not on its own. Dead reckoning is an estimate built from pace, time, and bearing, and small errors accumulate the longer you go without checking a physical landmark. Use it between known points, not as a replacement for regularly confirming your position against the map and the terrain.
A Brief Safety Note
Getting disoriented on a trail is common and, with the steps above, usually short-lived. It becomes a genuine emergency when injury, weather, darkness, or exhaustion are added to the mix. If you cannot confirm your location after a calm, methodical review, or if anyone in your group is injured, dehydrated, or showing signs of hypothermia or heat illness, stop trying to self-navigate out. Stay in place, signal with your whistle, mirror, or bright clothing, and use a satellite messenger or personal locator beacon if you carry one. If you have cell signal at any point, even briefly, call 911 or the appropriate local emergency or park ranger line and share your last known confirmed location. This article covers wayfinding skills, not wilderness first aid or medical decision-making, so treat any medical concern as a reason to prioritize rescue over continued route-finding.
References and Sources
- American Hiking Society, “Lost Outdoors” — americanhiking.org/resources/lost-outdoors
- Appalachian Trail Conservancy, “Navigation and Tools” — appalachiantrail.org, Essential Skills: Navigation and Tools
- REI Co-op Expert Advice, “How to Use a Compass” — rei.com/learn/expert-advice/navigation-basics.html
- REI Co-op Expert Advice, “How to Adjust the Declination on a Compass” — rei.com/learn/expert-advice/compass-declination.html
- REI Co-op Expert Advice, “How to Read a Topo Map” — rei.com/learn/expert-advice/topo-maps-how-to-use.html
- REI Co-op Expert Advice, “The Ten Essentials” — rei.com/learn/expert-advice/ten-essentials.html
- Ferguson, C. et al., “An agent-based model reveals lost person behavior based on data from wilderness search and rescue,” Scientific Reports, 2022 — DOI: 10.1038/s41598-022-09502-4
- Bonato, M. et al., “Are Suggested Hiking Times Accurate? A Validation of Hiking Time Estimations for Preventive Measures in Mountains,” Medicina, 2025 — DOI: 10.3390/medicina61010115