




























By Olivia Bennett
The first time the water closes over your shoulders somewhere that isn’t a chlorinated rectangle with lane ropes, everything feels different. There’s no black line to follow, no wall to push off, and the person a few feet away is a stranger, not a lifeguard on a raised chair. Open water swimming, whether in a lake, a reservoir, or the sea, is one of the most rewarding ways to move your body outdoors, and it’s also an activity where a handful of specific, learnable habits separate a great morning swim from a genuine emergency.
This guide is built for pool swimmers making that first move outdoors. It focuses on the safety practices that matter most in the first weeks and months: how your body reacts to cold water, what gear actually earns its place in your kit bag, how to read currents, and when the safest swim is the one you don’t take. None of this is meant to make open water sound frightening. It’s meant to make it something you can do with a clear head, good preparation, and a plan.
What Makes Open Water Different From the Pool
A 25-metre pool is a controlled environment: the temperature is steady, the water is clear, the depth is known, a lifeguard is watching, and if something goes wrong you are never more than a few strokes from the side. Lakes, rivers, and coastal water remove nearly all of those guarantees at once. Temperature can swing several degrees between the surface and a few feet down. Visibility might be measured in inches. There may be no lifeguard, no marked lane, and no wall.
None of that means open water is unsafe by nature. It means the swimmer has to take on jobs the pool used to do automatically: watching the weather, judging the current, choosing an entry and exit point, and knowing their own limits before getting in. The rest of this guide walks through each of those jobs in the order a beginner is likely to meet them, starting with the single biggest hazard for anyone new to cold, open water.
Cold Water Shock: What It Is and Why It Matters Most
Cold water shock is the body’s involuntary reaction to sudden immersion in cold water, and it is the leading reason healthy swimmers get into trouble in the first minute of a swim, long before exhaustion or distance is a factor. According to the U.S. National Weather Service, gasping and rapid, uncontrollable breathing can begin the moment cold water touches the skin and can last two to three minutes or longer, and this involuntary gasp reflex is dangerous precisely because it can cause a swimmer to inhale water even in calm conditions. At the same time, heart rate and blood pressure spike sharply, which the National Weather Service notes can raise the risk of a cardiac event or stroke in people who are vulnerable, and clear thinking becomes harder in the first moments of immersion.
Muscle control degrades on a slightly slower timeline but just as seriously. Within seconds to a few minutes of cold immersion, grip strength, finger dexterity, and the coordinated arm and leg movement a swim stroke depends on all begin to fail, which is why self-rescue without a flotation aid becomes progressively harder the longer someone stays in cold water. This is sometimes summarised as “swim failure,” and it is a separate, later stage from the initial gasp response.
Cardiac Caution
Cold water immersion produces a real, measurable cardiac stress response, including rapid heart rate and blood pressure changes. Recent field research using extended heart rhythm monitoring during open water cold immersion has documented arrhythmia events in some swimmers during the entry phase, and pediatric research has similarly linked the cold shock response to changes in heart rhythm. If you have a history of heart disease, arrhythmia, high blood pressure, or any cardiac condition, or if you are simply unsure of your cardiovascular health, speak with a doctor before you try cold open water immersion. This is not a step to skip because you feel fit; the cardiac response to cold shock is involuntary and does not check your training log first.
The Practical Takeaway
Cold water shock is not something willpower solves in the moment. It is managed beforehand, through slow entry, breath control, and acclimatisation over repeated swims, which is the subject of the next section.
“I just ease myself in gently, toes first, knees, hands, just everything really slowly.” — Louise Minchin, on entering cold open water, via RNLI beginner swimming guidance
Acclimatisation: Building Cold-Water Tolerance Safely
Acclimatisation is the gradual process of getting your body used to cold water over repeated, controlled exposures, and it is the single most effective long-term defence against cold water shock. The Outdoor Swimming Society, whose guidance is widely referenced across the UK open water community, recommends swimming in cold water regularly, ideally once a week and preferably two to three times a week, and gradually extending time in the water rather than jumping straight to long swims. Their guidance also notes it is far easier to begin an open water habit while the water is still relatively mild, around 16 degrees Celsius or warmer, and then continue swimming as the seasons cool, than it is to start cold water swimming for the first time once temperatures have already dropped.
Entry technique matters as much as frequency. RNLI beginner guidance is consistent on this point: walk in slowly, never jump or dive, and splash water on your neck, chest, and forehead before you commit your whole body, since this pre-exposes the areas most responsible for triggering the gasp reflex. Keep your breathing controlled as you go, and resist the urge to hold your breath, since breath-holding paired with the shock of cold water is a poor combination.
A Sample Acclimatisation Progression
There’s no single official timetable every swimmer must follow, since fitness, prior cold exposure, and local water temperature all vary. The table below is a reasonable, conservative starting framework for a beginner moving from pool swimming into cold open water across a season, built around the principle of gradual, repeated exposure rather than a fixed number of weeks.
| Stage | Water Feel | Typical Time In Water | Focus |
|---|---|---|---|
| Stage 1: First exposures | Mild, around 16°C or above where possible | A few minutes, entry and short float only | Slow entry, breath control, staying near the shore |
| Stage 2: Building familiarity | Mild to cool | Short, easy swims close to shore | Steady breathing while swimming, sighting practice, buddy present |
| Stage 3: Regular seasonal swims | Gradually cooling with the season | Gradually extending, guided by comfort, not the clock | Consistency (weekly or more), monitoring for numbness or shivering |
| Stage 4: Cold-season swimming | Below roughly 10°C | Short, deliberately brief dips | Neoprene gloves, socks, and hat; fast, warm change afterward; never swimming alone |
Two things stay constant at every stage. First, get out while you still feel in control, not after you’ve started to shiver hard or fumble with your hands, since both are signs your body is already working to compensate. Second, plan your warm-up before you get in: dry layers, a hot drink, and warm gloves waiting on the shore matter as much as anything you do in the water.
Essential Safety Gear: Tow Floats, Visibility, and Wetsuits
The Tow Float
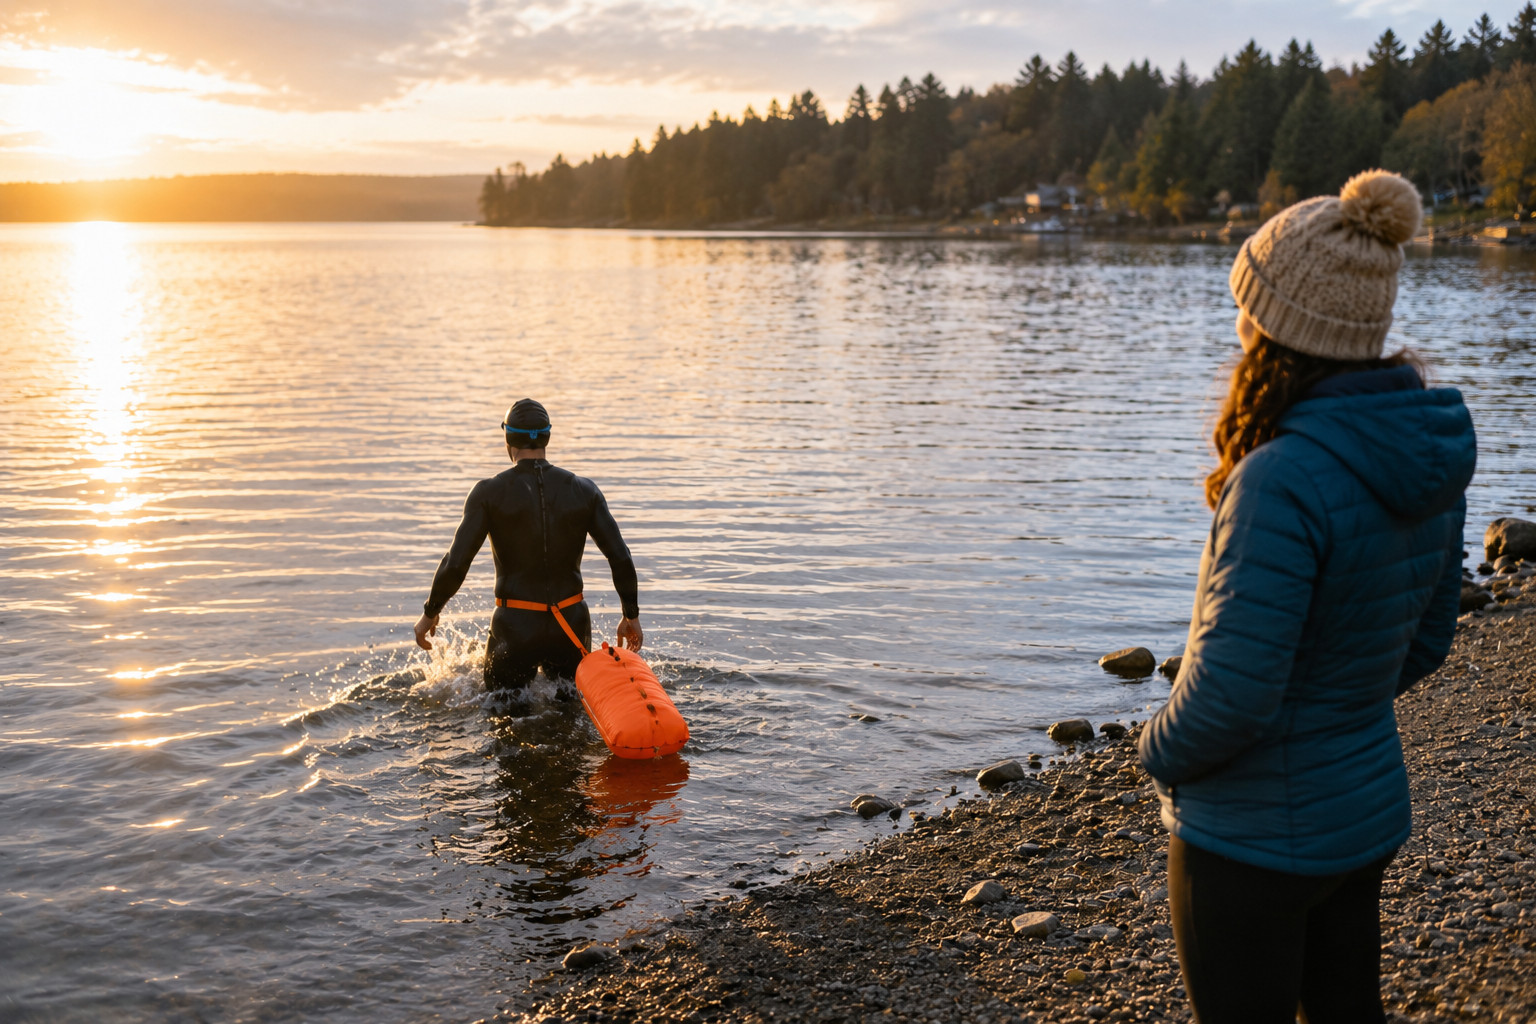
A tow float is a small, brightly coloured inflatable buoy that attaches to a waist belt and trails behind you as you swim. It serves three separate purposes at once: it gives you something to rest on or hold if you get tired or cramp up, it makes you dramatically easier to spot from shore, a boat, or a rescue craft, and many models include a dry pouch for a phone, whistle, or car key. RNLI beginner guidance lists a fluorescent tow float alongside a brightly coloured swim cap as two of the most important, low-cost pieces of open water kit a new swimmer can own.
Visibility Gear
A brightly coloured swim cap, in pink, orange, or yellow rather than black or navy, does one simple job: it makes your head visible against grey or reflective water to anyone on shore, in a boat, or paddling nearby. Pair it with a tow float and, in low light or open coastal water, consider a waterproof light clipped to your float. None of this gear prevents an emergency by itself, but it dramatically shortens the time it takes for help to find you if one happens.
Wetsuit Basics
A wetsuit is not just about comfort. RNLI guidance is direct that a wetsuit should be worn for sea or open water swimming because it both retains body heat and adds buoyancy, which reduces the effort needed to stay afloat and can extend how long you can safely stay in the water. A well-fitting swim-specific wetsuit (rather than a surfing wetsuit, which is cut differently and restricts shoulder movement) is worth the investment once you’re swimming outdoors more than occasionally.
Wetsuits aren’t universally the right call in every condition. The Outdoor Swimming Society notes that in very cold water, some swimmers find they generate more chill getting in and out of a wetsuit than they save by wearing one, and prefer a fast change routine with warm layers ready instead. As a beginner, the safer default is to wear one, especially for your first season, and revisit that choice as you gain experience and understand your own cold tolerance.
Quick Gear Checklist for a Beginner’s Kit Bag
- Swim-specific wetsuit (season and water-temperature dependent)
- Bright swim cap (pink, orange, or yellow)
- Tow float with a dry pouch
- Whistle, either attached to the tow float or your costume
- Phone in a waterproof pouch, or left with your buddy on shore
- Warm, dry layers, a hat, gloves, and a hot drink for after
Sighting: Finding Your Way Without Lane Lines
Without a black line on the pool floor, staying on course in open water is a skill in its own right, usually called sighting. The technique itself is simple: pick a fixed, easy-to-spot landmark ahead of you, such as a buoy, a tree, or a building on the shore, and every few strokes, lift your eyes just above the surface for a fraction of a second to check you’re still heading toward it, then put your face back down and continue your stroke. U.S. Masters Swimming coaching guidance recommends adjusting how often you sight based on conditions: in choppy water or where currents may be pulling you off course, sight more frequently than you would in a still, calm lake.
A few habits make sighting easier to learn. Practise it in a pool first, lifting your eyes to a fixed point at the end of the lane every six to ten strokes so the motion becomes automatic before you need it outdoors. Choose a landmark that will still be visible at swimmer’s-eye level, which is much lower than it looks from the shore, tall, fixed features work far better than something small or low. And build in a habit of glancing sideways or briefly checking your position relative to the shoreline itself, not just your target landmark, since that’s your fastest read on whether a current is pulling you sideways.
Currents and Rip Currents: Swimming Parallel to Shore
Currents are one of the least visible hazards in open water, and rip currents specifically are a leading cause of ocean rescue call-outs. According to NOAA, rip currents are channelled flows of water moving away from shore, typically 15 to 90 metres wide, that can be hard to spot but sometimes show up as a visible gap in the breaking waves, a channel of choppier or discoloured water, or a line of foam or seaweed steadily moving out to sea. NOAA also notes rip currents are responsible for roughly 100 drowning deaths and around 30,000 rescues in the United States each year, which makes recognising and responding to one a core beginner safety skill, not an advanced one.
The guidance from every major water safety body is consistent on what to do if you’re caught in a rip current: do not swim directly against it back toward shore. Instead, stay calm, stay afloat, and swim parallel to the shoreline until you feel the pull of the current ease, then angle back in toward the beach. NOAA’s core advice is blunt and worth memorising word for word: stay afloat, signal for help, and swim parallel to the shore rather than exhausting yourself fighting the current directly. If you can stand, RNLI guidance adds a useful clarification: wade rather than swim, since walking is far less tiring than swimming against moving water.
The same “swim parallel” principle applies more broadly in lakes and rivers with any noticeable current or tidal pull. RNLI advice for open water swimmers generally recommends staying close to the shore and swimming parallel to it during a normal swim, rather than heading straight out, which makes it far easier to notice early if you’re being carried off your intended line and to get back to shallow water quickly if needed.
“Stay afloat, yell for help, swim parallel to the shore. Do not exhaust yourself fighting the current.” — NOAA guidance on escaping a rip current
Buddy Systems and Choosing Supervised Venues
Swimming with another person is not a nice-to-have for open water; it is repeatedly named by safety organisations as one of the single most effective protections a beginner has. RNLI guidance recommends always swimming with someone else and avoiding solo open water swims, and Olympic swimmer Alice Dearing puts the same idea more simply in RNLI’s beginner materials: get a buddy and swim as part of a group, since it is both safer and more enjoyable. U.S. Masters Swimming coaching guidance goes further, pointing out that a lifeguard cannot substitute for a dedicated swim buddy, since a lifeguard’s attention is spread across every person at the venue, not focused on you.
A genuine buddy system means more than being in the water at the same time as someone else. Before you get in, agree on a route, a turnaround point, and roughly how long you expect to be swimming. If you’re swimming somewhere with mobile signal, tell a third person on shore, or a friend or family member not swimming that day, your exact location and expected return time, and check in with them once you’re out.
Choosing a Venue
For your first season, a lifeguarded, designated open water swim venue is the safest choice by a wide margin. These sites typically mark safe swim areas, monitor water quality, post current water temperature, and have trained staff watching the water. Where lifeguards are present at a beach, both RNLI and CDC guidance recommend swimming within the flagged or marked area specifically because it has been assessed for hazards that day. Unsupervised wild swim spots can absolutely be swum safely, but that judgment is better made once you’ve built experience, ideally alongside or under the guidance of more experienced open water swimmers, rather than on your very first few outings.
When Not to Swim: Reading the Warning Signs
Part of becoming a safe open water swimmer is getting comfortable calling off a swim. Every safety organisation referenced in this guide treats this as a core skill, not a failure of nerve.
Do Not Swim If:
- Thunder or lightning is present or forecast nearby. U.S. Masters Swimming guidance is explicit: if you hear thunder before or during a swim, get out of the water and to a safe location immediately.
- Visibility is poor due to fog, dusk, or algae bloom, and you cannot see hazards, boat traffic, or your buddy clearly.
- Strong wind, large waves, or a red-flag or closed-beach warning is posted at a lifeguarded venue.
- You have a fever, an open wound, an active ear or sinus infection, or you’re feeling unusually fatigued or unwell.
- You have a cardiac condition, arrhythmia, or uncontrolled high blood pressure and have not first discussed cold water immersion with a doctor.
- You’ve been drinking alcohol; CDC guidance names alcohol use as a direct contributor to drowning risk around any body of water.
- You don’t know the venue’s currents, tides, entry and exit points, or you’re swimming somewhere with no phone signal and nobody knows where you are.
None of these are permanent bans on swimming. A choppy, thundery morning simply means try again tomorrow, or head to a sheltered venue instead. The habit worth building is treating “not today” as a completely normal, responsible outcome, the same way a runner might skip a session on an icy pavement.
Your Pre-Swim Safety Checklist
Before every open water swim, especially in your first season, run through a short check. It takes under two minutes and it catches most of the mistakes that lead to a bad outcome.
Pre-Swim Checklist
- ☐ Checked the weather and water conditions for today, not yesterday
- ☐ Told someone my location and expected return time
- ☐ Swimming with a buddy, or at a staffed, lifeguarded venue
- ☐ Wearing a bright swim cap and a tow float
- ☐ Wetsuit on if water temperature calls for it
- ☐ Phone in a waterproof pouch, or safely with my buddy on shore
- ☐ Identified my entry and exit points before getting in
- ☐ Planned a slow entry: no jumping, no diving, breathing under control
- ☐ Dry, warm layers and a hot drink ready for when I get out
- ☐ Feeling well today, with no fever, infection, or unusual fatigue
Putting It Together for Your First Season
Most of what separates a confident open water swimmer from a nervous one isn’t raw fitness, it’s repetition of a small set of habits until they become automatic: entering slowly, sighting a landmark every few strokes, keeping a buddy or lifeguard in view, and knowing your exit point before your entry point. Start at a lifeguarded lake or a calm, sheltered stretch of coastline with mild water, ideally with someone who already swims outdoors. Keep your first sessions short. Wear the cap, the float, and, in most cases, the wetsuit. Build your minutes gradually, the way the acclimatisation table above suggests, rather than matching a plan built for someone with years of cold exposure behind them.
The pull of open water, the light on the surface, the quiet away from a crowded pool, is real, and it’s worth protecting. Good preparation is what lets you keep coming back to it season after season instead of learning its risks the hard way.
Frequently Asked Questions
Do I need a wetsuit for my first open water swim?
In most conditions, yes, especially for a beginner. RNLI guidance recommends wearing a wetsuit for sea and open water swimming because it retains body heat and adds buoyancy, both of which make a first swim considerably safer and more comfortable. As you gain experience and understand your own cold tolerance, you may choose to swim without one in milder water.
How cold is too cold for a beginner to swim in?
There’s no single universal cutoff, but the Outdoor Swimming Society suggests it is far easier to start an open water habit when water is around 16°C or warmer, then continue as temperatures drop with the season, rather than beginning cold water swimming for the first time once it’s already very cold. Below roughly 10°C, expect numbness and pain in the extremities, and consider neoprene gloves, socks, and a swim hat.
What should I do if I get caught in a rip current?
Stay calm, stay afloat, and do not swim directly against the current back toward shore. NOAA guidance is to swim parallel to the shoreline until the pull weakens, then angle back in; if you can stand, wade rather than swim, since it takes far less energy.
Is it safe to swim in open water alone?
Safety organisations, including the RNLI and U.S. Masters Swimming, consistently advise against swimming alone in open water. A buddy, or a lifeguarded venue with someone on shore who knows your plan and return time, is one of the most effective protections available to any open water swimmer, beginner or experienced.
What is cold water shock, and how long does it last?
Cold water shock is the body’s involuntary response to sudden cold immersion, involving gasping, rapid breathing, and a spike in heart rate and blood pressure. The U.S. National Weather Service notes the intense gasping and rapid breathing phase typically occurs in the first two to three minutes of immersion, while muscle control and strength can continue declining over a longer period, which is why a slow entry and staying near your exit point during those first minutes matters so much.
Do I need to tell someone before I go for a swim?
Yes. RNLI guidance recommends telling someone your exact location and expected return time before every open water swim, in addition to swimming with a buddy where possible. This single habit is what allows help to be sent to the right place quickly if something does go wrong.
References
- RNLI. “RNLI’s top beginners tips for open water swimming.” rnli.org
- RNLI. “Open Water Swimming Safety Advice and Tips.” rnli.org
- U.S. Masters Swimming. “Safety Tips for Open Water Swimming.” usms.org
- National Weather Service. “Cold Water Hazards and Safety.” weather.gov
- NOAA National Environmental Satellite, Data, and Information Service. “How Do I Escape Rip Currents?” nesdis.noaa.gov
- Outdoor Swimming Society. “How to Acclimatise to Cold Water.” outdoorswimmingsociety.com
- Centers for Disease Control and Prevention. “Drowning Prevention.” cdc.gov
- Merkt B, Craviari C, Baggish AL, Namdar M, Meyer P. “Cardiac arrhythmia during cold-water immersion: a self-controlled field study with extended rhythm monitoring.” Journal of Exercise Science and Fitness, 2026. DOI: 10.1016/j.jesf.2026.200479
- Peter S, Michaelis A, Wagner R, et al. “Mechanisms of drowning in children: influence of cold shock response on repolarization patterns and arrhythmia burden in healthy children.” Frontiers in Sports and Active Living, 2026. DOI: 10.3389/fspor.2026.1809042