


























Outdoor & Nature-Based Movement Series
By Olivia Bennett
By the time a park path turns silver with frost, most of us have already made a decision about the season without quite realizing it: either the workout moves indoors until spring, or it adapts. This piece is written for the second group. It closes out a series about training in the outdoors across every kind of terrain and weather, and it ends where a lot of winter training plans quietly stall out: not on the treadmill and not in the parking lot, but on the two or three feet of ground between your front door and whatever trail, sidewalk, or park loop you were planning to use.
Traction is the part of winter exercise that rarely gets its own conversation. Layering gets covered constantly. Cold-air breathing gets covered constantly. But the actual physics of a foot meeting a frozen surface (what kind of surface it is, what’s under your shoe, and how your body should move across it) tend to get a single throwaway sentence: “wear good shoes and be careful.” That sentence is not enough to keep someone upright on a glazed sidewalk at 6 a.m., and it is not enough to help someone choose between a $30 pair of ice cleats and a $70 set of mountaineering crampons for a walk around the block.
This article is the deliberately narrow, practical answer: how to choose a traction device, how to read the surface you’re about to step on, how to adjust your gait when the ground stops cooperating, and how to decide, without guilt, that today’s session belongs indoors.
A note on scope. This is the eighteenth and final article in our outdoor training series. If you’re looking for layering strategy, breathing in cold air, and pacing adjustments for winter running, that’s covered in our cold-weather running guide. If you want a broader look at uneven terrain, roots, rocks, and trail hazards in general, that’s covered separately too. This piece stays focused on one specific problem: ice and snow underfoot, and what to put on your feet in response.
Why Traction Deserves Its Own Decision
Ice is not one surface. That’s the single idea this entire article is built around. A frozen puddle, a stretch of packed snow that’s been walked over by fifty people, a skim of glare ice on a bridge deck, and a slushy crosswalk all behave differently under a shoe, and none of them respond to the same fix. Choosing “a traction device” without asking which of these you’re actually walking on is a little like choosing “a jacket” without checking the temperature.
The Centers for Disease Control and Prevention puts it bluntly in its winter storm guidance: walking on ice is extremely dangerous, and the agency’s practical advice for reducing the risk centers on treating walkways with salt or sand and avoiding ice-covered ground altogether when you can. That’s sound advice for a driveway. It’s less useful for someone whose training plan calls for six miles outdoors in January, because avoiding ice entirely often isn’t realistic once you leave the sidewalk directly in front of your house. That’s where equipment and technique take over from avoidance.
The Traction Device Family
There are four broad categories worth knowing, and they are not interchangeable. Mixing them up, bringing mountaineering crampons to a jog around a park loop or trusting a pair of thin ice cleats on a steep, icy incline, is a common and avoidable mistake.
| Device | Typical Build | Best For | Limitations |
|---|---|---|---|
| Microspikes | Stretch-rubber harness with roughly 3/8-inch steel spikes in a chain pattern | Packed snow and ice on established trails, sidewalks, and moderate inclines | Struggles in deep, soft, or unconsolidated snow; not built for steep or technical terrain |
| Crampons (hiking-style) | Rigid or semi-rigid frame with longer spikes, roughly 3/4 to 1 inch, often with a heel piece | Steep, icy, or untracked terrain; early-season snow without a packed-down path | Heavier, slower to put on and take off, generally overkill for flat neighborhood routes |
| Winter running shoes (built-in lugs) | Aggressive rubber outsole lugs, sometimes with an ice-specific rubber compound | Light snow, slush, cold-but-clear pavement, and mixed wet-dry surfaces | Rubber lugs alone don’t reliably bite into hard glare ice the way metal spikes do |
| Strap-on ice cleats | Coiled wire or small stud grid stretched over the shoe sole | Short walks, commuting, dog walks, and casual outings on sidewalks and driveways | Lighter-duty than microspikes; manufacturers generally note they’re not meant for gravel, bare concrete, or indoor floors |
Microspikes
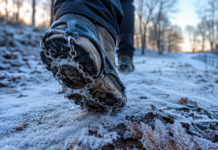
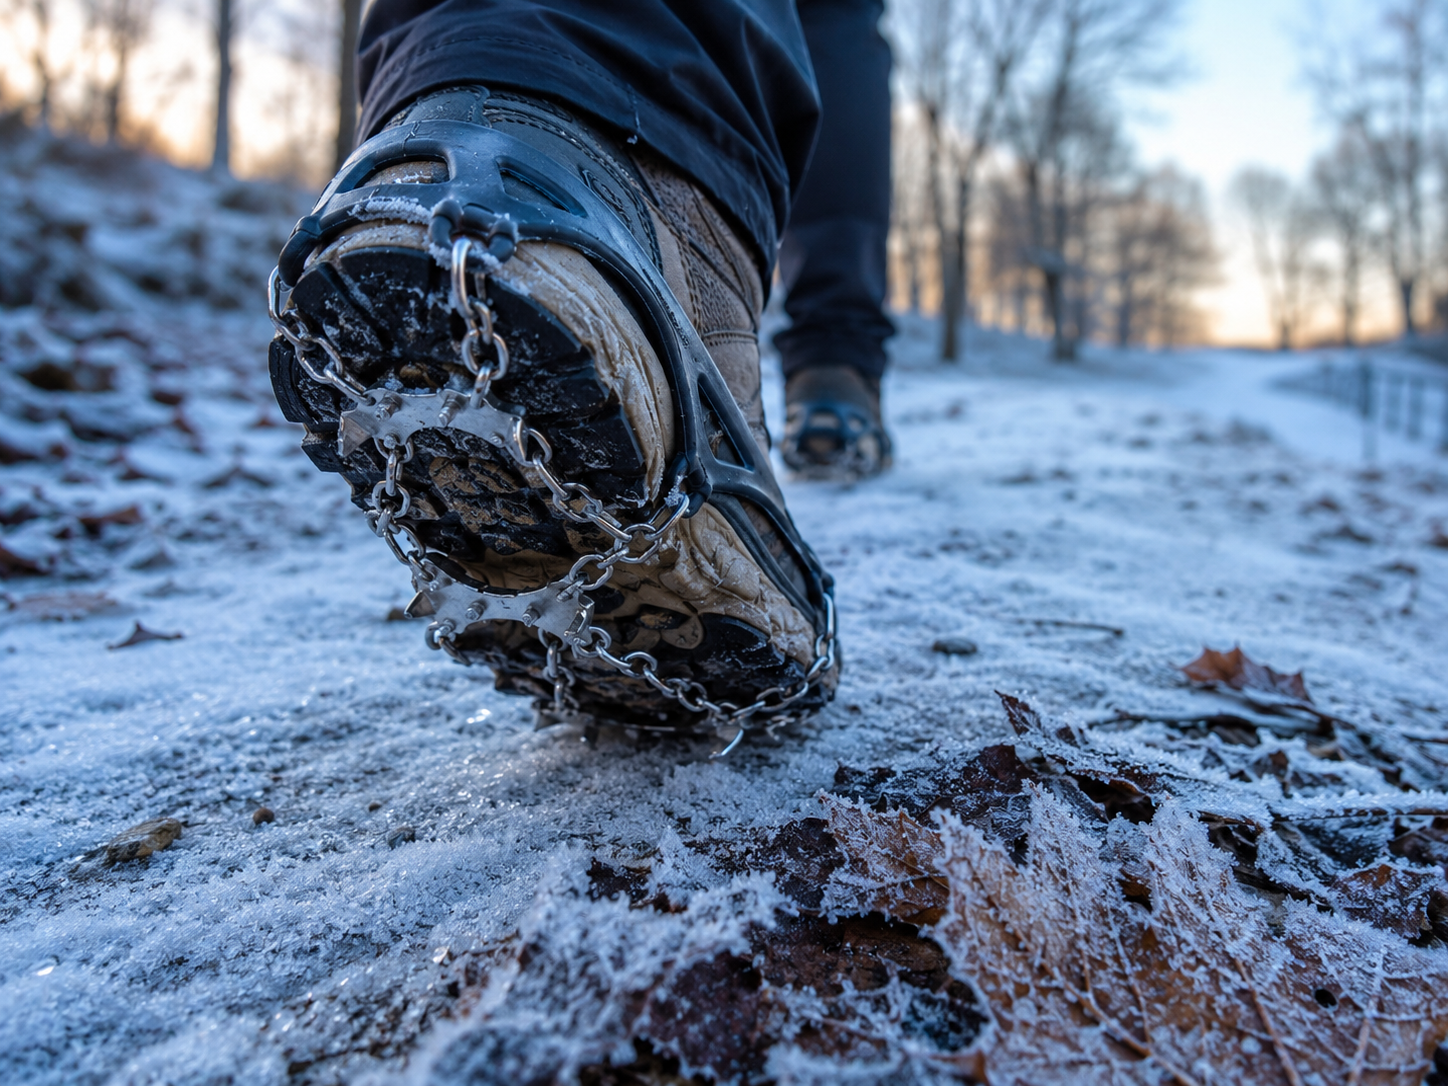
Microspikes are the workhorse for most outdoor exercisers dealing with winter conditions. They’re built around a rubber harness that stretches over a running or hiking shoe, with a chain of short steel spikes on the bottom. According to product specifications compiled in a widely referenced buyer’s guide comparing Kahtoola’s MICROspikes to the brand’s crampon lines, microspikes typically carry spikes around three-eighths of an inch, tuned for ice and consolidated, walked-on snow rather than deep or loose powder. That length is short enough to jog in comfortably and long enough to bite through the glaze on a packed trail or an icy sidewalk. If your winter training route is mostly flat or gently rolling and mostly on ground other people have already walked or driven over, microspikes are very likely the right first purchase.
Crampons
Hiking crampons step the spike length up considerably (often three-quarters of an inch to a full inch, per the same technical comparison) and add a more rigid frame, sometimes with a dedicated heel piece for extra security on steep ground. That extra length matters when you’re dealing with early-season snow that hasn’t been packed down, or a slope steep enough that a slip has real consequences. It’s also the reason crampons are the wrong tool for a routine neighborhood run: the added weight, stiffness, and time it takes to strap them on don’t pay off on flat, already-packed ground, and the longer spikes can catch awkwardly if you’re moving at a running gait rather than a hiking pace.
Winter running shoes with built-in lugs
A newer category worth knowing about is footwear designed from the outsole up for cold, wet, and lightly icy conditions, without needing an add-on device at all. Several running shoe lines use rubber compounds engineered specifically to grip ice: Vibram’s Arctic Grip technology, for instance, combines an ice-specific rubber compound with deeper multidirectional lugs, and the brand describes it as built for “excellent grip and traction on wet ice surfaces” across running, hiking, and everyday winter wear. Shoes like this are a reasonable choice if your winter routes are usually just cold and damp rather than reliably sheeted in ice, think slush, wet pavement, and the occasional icy patch, rather than a consistently frozen trail. They won’t outperform metal spikes on hard glare ice, but they’re far less hassle for routes where ice is only an occasional problem.
Strap-on ice cleats
The lightest-duty option in this lineup is the coiled-wire or small-stud cleat, the kind most people picture when they hear “ice grippers,” sold under brand names like Yaktrax. These are designed for short, low-intensity outings: walking to the car, a slow dog walk, standing and working outside. Manufacturer guidance for this category is specific about where these devices belong and where they don’t. Yaktrax’s own published safety information notes that its traction devices are “not for use on gravel, concrete, or sanded roads cleared of snow,” aren’t designed for indoor use, and require a minimum body weight of roughly 70 to 75 pounds to engage properly, which is also why the company doesn’t make versions sized for young children. Treat that kind of guidance as a genuine limitation rather than fine print: a cleat rated for slow walking on ice is not the same product as a microspike rated for a run on a packed trail, even when they look similar in a product photo.
Brand mentions in this article (Kahtoola, Yaktrax, Vibram) describe manufacturer specifications and published safety guidance for illustration only. They are not endorsements, and equivalent products from other brands may serve the same purpose.
Reading the Surface Before You Decide
Choosing a device is only half the equation. The other half is being honest about what’s actually under your feet, since the same 30-minute route can shift between three or four surface types in a single outing: dry pavement near your door, packed snow on a park path, and a sheet of black ice where a gutter has been draining and refreezing all week.
Surface-Reading Quick Guide
- Black ice. A thin, often nearly invisible glaze that forms when moisture freezes on a surface that still looks dark and wet. It’s most common at dawn, in shaded spots, on bridges and overpasses, and anywhere water has been draining and refreezing repeatedly. Treat any patch of pavement that looks “wet” when the air temperature is below freezing as suspect until proven otherwise.
- Packed snow. Snow that’s been walked, run, or driven over enough times to compress into a firmer, more predictable surface. It usually offers more grip than raw ice but less than dry pavement, and it can hide icy patches underneath a thin fresh layer.
- Fresh or loose snow. Unconsolidated powder that hasn’t been compacted. It can be forgiving to run through at low depths, but it also hides what’s underneath (ice, uneven pavement, curbs), and deeper coverage changes your gait mechanics regardless of traction device.
- Slush. Partially melted snow or ice, often at transition temperatures near freezing. It’s typically less slick than solid ice but soaks through shoes quickly and can conceal a harder icy layer directly underneath.
- Glare ice. A visibly shiny, hard, uniform ice surface, often from refreezing after a partial thaw. This is the surface where metal-spike traction devices earn their keep; rubber lugs alone tend to skate across it.
A practical habit worth building: scan the next 10 to 15 feet of ground as you move, not just the spot directly under your feet. Shaded areas, north-facing slopes, spots near downspouts, and anywhere pavement looks glossy rather than matte deserve a second look before you commit your full stride to them.
“The most dangerous ice is the ice you don’t see coming — the thin, dark patch that still looks like wet pavement.”
Matching Device to Surface
Put the two ideas together, the device table and the surface guide, and the decision gets much simpler. For an average winter workout on sidewalks and park paths that alternate between packed snow and the occasional icy patch, microspikes cover the widest range of conditions with the least hassle. For a slow neighborhood walk on mostly-clear ground with a few icy spots near curbs and driveways, lighter strap-on cleats are proportionate and easier to keep by the door. For a steep, untracked, early-season trail, step up to crampons rather than asking microspikes to do a job they weren’t built for. And for routes that are mostly cold and wet rather than reliably icy, a winter-specific running shoe with an ice-oriented rubber compound may mean you don’t need an add-on device most days at all. It’s still worth keeping a lighter backup traction device in your bag for the days it turns out you needed one anyway.
One detail that trips people up: traction devices change how a shoe feels underfoot, and that takes a short adjustment period. Spend a few minutes walking on a driveway or a short flat stretch the first time you use a new device before taking it onto a real route, especially before running in it.
Gait Adjustments for Ice
Even the right device benefits from a different way of moving. Physical therapists commonly describe this as walking “like a penguin,” and the mechanics behind that image are worth taking seriously rather than treating as a cute metaphor. According to guidance from a physical therapist at Avera Health, the technique centers on a few specific adjustments: pointing your toes very slightly outward, taking smaller steps than usual, keeping your feet flatter on the ground rather than striking heel-first, keeping your head upright instead of leaning forward, and keeping your hands out of your pockets so you can catch your balance if you need to.
Gait Checklist for Icy Ground
- Shorten your stride and slow your pace, since a shorter step keeps your center of gravity closer to your base of support.
- Land flatter-footed rather than striking hard on your heel; this spreads contact across more of the shoe’s surface.
- Keep your weight centered over your feet rather than leaning forward, which is a common instinct that actually increases slip risk.
- Keep your hands free instead of in pockets, so you can react quickly if a foot slides.
- Slow down noticeably when moving from a dry surface onto a wet or icy one, and again at curbs, ramps, and stairs.
- Favor salted, sanded, or well-trodden paths over cutting a new line across untouched snow or ice.
These adjustments matter with or without a traction device on your shoe, and they matter more on the days you’re wearing one, since a spike or cleat can still slip if your weight is thrown too far forward or your stride is too long and fast for the ground you’re covering.
When to Move the Workout Indoors Entirely
No traction device fixes every condition, and part of good judgment is recognizing the days when the honest answer is to train indoors. A few situations where that’s usually the right call:
- Freezing rain or an active ice storm. Ice forming in real time coats every surface evenly, including ones a traction device can’t grip reliably, and it keeps forming while you’re out there.
- Low light plus icy conditions together. Being able to see and read the surface ahead of you is part of how traction devices and gait adjustments work in the first place; take that away and the risk goes up regardless of what’s on your feet.
- A route with no safe alternative to a steep, icy stretch. If getting to safer ground requires crossing the most dangerous part of your route first, that’s a sign to change the plan rather than push through it.
- You’re already fatigued, rushed, or distracted. Reaction time and balance both suffer under fatigue, which is exactly the margin you need most on slick ground.
- A personal history of falls or a health condition affecting balance. This is the moment to be more conservative, not less, and to lean on indoor options without treating it as a setback.
None of this means winter training has to shrink down to nothing. It means keeping an indoor backup plan (a set of stairs, a treadmill, bodyweight circuits, a gym session) ready to substitute in without guilt, the same way you’d substitute a workout for a scheduling conflict.
A Practical Note on Fall Risk, Especially for Older Adults
This section is meant to inform, not alarm. Falls are common enough, and consequential enough, that they’re worth naming directly rather than gesturing at vaguely. The CDC reports that more than one in four older adults falls each year, that falling once roughly doubles the likelihood of falling again, and that about one in ten falls results in an injury serious enough to limit daily activity for a day or more. Falls are also the leading cause of hip fractures and a leading cause of traumatic brain injury in this age group, according to the same CDC data summary. Separately, the U.S. Consumer Product Safety Commission’s injury figures cited by the American Academy of Orthopaedic Surgeons show winter activity injuries running into the hundreds of thousands annually across ice skating, sledding, and snow sports combined — a reminder that icy-condition injuries aren’t a niche concern even outside the specific fall statistics for older adults.
None of that is a reason to avoid winter movement. It’s a reason to be specific about precautions if you or someone you’re training with is at higher risk: choose a device rated for the actual surface you’ll cover, favor cleared and salted paths, go out with a companion or phone on the more exposed days, keep pace and stride conservative rather than habitual, and treat “I’ll just be extra careful” as a starting point rather than a full plan. If balance, vision, or a recent fall is already a known concern, a conversation with a physical therapist or physician about winter-specific precautions is a reasonable and proactive step, not an overreaction.
Caring for Your Traction Gear
Traction devices are inexpensive relative to the fall they can help prevent, but they do wear out and lose effectiveness in ways that are easy to miss. A few habits worth building into your routine:
- Rinse off road salt and grit after use, since salt corrodes metal spikes over a season faster than plain water and cold ever will.
- Let devices air dry fully before storing them; packing them away wet encourages rust on spikes and degrades rubber harnesses.
- Check spike length and harness elasticity at the start of each winter; a stretched-out harness that no longer sits snugly is more likely to shift or come off mid-stride.
- Retire cleats or microspikes once spikes are visibly worn down or the harness has lost its grip on the shoe; a loose device is arguably worse than no device, since it can shift underfoot unpredictably.
Bringing the Series to a Close
Across this outdoor training series, the throughline has been the same: the outdoors is worth training in, and training in it well means paying attention to the specific conditions in front of you rather than applying one generic approach to every trail, temperature, and season. Traction is the last piece of that puzzle for a reason — it’s the point where the ground itself becomes the variable you have to plan around, not just the weather or the terrain’s shape. Get the device right for the surface, adjust how you move across it, and know when the smarter workout is the one you do indoors. That’s a fitting place to end a series about moving well outside, in every condition the outdoors actually offers.
Frequently Asked Questions
Can I run in microspikes, or are they only for walking?
Most microspikes are designed to handle a running gait on packed snow and ice, and many trail and road runners use them through the winter. Give yourself a short adjustment period on a flat, familiar stretch before taking them onto a full route, since the added grip and slight bulk under your shoe change your feel for the ground.
Do I need crampons for a normal neighborhood run, or is that overkill?
For most flat or gently sloped routes on packed snow and ice, crampons are more than you need. They’re built for steep, untracked, or technical terrain. Microspikes or strap-on cleats are usually the better fit for everyday routes, and they’re lighter and faster to put on.
How do I tell if a patch of pavement is black ice before I step on it?
Look for pavement that appears glossy, dark, or “wet” when the air temperature is at or below freezing — that visual mismatch is the main clue, since black ice is thin and translucent rather than opaque white. Shaded areas, bridges, overpasses, and spots near drainage points are the most common locations, so treat those areas with extra caution regardless of how the rest of your route looks.
Are winter running shoes with built-in traction enough on their own, or do I still need a separate device?
It depends on how consistently icy your routes are. Shoes with ice-oriented rubber compounds handle cold, wet, and lightly icy conditions well without an add-on. On days with hard glare ice or steeper icy sections, a separate metal-spike device generally outperforms rubber lugs alone, so it’s worth keeping one in reserve even if you don’t need it most days.
Is it safe for older adults to keep exercising outdoors in winter at all?
For many older adults, yes, with proportionate precautions — a properly fitted traction device suited to the actual surface, a shorter and more deliberate stride, cleared or salted paths where possible, and a companion or phone on the more exposed days. If there’s a recent fall history or a known balance concern, it’s reasonable to talk with a physical therapist or physician about winter-specific adjustments before making major changes to an outdoor routine.
What’s the single most common mistake people make with winter traction devices?
Mismatching the device to the surface — bringing lightweight strap-on cleats to a steep, icy, untracked trail, or assuming rubber-lugged shoes alone will hold on hard glare ice. The device families in this article are built for different conditions, and checking the surface first is what makes the equipment choice make sense.
References
- Centers for Disease Control and Prevention. Safety Guidelines: During and After a Winter Storm.
- Centers for Disease Control and Prevention. Facts About Falls.
- American Academy of Orthopaedic Surgeons, OrthoInfo. Winter Sports Injury Prevention.
- Skurka, Andrew. Buyer’s Guide: Kahtoola MICROspikes vs. K-10 and KTS Crampons. Kahtoola product specifications, cited for illustration only, not an endorsement.
- Yaktrax. Frequently Asked Questions. Manufacturer safety guidance, cited for illustration only, not an endorsement.
- Vibram. Arctic Grip All Terrain Technology. Manufacturer technology description, cited for illustration only, not an endorsement.
- Avera Health. Walk Like a Penguin and Other Tips to Avoid Winter Slips.