


























Fitness / Training Guides
How to Train for a Multi-Day Trek: A Complete 8 to 12 Week Plan
By Noah Sato
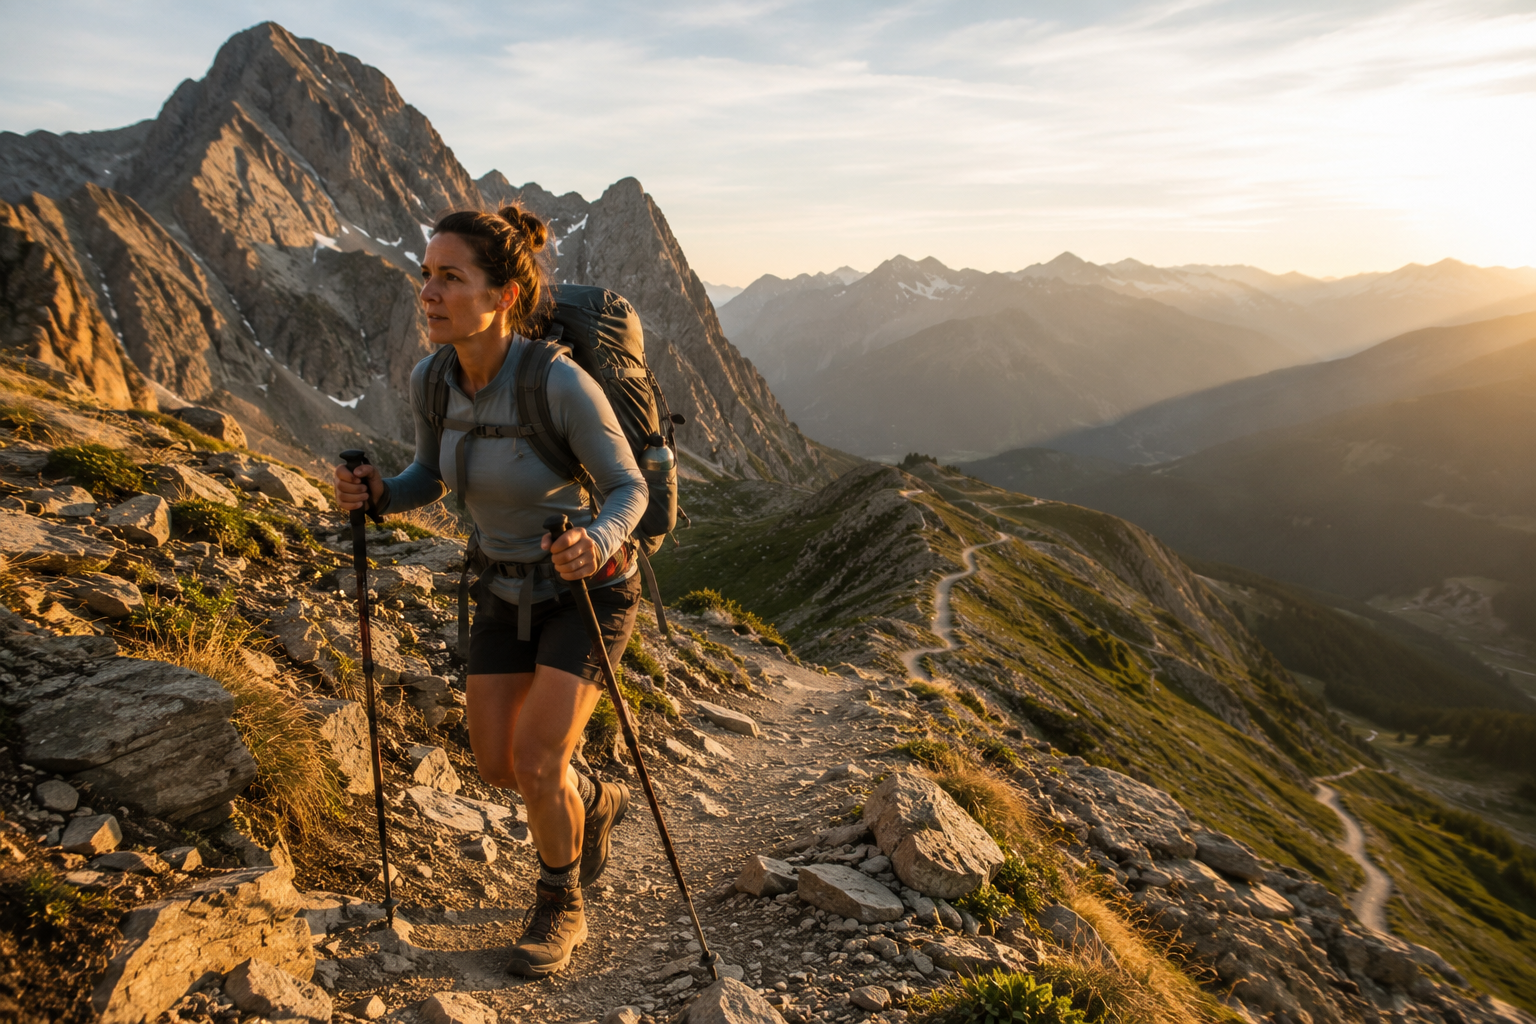
A single-day hike and a multi-day trek ask different things of your body. On a day hike, you walk hard for a few hours and then you get to rest, eat a real dinner, and sleep in your own bed. On a trek across the Camino de Santiago, the Inca Trail, or the Tour du Mont Blanc, you wake up already tired, put the same pack back on, and do it again, for a week, ten days, or longer. The training that gets you ready for that kind of cumulative demand looks different from general hiking fitness, and closing that gap is what this guide is built to do.
A quick note before you start: this plan is written for generally healthy adults preparing for a demanding multi-day trek. If you have a joint condition, a cardiac condition, high blood pressure, or an injury that flares with sustained load-bearing exercise, talk with a doctor before starting a loaded-pack training program or committing to a trek with repeated long days and significant elevation gain. This article is educational and is not a substitute for personalized medical advice.
Why Multi-Day Treks Need Their Own Training Plan
If you already have a base of hiking fitness, you can comfortably knock out a half-day hike on local trails, and you have broken in a decent pair of boots, you are not starting from zero. But that base is not the same as being ready to carry a loaded pack for six, eight, or ten consecutive days, often with thousands of feet of cumulative elevation gain and loss. A shorter guided walking holiday with lighter daily mileage and luggage transfers between hotels asks much less of your legs and joints than a self-supported, back-to-back multi-day itinerary. This guide focuses specifically on the endurance progression a bigger trek demands: building weekly mileage and vertical gain over time, training with a loaded pack, practicing consecutive long days on tired legs, strengthening the muscles that protect your knees on descents, and dialing in the footwear and fueling strategy that keeps you moving on day seven, not just day one.
None of this requires elite athleticism. It requires consistency, a sensible progression, and enough lead time. A minimum of about 8 weeks of structured preparation is workable for a moderate trek, while 16 to 24 weeks is considered optimal for more demanding routes with sustained elevation gain, according to Uphill Athlete’s trekking training guide (see References). If your trip is 10 weeks away, you still have a meaningful window to work with; if it is 16 weeks away, you have room to build a deeper aerobic base before the harder weeks begin.
“Start with 10 pounds or so, then add a few more pounds each week until you get to about 80% of your anticipated pack weight.” — REI Expert Advice, “Conditioning for Backpacking and Hiking”
The Four Pillars of Multi-Day Trek Training
Every effective trek-prep plan is really built from four overlapping pieces of work. You do not train them one at a time in isolation; they layer on top of each other over the course of your plan.
1. Progressive mileage and vertical gain
Your weekend hikes get longer and gain more elevation, week over week, so your cardiovascular system and connective tissue adapt gradually instead of being shocked by trek-day mileage on day one of the actual trip.
2. Loaded pack conditioning
Carrying weight changes your gait, your balance, and the load on your hips, knees, and lower back. That has to be trained specifically; walking fitness without a pack does not fully transfer to walking fitness with 25 to 35 pounds on your back.
3. Back-to-back long days
This is the piece that separates multi-day trek training from single-day hike training. Your legs need to learn what it feels like to start a long day already fatigued from the day before. A Saturday hike followed by a fresh, well-rested Sunday hike does not replicate that.
4. Eccentric strength for descents
Downhill walking loads your quadriceps eccentrically: the muscle lengthens under tension as it controls your descent, and this is a major source of the deep, lingering soreness that can wreck the back half of a trek if you are not prepared for it. Targeted strength work changes that.
The rest of this guide walks through how to build all four of these into a structured weekly plan, step by step.
Step-by-Step: Building Your Training Plan
Step 1: Assess your starting point and your trip’s real demands
Before you build a single week of training, get honest about two things: your current fitness, and what your specific trek actually requires. A Camino de Santiago itinerary with luggage transfer and roughly 12 to 15 miles a day on mostly gentle terrain is a very different physical task than a self-supported Tour du Mont Blanc circuit with a full pack and repeated 3,000-foot climbs, or an Inca Trail itinerary with sustained high-altitude stone stairs. Look up your trip’s typical daily mileage, daily elevation gain and loss, number of consecutive trekking days without a rest day, and expected pack weight. Those four numbers are what your training plan needs to be built around.
Step 2: Build your aerobic base first
For roughly the first third of your plan, the priority is simply frequent, easy-to-moderate cardio: brisk walking, hiking local trails, cycling, or stair climbing, several times a week. Uphill Athlete’s trekking guidance recommends training six days a week during this phase, split as four aerobic sessions, two strength sessions, and one full rest day, with weekly training volume starting around 5 to 8 hours and building toward 10 to 12-plus hours a week for more demanding treks. You do not need to hit those upper numbers if your trip is more moderate, but the structure, frequent aerobic work, two dedicated strength days, and one true rest day, is a solid template regardless of trip difficulty.
Step 3: Add pack weight gradually, not all at once
Once you have a couple of weeks of consistent walking under you, start adding weight to your pack on training hikes. This should be a slow build. REI’s conditioning guidance suggests starting light and adding a few pounds each week until you reach about 80 percent of your anticipated trip pack weight, using that 80 percent load for your final training hikes before departure. CleverHiker’s training guidance frames it slightly differently but points the same direction: start around 25 percent of your total intended pack weight and build up to at least 75 percent by the weeks closest to your trip. The common thread from both sources is the same: never jump straight to full trip weight, and never let final training loads exceed roughly 75 to 80 percent of what you will actually carry.
Step 4: Introduce back-to-back long days
This is the step people skip most often, and it is arguably the most trek-specific piece of the whole plan. Somewhere around the midpoint of your training block, start scheduling two long, loaded hikes on consecutive days, Saturday and Sunday, for example, instead of one long hike followed by a rest day. The point is not distance for its own sake; it is teaching your legs, feet, and mind what it feels like to shoulder the pack again on tired legs. If your trek involves five or more consecutive trekking days, try to build toward at least one stretch of three consecutive loaded hiking days in the final third of your plan, even if each individual day is shorter than your longest single training hike.
Step 5: Train the eccentric strength that protects your knees on descents
Twice a week, alongside your cardio, add strength work that specifically targets the lowering, controlled phase of leg movement: step-downs off a curb or low step, slow eccentric squats (a slow four-to-five count on the way down), reverse lunges, and calf raises with a slow lowering phase. Research on downhill-walking-induced muscle damage, published in PLOS One, found that a short bout of gentle downhill walking performed in the two weeks before a demanding downhill effort produced a meaningful protective effect: participants who did a brief preconditioning downhill walk showed roughly 47 percent less strength loss, 47 percent lower creatine kinase (a marker of muscle damage), and 66 percent less soreness after a strenuous 40-minute downhill walking test compared with participants who had not preconditioned that way (Nosaka et al., PLOS One, 2017, DOI 10.1371/journal.pone.0173909, see References). In plain terms: a little bit of downhill and eccentric-focused practice ahead of time meaningfully blunts how wrecked your legs feel after the real downhill days on trek.
Step 6: Break in your footwear and build a blister-prevention habit
Your footwear and sock system needs to be fully broken in and trek-tested well before departure, not just worn a few times around the house. Wear your trekking boots or shoes on every loaded training hike from the point you start adding pack weight. See the checklist further down this guide for the specific habits that reduce blister risk on multi-day efforts.
Step 7: Rehearse your on-trail nutrition and hydration
Do not wait until trip day to find out what food and fluid strategy works for you over many consecutive hours of effort. Use your longer training hikes to test snacks, meal timing, and fluid intake under real conditions.
Step 8: Taper in the final one to two weeks
Reduce training volume in the last week or two before departure while keeping some light intensity in your legs. Uphill Athlete’s guidance suggests trimming to about two lighter strength sessions at roughly half your usual load during the taper, and REI’s advice is even simpler: rest for a few days, or even a full week, immediately before your trip. Your legs do not get fitter in the final 72 hours before departure; they get fresher, and that is what you want walking onto the first day of your trek.
A 10-Week Progressive Training Plan
The table below lays out a representative 10-week structure. If your trip is closer, you can compress this toward 8 weeks by tightening the base-building phase; if you have more lead time, extend the base phase to fill a 12-week or longer window before layering in the same progression toward the end. Pack weight percentages are relative to your actual anticipated trip pack weight.
| Week | Phase | Weekday Training | Weekend Long Hike | Pack Weight |
|---|---|---|---|---|
| 1 | Base | 3x 30-40 min brisk walk or cardio, 2x bodyweight strength | 60-90 min, easy terrain | Empty or about 10% target |
| 2 | Base | 3x cardio (add gentle hills), 2x strength | 90 min, rolling terrain | About 15% target |
| 3 | Build | 4x cardio, 2x strength (step-ups, lunges) | 2-2.5 hrs, some elevation | About 25% target |
| 4 | Recovery | Volume cut about 50%, easy cardio only | 60-75 min, easy | About 20% target |
| 5 | Build | 4x cardio, 2x strength (add step-downs, eccentric work) | 3 hrs, moderate elevation | About 35-40% target |
| 6 | Build | 4x cardio, 2x strength | Back-to-back: Sat + Sun, 2.5-3 hrs each | About 50% target |
| 7 | Peak | 4x cardio, 2x strength | 3.5-4 hrs, significant elevation | About 60-65% target |
| 8 | Peak | 4x cardio, 2x strength | Back-to-back: 2-3 consecutive loaded hikes | About 70% target |
| 9 | Peak | 3x cardio, 2x strength | Longest single hike of the plan | About 75-80% target |
| 10 | Taper | 2x light strength at about 50% load, easy walking | One easy, short loaded walk, then rest 2-3 days before departure | About 40-50% target |
Table structure adapted from published trek-training guidance: recovery-week and taper structure from Uphill Athlete; pack-weight progression from REI Expert Advice and CleverHiker (full citations in References).
Loaded Pack Weight: How Much, How Fast
Pack Weight Progression Guide
- Weeks 1-2: Train mostly unloaded or with a light 5-10 pound daypack to establish walking rhythm and break in footwear.
- Weeks 3-5: Build to roughly 25-40 percent of your anticipated trip pack weight.
- Weeks 6-8: Build to roughly 50-70 percent of your anticipated trip pack weight, and start layering in back-to-back long days at this load.
- Week 9 (peak): Cap training load at about 75-80 percent of your true trip pack weight. Both REI and CleverHiker’s guidance converge here: train up to roughly three-quarters to four-fifths of your real load, not the full amount, on a regular basis.
- Final taper week: Drop back to a lighter load (40-50 percent) for a short shakeout walk, then rest.
Safety ceiling: regardless of your trip’s target pack weight, avoid regularly training with a load heavier than about 20 percent of your own body weight, per general trekking-conditioning guidance. If your trip genuinely requires carrying more than that, prioritize gear weight reduction over trying to train your body into carrying an excessive load.
Footwear and Blister Prevention
Blisters are one of the few things that can turn a well-trained hiker’s trek into a miserable one, and they are almost entirely preventable with the right habits built during training, not improvised on trip day.
Blister Prevention Checklist
- ☐ Break in footwear gradually. Wear new boots or trail shoes for short periods first, then progressively longer loaded hikes, well ahead of trip day, per Cleveland Clinic guidance on blister prevention (see References).
- ☐ Choose moisture-wicking socks with smooth, low-profile seams. Synthetic or wool-blend socks that hold their shape and pull moisture away from skin outperform cotton, which stays wet and increases friction.
- ☐ Pack a spare pair of socks and change into dry ones if your feet get damp mid-hike or mid-trek.
- ☐ Confirm your fit is not too loose or too tight. Feet can change size over time and even swell slightly on long trekking days, so get fitted close to your trip if your boots are more than a couple of years old.
- ☐ Use a drying agent on sweat-prone feet the night before a long hike; aluminum chloride, cornstarch, or a talc-free foot powder can reduce excess moisture.
- ☐ Treat hot spots the moment you feel them, not after they turn into a blister. Stop, apply a bit of petroleum jelly or a friction-reducing bandage, and keep moving.
- ☐ Carry a small blister kit on every long training hike so treating hot spots becomes second nature before trip day.
Fueling and Hydration for Multi-Day Effort
Multi-day trekking asks your body to refuel and rehydrate well enough, day after day, that you show up for the next morning still capable of a full day’s effort. That is a different job than fueling a single afternoon hike.
Hydration
A general starting point from registered dietitian guidance cited by the American Heart Association is to plan on roughly half a liter of fluid per hour of hiking in cool to moderate conditions, and closer to a full liter per hour in hot conditions or during more strenuous effort (American Heart Association, 2026, see References). You do not necessarily need a specialized electrolyte product; a salty snack such as pretzels can help replace sodium lost through sweat on long days, though an electrolyte mix is a reasonable option if it encourages you to drink more consistently.
Fueling on the trail
Practical, trail-tested food choices highlighted in the same guidance include whole-grain tortillas, quick-cooking oats, and unsweetened dried fruit for carbohydrates, alongside tuna pouches, jerky, and roasted edamame or chickpeas for protein. Fresh fruit like bananas, oranges, or apples packs both quick and slower-digesting carbohydrates in a trail-friendly form. The specific foods matter less than the habit: eat consistently through the day in small amounts rather than skipping food until you feel hungry, since on multi-day efforts, running your energy tank near empty on day two makes day three noticeably harder.
Use your longest training hikes, and especially your back-to-back training weekends, to rehearse this. Bring the actual snacks you plan to carry on trek, drink on the schedule you plan to use, and notice how your body responds the next morning. That feedback is exactly what you want before you are three days into a remote trek with no easy way to adjust.
Training your fueling strategy matters as much as training your legs. A trek you are ready for on paper can still fall apart on day four if your eating and drinking habits were never tested under real, sustained effort.
Common Mistakes to Avoid
- Jumping straight to full pack weight. A sudden heavy load increases strain on hips, knees, and the lower back before your body has adapted. Build up gradually as outlined above.
- Skipping back-to-back training days entirely. Single long hikes followed by full rest do not teach your legs what consecutive trekking days feel like.
- Buying new boots two weeks before departure. Footwear needs real break-in time on loaded training hikes, not a few short test walks.
- Only training on flat ground. If your trek has real elevation gain and loss, your training hikes need it too, especially the downhill sections.
- Training hard right up until departure day. A taper in the final week protects the fitness you have already built rather than adding meaningfully to it.
Frequently Asked Questions
How many weeks do I actually need to train for a multi-day trek?
Eight weeks is a workable minimum for a moderate multi-day trek if you already have some hiking fitness, but 16 to 24 weeks is considered optimal for more demanding routes with significant elevation gain, according to trekking-specific training guidance from Uphill Athlete. If you are starting from a lower fitness base or your trip involves consistently steep, high-mileage days, lean toward the longer end of that range.
How heavy should my pack be during training hikes?
Build gradually from a light load toward roughly 75 to 80 percent of the weight you expect to carry on the actual trek, per REI and CleverHiker’s conditioning guidance. Save your true full pack weight for the trip itself rather than carrying it repeatedly in training, and avoid training loads heavier than about 20 percent of your own body weight as a general ceiling.
Do I really need to train back-to-back long days?
If your trek involves multiple consecutive trekking days, yes. This is the piece of training that most closely mimics the actual cumulative fatigue of a multi-day itinerary, and it is easy to skip because it is more logistically demanding than a single weekend hike. Even two consecutive moderate hikes teach your body something a single long hike cannot.
What is the best way to prepare my legs for steep descents?
Add eccentric-focused strength work, such as slow step-downs, controlled squats, and reverse lunges, twice a week, and include real downhill sections in your training hikes whenever possible. Research on downhill-walking-induced muscle damage found that even brief, gentle downhill walking practice ahead of time meaningfully reduced strength loss, muscle damage markers, and soreness after a harder downhill effort.
Is this plan different for the Camino de Santiago versus the Inca Trail or Tour du Mont Blanc?
The core training structure is the same, but the emphasis shifts. A Camino itinerary with luggage transfer and gentler terrain leans more on mileage endurance and footwear comfort than heavy pack conditioning. An Inca Trail or Tour du Mont Blanc trip, with sustained climbing, descending, and a heavier self-carried pack, leans harder on the loaded-pack progression and eccentric strength work described above. Adjust the pack-weight targets and elevation focus in this plan to match your specific trip’s daily mileage and elevation profile.
What if I miss a week of training?
One missed week will not undo weeks of consistent progress. Resume at roughly the same pack weight and mileage you were at before the gap, rather than trying to jump back to where the calendar says you “should” be. If you missed more than two weeks, back off your pack weight and mileage slightly for a week before returning to the planned progression.
The Bottom Line
Training for a multi-day trek is less about any single hard workout and more about the accumulation of consistent, progressively loaded miles over several weeks, paired with strength work that specifically protects your knees on descents and a fueling strategy you have already tested. Give yourself an honest timeline based on your trip’s real demands, build your pack weight gradually, do not skip the back-to-back long days, and taper before you go. Do that, and the version of you who steps onto the trail on day one will still feel strong on the final day, which is the entire point.
References
- REI Co-op. “Conditioning for Backpacking and Hiking.” REI Expert Advice. https://www.rei.com/learn/expert-advice/conditioning-backpacking.html
- Uphill Athlete. “Training for Trekking and Hiking.” https://uphillathlete.com/trekking/training-for-trekking-and-hiking/
- CleverHiker. “How to Train for Hiking and Backpacking Trips.” https://www.cleverhiker.com/backpacking/how-to-train-for-a-backpacking-trip/
- Cleveland Clinic. “5 Ways to Avoid Blisters (and the Best Ways to Treat Them).” https://health.clevelandclinic.org/5-ways-to-avoid-blisters-and-the-best-ways-treat-them
- Nosaka K, et al. “Prevention of downhill walking-induced muscle damage by non-damaging downhill walking.” PLOS One, 2017. DOI: 10.1371/journal.pone.0173909
- American Heart Association. “How to Fuel Your Outdoor Adventures with Healthy Foods and Smart Hydration on the Trail.” 2026. https://www.heart.org/en/news/2026/03/25/how-to-fuel-your-outdoor-adventures-with-healthy-foods-and-smart-hydration-on-the-trail