


























By Sophie Taylor
You finish a set, glance at the number on the app, and feel a small flicker of pride: twelve reps, up from ten last week. But if you played back a video of that set, would it show twelve clean, controlled repetitions, or eight good ones followed by four that a coach would wave off the moment they saw them?
That gap between the number on paper and what actually happened under the bar is where most avoidable training plateaus and joint aches live. Rep counting is easy to track and satisfying to watch climb. Form is harder to see from the inside, because you’re the one doing the lifting, breathing hard, and trusting a mirror that only shows one angle for a fraction of a second. The fix isn’t more willpower or a vague reminder to “focus on form.” It’s turning your phone into an outside observer, then reviewing that footage with a specific checklist instead of a vague glance.
This guide walks through why rep quality matters more than rep count for most training goals, what actually degrades first when a set goes long, how to set up a phone to capture useful footage without turning your workout into a film shoot, and how to review that footage like a coach would — joint by joint, rep by rep.
Why Counting Reps Without Watching Them Is a Trap
Rep count is a proxy, not a goal. It stands in for the thing you actually care about, whether that’s building muscle, getting stronger, or training safely enough to keep doing this for years. When the proxy and the target drift apart, tracking the proxy starts working against you.
Consider two lifters doing a set of goblet squats for ten reps. Lifter A hits full depth every rep, keeps her ribcage stacked over her pelvis, and controls the descent for about two seconds each time. Lifter B also does ten reps, but by rep six his heels are lifting, his lower back is rounding at the bottom, and the last three reps are really just partial squats with a bounce out of the hole. Both logs say “10 reps.” Only one of those sets is doing what the program intended.
This isn’t a niche problem. Research on resistance-trained squatters has shown that even experienced lifters change their movement pattern as a set gets harder — velocity slows, and the body recruits compensatory strategies to finish the rep any way it can. A study using bar-velocity tracking found a strong inverse relationship between how slowly the bar moved and how hard lifters rated the set (r = -0.88 in experienced squatters, r = -0.77 in novices), which is a technical way of confirming something every lifter has felt: the last few reps of a hard set look and feel completely different from the first few (Zourdos et al., Journal of Strength and Conditioning Research, 2016).
The practical upshot: a rep count tells you volume was completed. It says nothing about whether the tissue that was supposed to do the work actually did it, or whether a joint absorbed load it wasn’t built to take on that rep.
“The last two or three reps of a set are where technique is most likely to fail, and they’re also the reps doing the most to signal your body to adapt. Losing form there doesn’t just risk injury — it can quietly change which muscles and joints are absorbing the work.”
What “Rep Quality” Actually Means
Rep quality isn’t a mood or a vibe. It’s a short list of observable, checkable things that stay consistent from the first rep to the last one in a set:
- Range of motion: the joint travels through the same distance on rep one and rep ten, not a shortened version by the end.
- Tempo and control: the eccentric (lowering) phase isn’t collapsing into a drop, and there’s no bounce or momentum doing work the muscle should be doing.
- Joint alignment: knees, hips, spine, and shoulders track in the plane they’re supposed to, rather than caving, hyperextending, or twisting to find a shortcut.
- Breathing and bracing: the trunk stays braced through the hardest part of the rep instead of the lifter holding their breath so long they go light-headed, or losing all tension and letting the spine round under load.
- Bar or load path: for barbell and dumbbell work, the load travels in a straight, efficient line rather than swinging forward, drifting, or requiring a heave to get moving.
None of these require a coach standing next to you to catch, once you know what you’re looking for on video. That’s the whole premise of a self-audit: you don’t need to be able to fix everything you see immediately, you just need to be able to see it accurately.
Setting Up Your Phone So the Footage Is Actually Useful
Bad camera setup ruins more form checks than bad lifting does. A shaky, badly angled, or badly lit video will hide exactly the details you’re trying to catch. A few minutes of setup fixes most of this permanently.
Camera Height and Angle
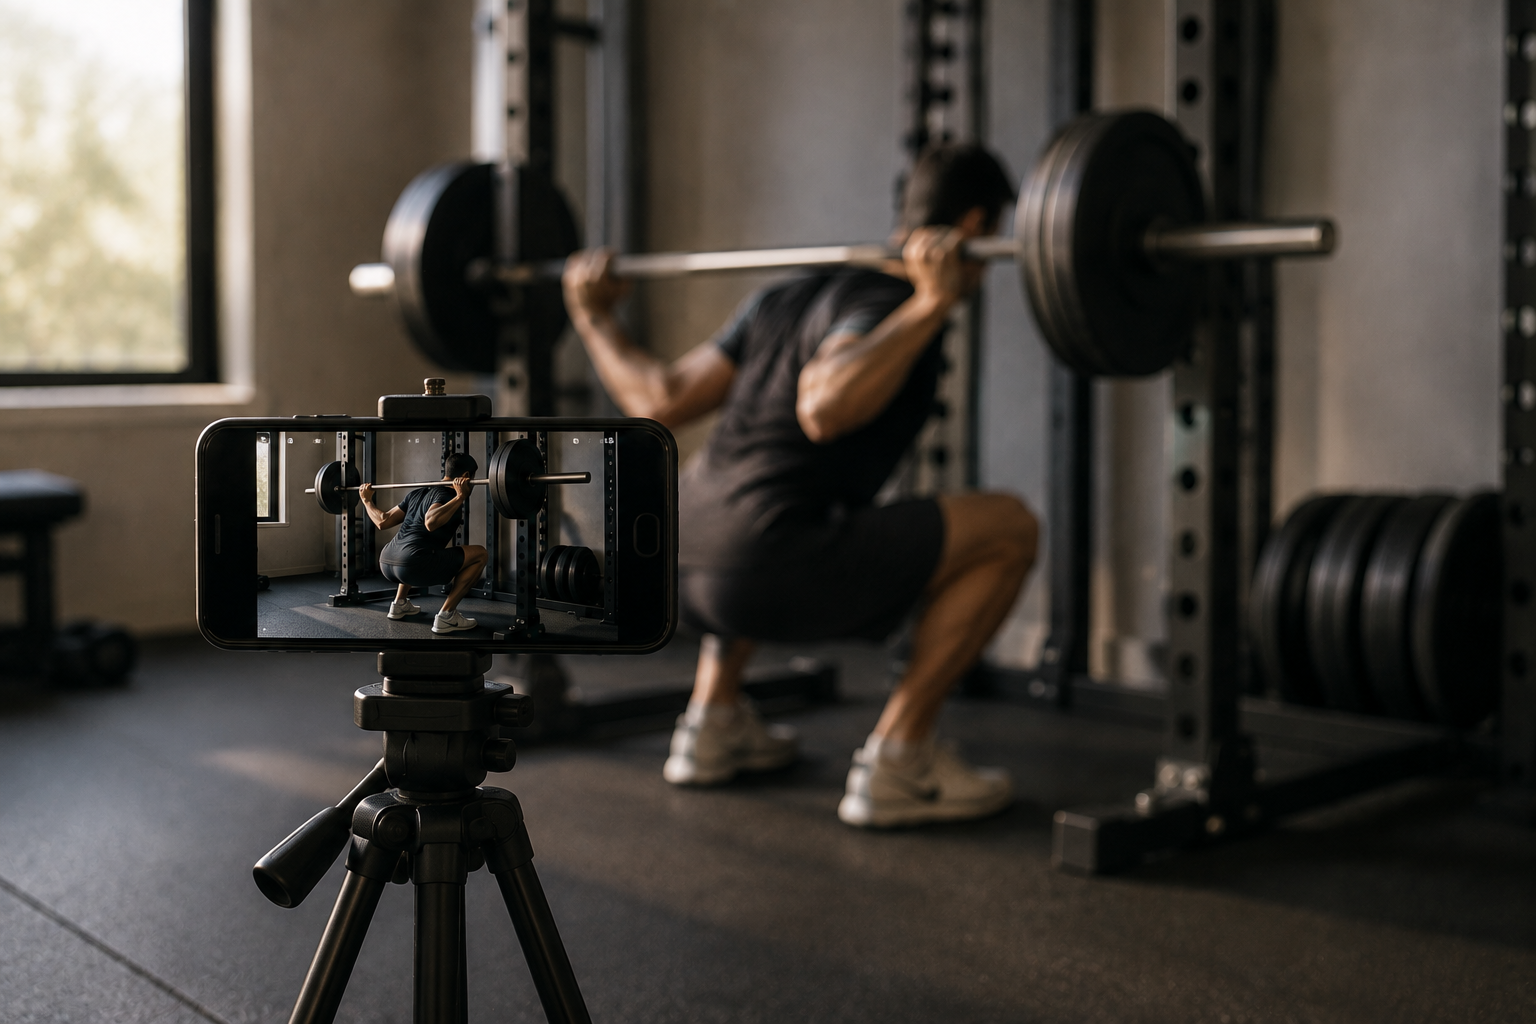
For squats and deadlifts, mount the camera at roughly hip height, level with the floor, not tilted up or down. A tilted camera distorts joint angles and makes it hard to judge things like knee position or bar path accurately. For most lower-body lifts, a straight side-on view (perpendicular to the direction you’re facing) shows depth, hip hinge, and spinal position most clearly. A front or 45-degree angle is better for catching knee valgus (knees caving inward) on squats and lunges.
For upper-body pressing work like bench press or overhead press, position the camera slightly above bench height and angled down just enough to capture the full range of the bar path along with your feet and hips, which matter more than most lifters assume for stability.
Distance and Framing
Back the camera up enough that your entire body, the full range of the implement, and a bit of space above and below fit in frame. Cut off feet or a barbell’s top position and you lose the two things that reveal the most about a breakdown in form. A tripod or a stable ledge beats propping the phone against a water bottle; even small amounts of camera shake make slow-motion review nearly useless.
Quick Setup Checklist
- Camera at hip height, level with the ground (not tilted).
- Full body plus the bar or implement visible, with margin above and below.
- Side view for depth and spine position; front or 45-degree angle for knee/shoulder tracking.
- Tripod, shelf, or rack ledge — anything that removes hand-hold shake.
- Good, even lighting; avoid filming directly into a window or bright light source.
- Record the whole set, not just one rep — quality often changes mid-set.
How to Review Your Own Footage Like a Coach Would
Watching your own lifting back can feel uncomfortable at first. Most people are their own harshest critic, or they watch once, cringe, and close the app. Neither reaction produces useful information. A structured review turns discomfort into data.
Step 1: Watch the Whole Set Once at Normal Speed
Before slowing anything down, watch the entire set in real time. You’re looking for the big picture: did the rhythm and range stay consistent, or is there an obvious point where things changed? Often you’ll notice the moment technique started to shift before you can articulate exactly what changed.
Step 2: Slow Down and Compare Rep 1 to the Last Rep
Play the first rep and the final rep of the set side by side, or back to back, in slow motion. Ask specific questions rather than a general “did that look okay”:
- Did the joint reach the same depth or range on both reps?
- Did the descent take roughly the same amount of time, or did the last rep drop faster?
- Did any joint (knee, hip, low back, shoulder) change alignment between the two reps?
- Was there a pause or hitch that wasn’t there on rep one?
Step 3: Pinpoint Where the Breakdown Starts
If you find a difference between rep one and the last rep, scrub backward through the middle reps to find the exact rep where it appeared. This matters because it tells you something practical: if form holds for six clean reps and only breaks on reps seven and eight, your effective, “bankable” rep count for that exercise and load is six, not eight. That’s genuinely useful programming information, not just a technique note.
Step 4: Score It Simply
A quick three-tier system keeps this from turning into an hour-long self-critique session:
| Grade | What It Looks Like | What To Do With It |
|---|---|---|
| Clean | Full range, controlled tempo, joints tracking correctly, breathing/bracing intact. | Counts fully toward your training goal. Safe to progress load or reps next session. |
| Borderline | Range or tempo slightly shortened, minor joint drift, but nothing dangerous. | Counts partially. Flag it; if it repeats often, address load or fatigue management. |
| Breakdown | Range collapses, momentum replaces control, joint alignment shifts noticeably (e.g., knee cave, spinal rounding under load). | Doesn’t count toward the working set. This is the cue to stop the set or drop the load. |
The Exercises Where Rep Quality Slips First
Not every movement breaks down the same way. Knowing the common failure pattern for an exercise tells you exactly what to zoom in on when you review footage.
Squats (Back, Front, Goblet)
Common breakdowns: heels lifting off the floor, knees caving inward (valgus) on the way up, losing depth as fatigue sets in, and the lower back rounding at the bottom of the rep. The side view is best for depth and spinal position; a front-facing or slightly angled view is better for catching knee valgus, which is a movement pattern that’s been studied extensively as a marker of altered lower-limb control under fatigue and load.
Deadlifts (Conventional, Romanian, Trap Bar)
Common breakdowns: the bar drifting away from the shins/body, the hips shooting up faster than the chest on the pull (turning it into a stiff-legged good morning), and lower-back rounding, especially in the final reps of a set. A peer-implemented video feedback study published in the Journal of Applied Behavior Analysis found that when lifters were shown short video clips of their own deadlift attempts alongside specific verbal cues, their form improved measurably and the improvement held up across all participants in the study. The mechanism is simple: seeing the actual movement, rather than trusting the internal feeling of “that felt fine,” gave lifters concrete information they could act on.
Bench Press and Overhead Press
Common breakdowns: uneven bar path (one side lower or slower than the other), the lower back arching excessively off the bench to complete a rep, and the elbows flaring wider as fatigue sets in, which shifts stress toward the shoulder joint. A front-and-side angle catches bar-path symmetry; make sure your feet stay in frame too, since leg drive and hip position changes often show up before the upper body visibly struggles.
Rows and Pulldowns
Common breakdowns: increasing torso lean or body English to “cheat” the weight up, and a shortened range of motion at the top or bottom of the movement as the set progresses. These are subtle on video precisely because they build gradually, which is exactly why the rep-one-versus-last-rep comparison catches them when a single glance during the set wouldn’t.
A Practical Rule of Thumb
If you can’t confidently say a rep matched the quality of your best rep in that set, treat it as your working set’s true endpoint rather than banking it as a “completed” rep. Programs built around progressive overload assume the stimulus is comparable rep to rep; a rep count inflated with breakdown reps overstates how much productive work actually happened.
Why This Connects to Long-Term Progress, Not Just Injury Avoidance
It’s tempting to frame form checks purely as injury prevention, and that’s a real part of it. But rep quality also determines whether progressive overload — gradually increasing the demand placed on a muscle or movement over time — is actually happening in the way your program intends.
Progressive overload works because it applies a training stimulus that’s slightly beyond what the tissue is currently adapted to, prompting adaptation. If the last several reps of a set are technically compromised, the muscle group your program is targeting may be doing less work than the rep count suggests, while a joint or connective tissue that wasn’t meant to be the primary mover picks up the difference. Over months, that mismatch shows up as a stalled lift, a nagging joint ache with no obvious single cause, or both.
This is also where general activity guidelines connect to the conversation. Public health bodies including the CDC recommend resistance training for all major muscle groups at least twice weekly, generally in the range of 8 to 12 repetitions performed to a point where completing another rep without help would be difficult. That guidance assumes those reps are reasonably well executed. Twelve technically compromised reps and eight quality reps are not interchangeable, even though only one of those numbers looks better in a log.
A Simple Weekly Video Audit Routine
You don’t need to film every set of every session. A sustainable approach is to film one or two working sets per major lift, once a week, and review them the same day while the context is fresh.
Weekly Self-Audit Timeline
- Before the set: Set up the camera at the correct height and angle for the lift. Confirm your full body and the load are in frame.
- During the set: Lift normally. Don’t perform differently because you know you’re being filmed — the point is to capture your real working technique, including under fatigue.
- Immediately after: Note subjectively how the set felt, including which rep felt hardest, before you watch the footage. This gives you a comparison point against what you actually see.
- Same day, review: Watch at normal speed once, then compare rep one to the last rep in slow motion. Grade using the Clean / Borderline / Breakdown system above.
- Next session: If breakdown appeared consistently before your target rep count, adjust load, reduce reps, or add a rest-pause approach so future sets stay in the Clean-to-Borderline range for longer.
Common Mistakes People Make When Reviewing Their Own Form
A few habits quietly undermine the value of a self-audit even when the filming setup is good:
- Only watching the “hero rep.” Reviewing just the rep that felt best, or the heaviest single attempt, skips exactly the fatigue-driven breakdown you’re trying to catch.
- Judging speed instead of control. A rep can be fast and still controlled, or slow and still sloppy. Watch for smoothness and joint tracking, not just tempo.
- Trying to fix everything at once. If a set reveals three issues, pick the one most connected to safety (usually spinal position or a major joint) and address that first. Chasing every flaw simultaneously tends to create new compensations.
- Comparing your footage to someone else’s highlight reel. Social media lifting clips are frequently the best rep out of many attempts, filmed at a flattering angle. Compare your rep one to your own rep eight, not to a stranger’s best set.
- Skipping the review when the workout felt good. Fatigue-driven form loss often happens on the sessions that feel strong, precisely because you’re pushing closer to your limit.
When to Bring In a Second Set of Eyes
Self-review closes most of the gap between “felt fine” and “actually fine,” but it has limits. If you notice sharp or persistent pain (as opposed to normal training fatigue), a joint that seems to move in a way that doesn’t resolve even at lighter loads, or a technical issue you can identify but not correct despite several sessions of focused attention, it’s worth sending the footage to a qualified coach, physical therapist, or certified trainer, or booking a session for live feedback. Video review is a strong first filter, not a replacement for hands-on coaching when something isn’t resolving.
If you’re returning from an injury, are new to a specific lift, or are working with significant load relative to your bodyweight, an in-person or video consultation with a qualified professional before you build volume is a reasonable safety step, not an overreaction.
Frequently Asked Questions
How often should I film my lifts to audit form?
Once or twice a week per major lift is generally enough to catch developing patterns without turning training into a production. Film during a normal working set rather than only during warm-ups, since form issues tend to appear as fatigue accumulates, not at the start of a session.
Should I count a rep if it looked technically off but I still completed it?
Completing a rep and completing it in a way that serves your training goal are different things. If a rep noticeably shortened its range, added momentum, or shifted joint alignment compared to your best reps in that set, it’s reasonable to treat it as the practical end of that working set, even if your app still logs it as a completed repetition.
What’s the single most useful camera angle if I can only use one?
For most lower-body lifts (squats, deadlifts, lunges), a side-on view at hip height captures the most information: depth, spinal position, and hip-to-shoulder timing. For upper-body pressing, a front-and-slightly-above angle that keeps the bar path and feet visible tends to be more informative than a pure side view.
Is it normal for form to change slightly across a set, or is any change a problem?
Some tiny variation is normal, especially as effort increases near the end of a set. The distinction that matters is between minor variation (slightly slower tempo, marginally reduced range) and a genuine breakdown (joint alignment shifting, spinal rounding under load, momentum replacing muscular control). The grading system in this guide is designed to help you tell those apart rather than treating every small change as a red flag.
Can reviewing my own video really replace working with a coach?
It can meaningfully close the gap for lifters who don’t have regular access to in-person coaching, and research on video feedback in strength training has shown real improvements in technique when lifters review footage against specific cues. That said, a coach or qualified trainer can catch things a self-review misses, particularly with pain, asymmetries, or highly technical lifts, so treat self-audits as a strong supplement rather than a full substitute.
What if I don’t have anywhere to prop up my phone?
A stable, level surface at roughly the right height works fine as a substitute for a tripod, a shelf, the top of a low rack, or a weight plate propped against a wall to angle the phone. The priority is eliminating hand-shake and getting the height and angle roughly right; expensive equipment isn’t necessary to get useful footage.
References
- Zourdos, M.C., et al. (2016). Novel Resistance Training-Specific Rating of Perceived Exertion Scale Measuring Repetitions in Reserve. Journal of Strength and Conditioning Research. journals.lww.com / PubMed
- Evaluating peer-implemented video feedback to improve weight training form. Journal of Applied Behavior Analysis, University of South Florida (2022). PubMed
- Centers for Disease Control and Prevention. What Counts as Physical Activity for Adults — muscle-strengthening guidance. cdc.gov
- Science for Sport. Risks and Rewards of Squats and Deadlifts (commentary featuring Dr. Stuart McGill). scienceforsport.com
- StrengthBlox. How to Film for Powerlifting Coaching — camera angle and setup guidance. strengthblox.com