


























By Ada L. Wrenford
Strength training from a seated position is not a lesser version of standing training. It is a distinct discipline with its own mechanics, its own loading patterns, and its own progression logic. For the millions of people who train from a wheelchair, a bench, a stability chair, or any seated base, building strength means working with a fixed base of support rather than against it.
This guide lays out adaptive training for limited mobility as a practical system: the principles that govern safe seated loading, the equipment that makes seated strength work possible at home, and a beginner-to-advanced progression built around movements that translate to daily function. It also covers the warning signs that mean a session should stop and a clinician should get a call. Readers with a specific diagnosis, recent surgery, spinal cord injury, or a progressive neuromuscular condition should build their program with a physical therapist or physician rather than starting cold from an article, however thorough.
Why Seated Strength Training Deserves Its Own Framework
Standing strength programs rely on the legs and trunk to stabilize the spine while the arms or hips do the working movement. Remove the standing base and that stabilization job shifts entirely to the trunk, the chair or wheelchair frame, and whatever muscle groups remain available. A seated row, for example, recruits the lats and rhomboids the same way it would standing, but the core has to control rotation and anterior tilt without help from the legs pressing into the floor.
That shift changes three things about how a program should be built.
First, trunk control becomes a training goal in its own right, not an assumed baseline. Programs that skip direct core and postural work tend to stall early because the trunk fatigues before the target muscle does.
Second, range of motion is often dictated by the chair, not the joint. A wheelchair armrest, a seatback height, or limited hip flexion changes what a “full range” row, press, or curl actually looks like for that individual. Two people doing the “same” exercise from two different seated setups are often training meaningfully different ranges.
Third, the working muscle groups skew toward the upper body and trunk for many wheelchair users, particularly those with lower-limb paralysis or amputation. That means volume and recovery need closer monitoring, since the shoulders and upper back may be doing both daily mobility tasks (wheeling, transfers, pushing) and the strength program’s workload, with less muscular real estate to spread that load across.
The World Health Organization’s global guidelines on physical activity and sedentary behavior extended full recommendations to adults with disability for the first time in 2020, calling for muscle-strengthening activity that targets all major muscle groups on two or more days per week, at moderate or greater intensity, alongside 150 to 300 minutes of moderate aerobic activity weekly. That framework applies whether the training base is standing or seated; the target dose does not change, only the method of loading.
Core Principles of Adaptive Seated Strength Training
1. Stabilize the Base Before Loading the Limb
Before adding resistance to any seated exercise, confirm the seat, chair, or wheelchair is locked, braked, or otherwise secured against unwanted movement. A chair that slides on hard flooring or a wheelchair with unlocked casters turns a controlled row into an unpredictable one. A non-slip mat under chair legs or wheelchair casters is a low-cost fix that removes an entire category of risk.
2. Train the Trunk Directly, Not as an Afterthought
Seated core work looks different from floor-based core work. Seated marches, resisted trunk rotations against a band anchored at chest height, and isometric holds against a light external push all build the anti-rotation and anti-extension control that seated lifting demands. For wheelchair users with limited or absent trunk sensation, visual feedback (a mirror, or a training partner calling out drift) substitutes for the proprioceptive feedback that would normally flag a loss of position.
3. Match Grip and Attachment to the Hand Available
Not every user has a full-strength grasp. Loop handles, wrist cuffs, and gel-padded grips let someone with reduced hand function still load a muscle group through the wrist or forearm rather than the fingers. This is an equipment decision, not a strength deficit to push through.
4. Progress Load Before Range, or Range Before Load — Pick One at a Time
When both resistance and range of motion are limited, increase one variable at a time. Adding heavier resistance and a longer band pull in the same session makes it hard to know which change caused a shoulder to flare up the next day. Adaptive training rewards patience here more than standing programs do, because the compensation options are fewer.
5. Build in Deliberate Recovery for Repeat-Use Joints
For manual wheelchair users, the shoulders already absorb the mechanical demand of daily wheeling, transfers, and pressure relief pushes. Research on shoulder pain in this population, including the STOMPS randomized controlled trial published in the journal Physical Therapy, found that a structured strengthening and movement-optimization program reduced shoulder pain in people with chronic spinal cord injury, reinforcing that targeted strengthening paired with technique correction, not rest alone, is what protects overused shoulders long-term.
Equipment Options for Seated Strength Work
Seated strength training does not require a home gym. Most of the progressions below can run on three low-cost categories of equipment.
| Equipment | Best for | Typical cost | Notes |
|---|---|---|---|
| Loop resistance bands | Rows, presses, leg extensions, lateral raises | $10–$25 per set | Color-coded resistance levels; portable; low joint impact |
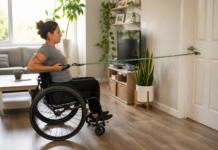
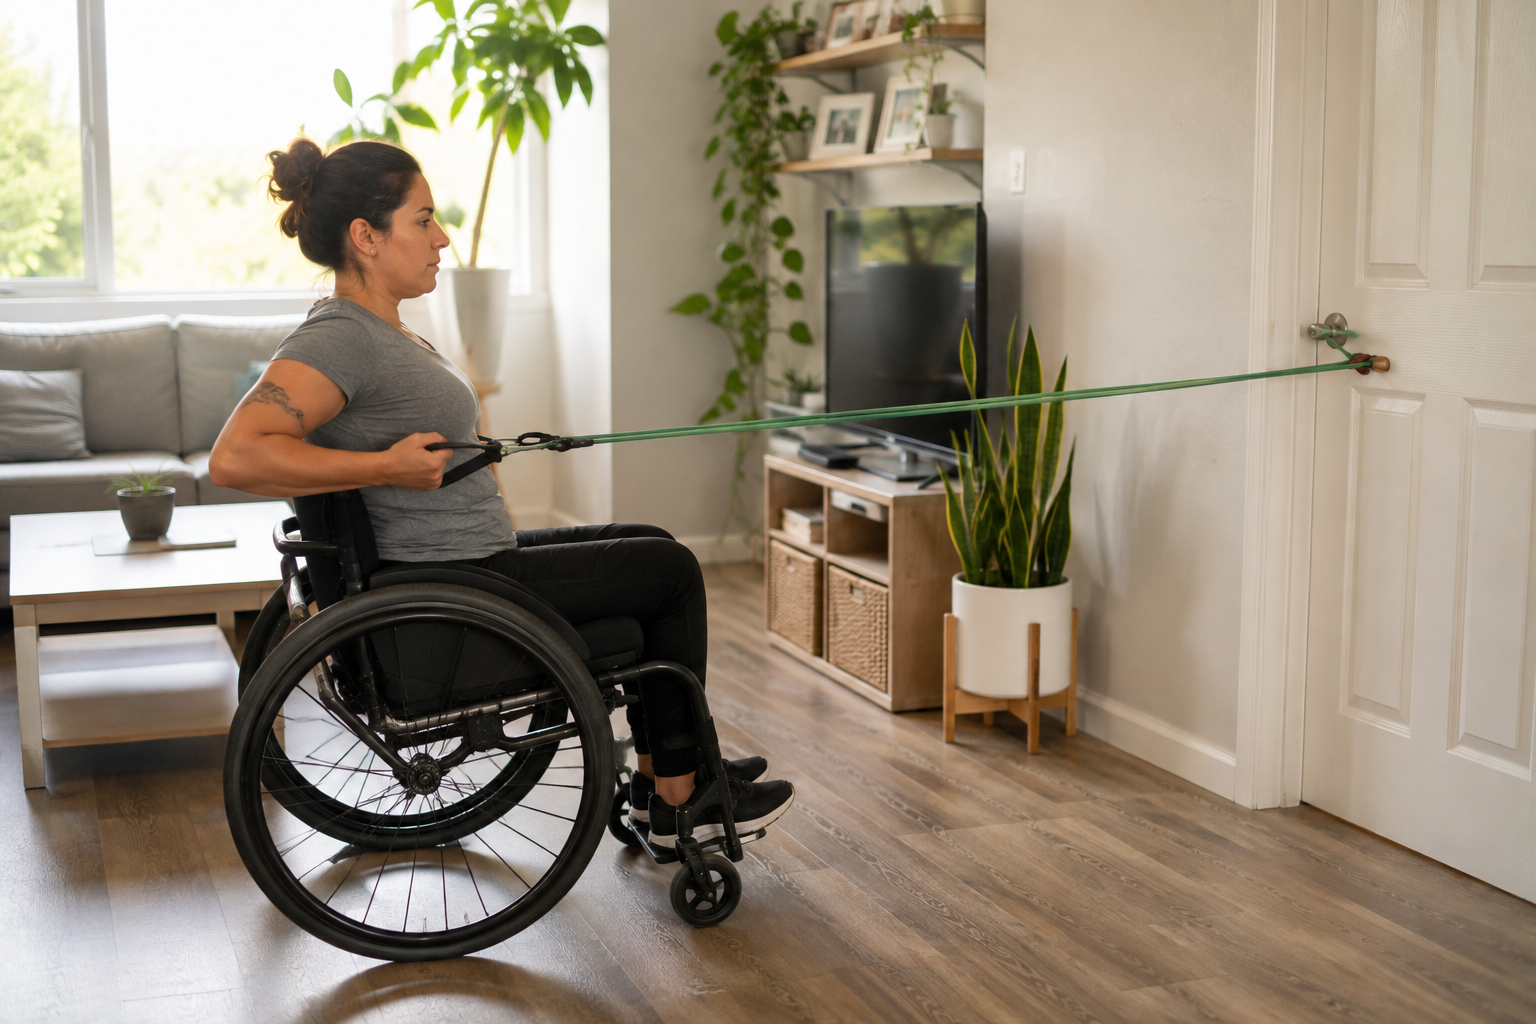
| Door anchor + long band | Rows, chest presses, trunk rotations | $10–$15 | Converts any door into a cable-row style station |
| Adjustable dumbbells or wrist weights | Bicep curls, shoulder presses, triceps extensions | $30–$120 | Wrist weights help users with limited grip strength |
| Wrist and hand cuffs | Anyone with reduced grasp | $8–$20 per pair | Straps the implement to the forearm instead of relying on grip |
| Non-slip mat or chair anchor strap | Any seated exercise | $10–$20 | Prevents chair or wheelchair drift during pulling movements |
| Stability cushion or lumbar support | Users needing extra trunk support | $15–$40 | Reduces fatigue-related postural drift in longer sessions |
Organizations such as Move United, a national network of adaptive sports chapters, and the National Center on Health, Physical Activity and Disability (NCHPAD), a CDC-funded center based at the University of Alabama at Birmingham, both maintain equipment guides and offer direct consultation. NCHPAD’s Expert Inclusion Specialists take calls Monday through Friday and can recommend adaptations specific to a person’s diagnosis and available equipment at no charge.
For anyone setting up a permanent training corner rather than a rotate-in-and-out setup, a few small choices make a large difference over months of use. Mounting a door anchor at two heights (roughly chest height and overhead) means one piece of hardware supports rows, presses, and overhead work without repositioning furniture each session. An adjustable-height table next to the training chair keeps water, a log book, and spare band handles within reach without requiring a reach-and-twist motion that can strain the trunk mid-session. None of this requires a dedicated room; a cleared corner of a living room or bedroom is enough space for the full progression list in this guide.
Cost is a real barrier for some households, and it is worth noting that a full starter kit, bands, a door anchor, and a set of wrist cuffs, typically runs under $50 total, well below the cost of most adaptive gym memberships or specialized equipment.
None of this replaces individualized fitting. A wheelchair user’s optimal seat height, backrest angle, and armrest position for training may differ from their everyday chair setup, and an occupational therapist or seating specialist can advise on whether a separate training chair is worth the investment.
Warm-Up and Cool-Down for Seated Sessions
A seated warm-up needs to do the same job a standing warm-up does: raise tissue temperature, rehearse the movement patterns about to be loaded, and give the trunk a chance to find its working position before resistance is added. Five to seven minutes is usually enough.
- Arm circles and shoulder rolls: 30 seconds each direction, unloaded
- Seated cat-cow through the upper spine: 8–10 slow reps, hands on thighs or armrests
- Band pull-aparts, very light resistance: 12–15 reps to prime the upper back
- Wrist and forearm circles: especially important for anyone gripping a bar, band handle, or wheel rim during the main session
- Trunk rotations, bodyweight only: 8 reps per side, matching the range used in the working sets
Cool-down after a seated strength session is shorter but should not be skipped, particularly for wheelchair users whose shoulders carry ongoing daily load outside the gym. Two or three minutes of light band pull-aparts, gentle wrist stretches, and slow shoulder circles help the working muscles settle rather than staying in a shortened, fatigued position for the rest of the day. Anyone icing a joint after previous sessions should keep doing so; a new strength program does not override existing pain-management guidance from a clinician.
Sample Progressions: Beginner to Advanced
The progressions below organize around four movement patterns that carry over to daily tasks: pulling, pushing, rotating, and hip/knee extension for those with usable lower-limb function. Each level assumes two to three sessions per week with at least one rest day between sessions targeting the same muscle groups.
Level 1 — Foundation (Weeks 1–4)
- Seated band row: light band anchored at chest height, 2 sets of 10–12 reps
- Seated chest press: band anchored behind the chair, 2 sets of 10–12 reps
- Seated trunk rotation, band-resisted: 2 sets of 8 reps per side, slow and controlled
- Seated marches (for those with hip flexion available): 2 sets of 10 per leg
Focus at this level is technique and finding a stable base, not fatigue. Stop each set two or three reps before form breaks down.
Level 2 — Building (Weeks 5–10)
- Seated band row: medium band, 3 sets of 10–12 reps
- Single-arm seated press: introduces unilateral loading and anti-rotation demand, 3 sets of 8–10 reps per side
- Bicep curls with wrist cuffs or light dumbbells: 3 sets of 10–12 reps
- Seated diagonal chop (band, anchored high): 3 sets of 8 reps per side
- Seated leg extensions (band around ankle, where applicable): 3 sets of 10–12 reps per leg
By this stage, users should be tracking which band color or weight they use per exercise, since the goal is measurable progression, not just repetition.
Level 3 — Strength Development (Weeks 11–18)
- Heavy band or cable seated row: 3–4 sets of 8–10 reps
- Seated overhead press: 3 sets of 8–10 reps, full control through the available range
- Weighted trunk rotation: 3 sets of 10 reps per side with added resistance
- Triceps extension (band overhead anchor): 3 sets of 10–12 reps
- Seated hip abduction/adduction against band resistance: 3 sets of 12 reps
This level introduces heavier, slower eccentric-focused reps: a 3-second lowering phase on presses and rows builds tendon resilience, which matters most for shoulders under repetitive daily load.
Level 4 — Advanced / Sport-Specific (Weeks 19+)
- Explosive-start band rows: controlled acceleration into the pull, 4 sets of 6–8 reps
- Single-arm overhead press with anti-rotation hold: 4 sets of 6–8 reps per side
- Medicine ball seated chest pass (with a partner or wall): 3 sets of 8 reps
- Weighted diagonal chop, full-range: 4 sets of 8 reps per side
- Sport-specific circuits matched to wheelchair basketball, adaptive rowing, or hand cycling, built with a coach familiar with that sport
Athletes reaching this stage often benefit from a Move United chapter or adaptive sports club, where sport-specific coaching replaces generic programming with movement patterns built for competition.
Stop and Consult a Clinician If You Notice:
- Sharp or shooting pain during any exercise, as opposed to muscular fatigue
- New numbness, tingling, or weakness in the arms or hands after a session
- Shoulder pain that persists more than 48 hours or worsens session over session
- Autonomic dysreflexia symptoms in people with spinal cord injury at or above T6 — pounding headache, flushing, sudden blood pressure spikes
- Dizziness, unusual shortness of breath, or chest discomfort during exercise
- Skin redness or pressure marks from equipment straps that do not fade within 15–20 minutes
A physical therapist or physician familiar with the individual’s diagnosis should review any new program before it starts, and should be the first call if any of the above occurs during training.
Programming Notes for Common Conditions
People training with limited mobility arrive from very different starting points, and a single program will not fit all of them. A few condition-specific notes:
Spinal cord injury (paraplegia or tetraplegia): Shoulder-sparing technique matters more than load. Seated rows should emphasize scapular retraction over arm-dominant pulling, and pushing volume should be tracked alongside daily wheeling and transfer volume, not in isolation.
Multiple sclerosis or other fluctuating neurological conditions: Fatigue, not muscle soreness, is often the limiting factor. Shorter sessions with more frequent rest breaks, and flexibility to skip or shorten a session on a high-fatigue day, tend to produce better long-term adherence than a fixed rigid schedule.
Lower-limb amputation: Trunk and hip stability work supports prosthetic use and transfers; seated core and hip-focused exercises carry particular functional value here.
Older adults with reduced standing balance: The WHO’s disability-inclusive guidelines specifically recommend that older adults add varied multicomponent activity emphasizing functional balance and strength on three or more days weekly to reduce fall risk, and seated strength work is a safe entry point for building that base before any standing balance work is attempted.
Cerebral palsy and other spasticity-related conditions: Resistance training does not worsen spasticity for most people and can improve functional strength when programmed with attention to tone patterns; exercises that pull a spastic muscle group into further shortening are generally avoided in favor of movements through the muscle’s more available range, ideally chosen in consultation with the person’s physical therapist.
Post-stroke hemiparesis: Training the less-affected side supports transfers and daily tasks, but the affected side should not be skipped entirely. Bilateral seated exercises, even at very light resistance on the weaker side, help maintain whatever motor pathways remain active and can support ongoing rehabilitation goals set with a physical therapist.
Building the Habit, Not Just the Program
A progression chart only works if sessions actually happen. Three things tend to separate people who stick with adaptive strength training from those who stop after a few weeks: a fixed, short session length that fits into an existing routine rather than competing with it; equipment stored where it is visible and ready rather than in a closet; and a way to log sets and resistance levels so progress is visible even when it is slow. None of these require special adaptive equipment. They are the same adherence principles that apply to any strength program, applied without exception here.
Progress in seated strength training is frequently slower and less linear than standing programs, particularly for anyone managing a fluctuating condition. That is not a sign the program is failing. Tracking function, not just load, matters: can a transfer happen with less arm strain than it did eight weeks ago, can a grocery bag be lifted overhead, can a wheelchair push up a ramp happen without the shoulder aching afterward. Those functional markers often move before the numbers on a band or dumbbell do.
Adaptive training for limited mobility is ultimately a set of engineering decisions: which base to stabilize, which joint to load, which range is honest for this body on this day. Get those decisions right, working alongside a physical therapist or physician for the first program build, and the strength follows the same rules it always has: consistent, progressive, and specific to the movement a person actually needs.
Frequently Asked Questions
Is seated strength training as effective as standing strength training?
For building muscular strength and endurance in the muscle groups being trained, yes. Seated training does not build standing balance or leg-driven power the way standing training does, so people who can safely stand for part of a session often combine both. For wheelchair users or others who cannot stand, seated training is the primary and fully valid mode, not a substitute for something better.
How often should someone with limited mobility do strength training each week?
The WHO’s disability-inclusive physical activity guidelines recommend muscle-strengthening activity targeting all major muscle groups on two or more days per week, which matches the general adult recommendation. Older adults with disability or additional fall risk are encouraged to add balance-focused activity on three or more days weekly.
What equipment is actually necessary to start?
A set of loop resistance bands and a door anchor cover most of the beginner and intermediate progressions in this guide for under $30 total. Wrist cuffs are worth adding for anyone with reduced grip strength. Nothing beyond that is required to begin.
Can someone with a recent injury or surgery start this program right away?
No. Anyone recovering from a recent injury, surgery, or hospitalization should get direct clearance and a program review from their physical therapist or surgeon before starting or resuming strength training. This guide is an educational framework, not a substitute for that individualized clearance.
What is the biggest injury risk in seated strength training?
For manual wheelchair users specifically, shoulder overuse is the most documented risk, since the shoulders already handle daily wheeling and transfer demands before any strength program adds to the load. Programming rest between sessions targeting the same muscle groups and prioritizing technique over added resistance both reduce that risk.
Where can someone find adaptive sports coaching beyond home strength training?
Move United maintains a network of adaptive sports chapters across the United States offering coached programs in wheelchair basketball, adaptive rowing, hand cycling, and other sports. NCHPAD’s Expert Inclusion Specialists can also help locate local adaptive fitness programs and equipment resources by phone at no cost.
References
- World Health Organization. WHO Guidelines on Physical Activity and Sedentary Behaviour, including recommendations for adults with disability. NCBI Bookshelf executive summary: ncbi.nlm.nih.gov/books/NBK566048
- Carlson KD, et al. Effectiveness of Exercise Programs for Management of Shoulder Pain in Manual Wheelchair Users With Spinal Cord Injury. PubMed. pubmed.ncbi.nlm.nih.gov/26308939
- Mulroy SJ, et al. Strengthening and Optimal Movements for Painful Shoulders (STOMPS) in Chronic Spinal Cord Injury: A Randomized Controlled Trial. PubMed. pubmed.ncbi.nlm.nih.gov/21292803
- National Center on Health, Physical Activity and Disability (NCHPAD), University of Alabama at Birmingham. nchpad.org
- Move United, national adaptive sports organization. moveunitedsport.org
- American College of Sports Medicine. ACSM’s Guidelines for Exercise Testing and Prescription. acsm.org
- Performance Health. Resistance Band Exercises for Wheelchair Users. performancehealth.com