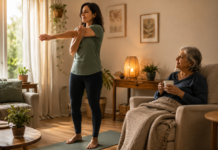
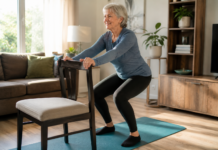



























Quick Answer
Test your mobility with a battery of five self-administered checks — overhead squat, weight-bearing ankle lunge, shoulder scratch reach, hip hinge/toe-touch, and a rotation check — record the numbers or photos as your baseline, work on the weakest areas for eight weeks, then repeat the exact same tests under the exact same conditions. Most people who train consistently can expect small but measurable changes in range of motion within six to eight weeks, though results vary by joint and by person.
By Rowan P. Briarwick
Who This Matters Most For
This guide is written for recreational lifters, runners, desk-bound office workers, weekend athletes, and anyone returning to movement after a period of inactivity who wants an honest, low-cost way to track mobility over time. It is especially useful if you have never had a formal movement screen and want a repeatable starting point before investing in a coach, a physical therapist, or a structured mobility program. It is not a diagnostic tool. If you have a known joint injury, recent surgery, or ongoing pain, the self-tests below can still give you useful information, but the results should be discussed with a physical therapist or physician rather than used to self-treat.
Why Bother Testing Your Own Mobility?
Most people never measure their mobility until something already hurts. By then, it is hard to know whether a joint restriction is new, old, or simply normal for that person. A short, repeatable self-test battery gives you a baseline number instead of a vague feeling of “my hips feel tight.” Numbers can be revisited later, which is the entire point of this guide: test once, do focused work, retest in eight weeks, and compare like with like.
Formal movement screens such as the overhead squat assessment are used by trainers precisely because they are quick, need no equipment, and give a consistent structure for spotting compensations at the ankles, hips, and shoulders (Physiopedia’s Overhead Squat Test entry, cited in References). The version in this guide adapts that same idea for solo use at home.
A note on rigor: None of these are lab-grade diagnostic tools. The weight-bearing lunge test, for example, has documented reliability in research settings, with inter-rater agreement (ICC) between 0.80 and 0.99 and a minimal detectable change of roughly 4.6 degrees or 1.6 cm between sessions (Powden, Hoch & Hoch, Manual Therapy, 2015). That means a change smaller than about 1.5–2 cm on that particular test could just be measurement noise rather than a real gain. Keep that in mind so you don’t over-read small fluctuations.
The Five-Test Mobility Battery
Do all five tests in one sitting, ideally after a light five-minute warm-up (marching in place, arm circles, a few bodyweight squats) so you are testing genuine mobility rather than a cold joint. Test both sides of the body separately wherever relevant, and always test in the same order, at a similar time of day, in the same shoes or bare feet, for your retest eight weeks later.
-
Overhead Squat Screen (whole-body pattern)
Stand with feet shoulder-width apart, arms straight overhead. Squat down as if sitting into a low chair, five slow repetitions, while someone films you from the front and side, or you set up a phone on a tripod. Watch for heels lifting, knees caving inward, arms falling forward, or the low back rounding excessively. Record which compensations show up and on which side. This mirrors the structure of the trainer-administered overhead squat assessment used widely in fitness screening (Physiopedia, Overhead Squat Test, see References).
-
Weight-Bearing Ankle Lunge (ankle dorsiflexion)
Face a wall in a half-kneeling lunge position with your front foot flat and toes pointing straight ahead. Keeping your heel glued to the floor, drive your front knee forward and try to touch the wall. Slide your foot back in small increments until you find the maximum distance at which your knee can still touch the wall without the heel lifting. Measure toe-to-wall distance in centimeters on both sides. General benchmarks describe roughly 10 cm or more as good functional dorsiflexion, 6–9 cm as moderate, and under 6 cm as restricted, with a side-to-side difference of more than 2–3 cm flagged as clinically meaningful (MAT Assessment, Weight-Bearing Lunge Test, see References). This test has among the strongest reliability data of any self-administered mobility check, which makes it the anchor test of this whole protocol.
-
Shoulder Scratch Reach (Apley-style)
Reach one arm up and over your shoulder, palm down, and the other arm up your back from below, palm out. Try to touch or overlap your fingers behind your back. Note the gap distance in centimeters (positive if the hands don’t meet, or overlap distance if they cross). Repeat with arms reversed. This combines internal rotation/extension on one side with external rotation/flexion on the other, and functionally mirrors reaching for a zipper or back pocket (Physiotutors, Apley Scratch Test, see References). Note that published reliability data specifically for this test is sparse, so treat your own gap measurement as a personal trend line rather than a validated clinical score.
-
Sit-and-Reach (posterior chain/hamstring flexibility)
Sit on the floor with legs straight and feet flat against a box, step, or wall (a stack of books works). Reach forward slowly with both hands stacked, hold for two to three seconds at your farthest comfortable point, and record the distance in centimeters past or short of your toes. Do not bounce. This is one of the more heavily studied flexibility tests in exercise science, with age- and sex-adjusted normative bands published by the American College of Sports Medicine (ACSM, 2018 guidelines, summarized in Sport Science Insider, see References). It is considered highly reliable when the warm-up and setup are kept identical between sessions.
-
Standing Trunk Rotation (thoracic spine mobility)
Sit or stand with a dowel, broomstick, or yardstick held across your collarbones. Keeping your hips square and facing forward, rotate your upper body as far as you can to one side, then the other. Use a phone photo taken from directly above (or have someone eyeball it against a wall marked with angle references) to estimate the rotation angle on each side. Record the degree estimate and note any asymmetry.
Test Battery at a Glance
The Test-Train-Retest Cycle
The whole point of this framework is a simple loop repeated once. Rather than guessing whether your mobility work is doing anything, you compare two identical measurements taken eight weeks apart.
Baseline Test
Run all 5 tests, record numbers/photos
Target Weak Spots
Pick 2-3 restricted areas, daily short sessions
Build Volume
Add loaded end-range work, progress gradually
Taper & Prep
Reduce novelty, keep consistent testing conditions
Retest
Same tests, same setup, compare to baseline
Step-by-Step Protocol
Pick a time of day, a location, footwear (or bare feet), and a warm-up routine you can repeat exactly in eight weeks. Write these details down alongside your results. Small changes in warm-up or time of day can shift your numbers more than eight weeks of actual mobility work would, so consistency matters more than precision here.
Work through all five tests in the order listed above. Use a tape measure, a phone camera, and a simple notebook or spreadsheet. Take a photo at each test’s end range in addition to the number, since photos catch compensations a single number misses.
Rather than trying to improve every joint at once, rank your five results against the reference ranges above and against your own left-right symmetry. Pick the two or three areas with the largest restriction or asymmetry. That focus is what makes an eight-week window realistic.
Weeks 1-2: introduce daily short mobility drills (5-10 minutes) targeting your weak areas, focusing on movement quality over intensity. Weeks 3-6: increase time under tension at end range, add loaded stretching or controlled articular rotations, and train the pattern two to three times per week in addition to daily drills. Weeks 7-8: hold volume steady rather than pushing new ranges, so your retest reflects settled adaptation rather than a one-off good day. This structure loosely follows the intervention lengths used in stretching research, where chronic programs averaging roughly six and a half weeks produced measurable range-of-motion changes (systematic review and meta-analysis, Sports Medicine, 2025).
At the eight-week mark, repeat the exact same warm-up, footwear, time of day, and test order. Take the same photos from the same angle. Resist the urge to retest early or to “have another go” if a number looks disappointing; multiple attempts on the same day inflate scores and defeat the purpose of a controlled comparison.
Before celebrating or getting discouraged, check whether your change exceeds the known measurement noise for that test. For the ankle lunge test specifically, a change smaller than roughly 1.5-2 cm may not represent a genuine improvement (Powden, Hoch & Hoch, 2015). For the other tests, a useful rule of thumb is to look for at least 1-2 cm of change, or a visibly reduced compensation on your side-by-side photos, before concluding something real happened.
Baseline vs. Week-8 Retest Template
Copy this table into a notes app or spreadsheet before you start.
Copy-Ready Checklist: Running Your 8-Week Test-and-Retest Cycle
- Warm up identically before both testing sessions
- Test both sides of the body, not just the dominant one
- Record numbers AND photos at week 0
- Write down footwear, time of day, and test order used
- Pick 2-3 target areas based on your weakest and most asymmetric scores
- Schedule short daily mobility work for weeks 1-2
- Progress to loaded or longer-duration end-range work for weeks 3-6
- Hold steady, avoid new stretches or drills during weeks 7-8
- Retest at week 8 using the identical setup from week 0
- Compare each change against the expected measurement noise for that test
- Set your next 2-3 target areas and repeat the cycle if desired
Worked Example: An Eight-Week Cycle in Practice
The scenario below is an illustrative narrative example written for teaching purposes. It is not data from a real research study or a real client, and the numbers are meant to show how the process fits together, not to serve as an expected outcome.
Imagine a 38-year-old office worker, we’ll call him Dev, who sits most of the day and lifts weights three times a week. At his baseline test, his ankle lunge measures 5 cm on the right and 8 cm on the left, well below the 10 cm benchmark for good dorsiflexion, with a clear asymmetry. His overhead squat shows his heels lifting and his low back rounding near the bottom. His sit-and-reach comes in a few centimeters short of his toes, and his shoulder scratch reach shows a modest gap on both sides.
Dev picks ankle dorsiflexion and hip hinge control as his two focus areas, since the squat pattern and the ankle numbers point to the same weak link. For the first two weeks he does five minutes of banded ankle mobilizations and calf/soleus stretching daily, plus a daily hip hinge drill with a dowel on his back to groove the pattern without load. From weeks three to six he adds a weekly session of tempo goblet squats and loaded ankle rocking, gradually deepening his range. In weeks seven and eight he keeps the same routine without adding anything new.
At his week-8 retest, using the same shoes, same time of morning, and same warm-up, Dev’s right ankle lunge comes in around 7.5 cm and his left around 9 cm, both changes larger than the roughly 1.5-2 cm measurement noise reported for this test, so they likely represent a genuine improvement rather than day-to-day variation. His overhead squat still shows a small amount of heel lift on the right, but noticeably less than before, based on comparing his week 0 and week 8 photos side by side. His sit-and-reach barely changed, which tells him hamstring length was never really his limiting factor, and he decides to leave that off his priority list for the next cycle and instead give the ankle work more time.
Common Mistakes
What Movement-Assessment Specialists Say
Screening tools like the overhead squat assessment were built to be “highly practical and time efficient” for spotting compensatory movement patterns without expensive equipment, which is exactly why they translate reasonably well to a self-administered setting (Physiopedia, see References). Research on the weight-bearing lunge test specifically notes it “can be used clinically to assess dorsiflexion range of motion as it provides consistent results between one or more clinicians and demonstrates reasonable responsiveness” (Powden, Hoch & Hoch, Manual Therapy, 2015), which is part of why it anchors this guide’s protocol rather than a less-studied test.
On timeframes, a 2025 systematic review and meta-analysis in Sports Medicine looking at static stretching interventions found that chronic programs in the literature averaged around 6.5 weeks of consistent practice, several sessions per week, before researchers measured meaningful changes in tissue stiffness and passive range of motion. That lines up closely with an eight-week self-test cycle, giving a few weeks of buffer for retesting logistics on top of a training block long enough to plausibly produce a change.
Safety and scope: This guide provides general educational information and is not medical advice, physical therapy, or a substitute for an individualized assessment. Stop any test immediately if it causes sharp pain, worsening pain, numbness, or tingling, and consult a physical therapist or physician before continuing. If you have a known injury, recent surgery, joint replacement, or a diagnosed condition affecting mobility, get personalized clearance before starting this protocol.
Key Takeaways
- A five-test battery covering ankles, hips, shoulders, hamstrings, and thoracic rotation gives a practical whole-body mobility baseline without equipment.
- The weight-bearing ankle lunge test has the strongest published reliability data of the tests here, making it a good anchor for tracking real change.
- Consistency in warm-up, footwear, time of day, and test order matters more than test-day performance for a fair retest comparison.
- Eight weeks lines up with typical stretching-study intervention lengths in the current research, roughly six to seven weeks on average.
- Small changes under about 1.5-2 cm on the ankle test may reflect measurement noise rather than real improvement.
- Focus on 2-3 priority areas per cycle rather than trying to improve every joint at once.
Frequently Asked Questions
Do I need special equipment to run these tests?
No. A tape measure, a wall, a phone camera, and a notebook or spreadsheet cover all five tests. A dowel or broomstick is helpful for the trunk rotation and overhead squat tests but not strictly required.
How accurate are self-administered mobility tests compared to a clinic visit?
They are less precise than tools like goniometers or motion-capture used in research settings, but tests such as the weight-bearing lunge test have shown strong reliability even outside a lab, with inter-rater agreement reported between 0.80 and 0.99 (Powden, Hoch & Hoch, 2015). Treat your results as a useful personal trend line rather than a clinical diagnosis.
Why eight weeks specifically, and not four or twelve?
Eight weeks is long enough to fall within the range typically studied in stretching and mobility research, where chronic interventions have averaged around six to seven weeks, while staying short enough to keep most people motivated and consistent. Four weeks is often too short for a measurable change to clear normal test-retest noise; twelve weeks works too but asks for a longer commitment before any feedback.
What if my retest score is worse than my baseline?
First check whether your test conditions actually matched, different footwear, a colder room, or skipping the warm-up can all lower a score without any real loss of mobility. If conditions were consistent and the drop persists, it may reflect fatigue, a recent hard training session, or simply normal variation, and it is worth mentioning to a physical therapist if the change is large or accompanied by pain.
Can I test more than one joint area at a time, or should I isolate one?
Running the full five-test battery at baseline and retest is recommended so you get a complete picture, but for your actual eight weeks of training work, focusing on just two or three priority areas usually produces more noticeable change than spreading effort across everything at once.
Is soreness during a mobility test normal?
A mild stretching sensation or muscular discomfort at end range is common and expected. Sharp, pinching, or worsening pain is not, and is a signal to stop that test and check in with a physical therapist or physician rather than push through it.
How often should I run the full 8-week cycle?
Many people find it useful two to three times a year, roughly aligned with training block changes or seasonal shifts in activity. Running it more often than every eight weeks doesn’t leave enough time for a real training effect to show up above measurement noise.
Do I need a partner to run these tests accurately?
Most of the five tests can be done solo with a tape measure and a tripod-mounted phone camera. The overhead squat screen benefits from a second set of eyes or a video review, since watching your own compensations while squatting is difficult, but it is not mandatory.
References
- Powden, C.J., Hoch, J.M., & Hoch, M.C. (2015). Reliability and minimal detectable change of the weight-bearing lunge test: A systematic review. Manual Therapy. sciencedirect.com/science/article/abs/pii/S1356689X15000065
- Physiopedia. Overhead Squat Test. physio-pedia.com/Overhead_Squat_Test
- Physiotutors. Apley Scratch Test / Dawbarn’s Test — Shoulder AROM Assessment. physiotutors.com/wiki/apley-scratch-test
- MAT Assessment. Ankle Flexibility Testing: Weight-Bearing Lunge Test (WBLT). matassessment.com/blog/weight-bearing-lunge-test
- Sport Science Insider. The Sit and Reach Test: Benefits & Normative Data (citing ACSM 2018 norms). sportscienceinsider.com/sit-and-reach-test
- Mechanisms Underlying Range of Motion Improvements Following Acute and Chronic Static Stretching: A Systematic Review, Meta-analysis and Multivariate Meta-regression. Sports Medicine (2025). link.springer.com/article/10.1007/s40279-025-02204-7
- Physio-pedia. Knee to Wall Test. physio-pedia.com/Knee_to_Wall_Test